How to Calibrate an Ecobee Thermostat: A Practical Guide
Learn how to calibrate your Ecobee thermostat for accurate temperature readings, improved comfort, and energy efficiency. This practical guide covers needed tools, a clear sequence of steps, troubleshooting tips, and authoritative sources for DIY calibration.

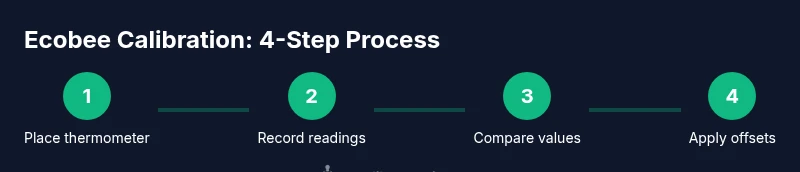
You will calibrate your Ecobee thermostat to improve temperature accuracy and comfort by validating readings against a trusted thermometer, adjusting sensor offsets if available, and verifying results across rooms and times of day. Gather a calibrated thermometer, your Ecobee device, the Ecobee app, and a log to document measurements. Expect a 45–90 minute process.
Why calibrating an Ecobee thermostat matters
Accurate temperature readings are the backbone of a comfortable home and efficient heating and cooling. When the Ecobee shows a different ambient temperature than the actual room temperature, the system may run more cycles or fail to reach the setpoint, causing discomfort and wasted energy. According to Calibrate Point, calibration is not about chasing perfection, but about aligning the thermostat’s sense of the room with reality. The payoff is steadier comfort across spaces, fewer abrupt swings in temperature, and a clearer path to energy savings through more predictable HVAC cycling. This section explains what calibration means in practical terms for Ecobee users and what you can expect from a careful approach that relies on readily available tools. The goal is actionable steps you can complete with common household items and the Ecobee app.
Ecobee uses its built-in sensors and multiple remote sensors to estimate the overall room temperature. Since sensors sit in different corners of the house and can drift over time, a methodical calibration helps align the thermostat’s reading with the environment. The objective is not to perfectly match outdoor conditions but to ensure indoor readings reflect the actual ambient temperature indoors. Small misalignments can result in rooms feeling warmer or cooler than intended, which in turn drives unnecessary HVAC activity and reduces comfort. With a practical calibration workflow, you can improve consistency without expensive equipment or complicated procedures.
Throughout this guide we keep the focus on practical actions you can perform with everyday tools and the Ecobee interface. If you have multiple zones or sensors, the general approach remains the same: establish a reliable reference, compare readings, adjust where possible, then verify results under real living conditions.
Before you begin: tools and safety
Before you start calibrating, assemble the essentials and review safety considerations. A reliable reference thermometer is the cornerstone of accuracy. You’ll also need access to the Ecobee app and the thermostat itself, plus a notebook or digital log to document readings. Place the thermostat away from heat sources like direct sunlight, lamps, or appliances that can skew its sensor. If you’re using remote sensors, ensure they are positioned in representative rooms and not in drafty hallways or enclosed closets.
What you’ll do is compare Ecobee readings to a trusted reference and, if available on your model, apply any temperature offset or sensor adjustments. Keep the power to the thermostat on during checks to avoid disrupting the HVAC system. If you’re a DIYer pursuing best practices, work in a single sitting or break the steps into two sessions to avoid rushing. The Calibrate Point team emphasizes consistency and careful logging over speed when calibrating medical-grade or high-precision instruments, and the same mindset helps with home thermostats. Ensure you have a stable, indoor environment for measurements, and record both the reference and Ecobee readings at each stage for later comparison.
Step 1: place a trusted reference thermometer in the living space
Start by locating a central, representative spot in a common living area, roughly at breathing height (about 4–5 feet above the floor). Place a calibrated digital thermometer there and allow it to equilibrate for 10–15 minutes before taking a reading. Take multiple readings over a short window (e.g., every 3–5 minutes) to get a stable average. This establishes your ground truth for “actual room temperature.” Avoid placing the thermometer near heat sources, vents, windows, or behind furniture. Record the average of those readings as your reference temperature. The goal is to have a single dependable baseline that reflects typical indoor conditions throughout the calibration window.
Step 2: record Ecobee readings and thermometer readings over a brief window
With the Ecobee installed as usual, read the thermostat’s current ambient temperature from the main screen or the app. Note the Ecobee reading alongside the thermometer average you established in Step 1. To reduce variance, perform this comparison during a stable HVAC state (for example, after a recent system cycle has completed and the room has settled). Repeat the measurements at three different times within one hour to capture typical fluctuations. Document both values in your log and compute the average discrepancy. This gives you a practical sense of how far off Ecobee is from reality in your home.
Step 3: check sensors and sensor placement for accuracy
Ecobee devices rely on multiple sensors, including remote sensors that may be placed in other rooms. Inspect sensor locations to ensure they are not blocked by furniture, placed in direct sunlight, or near appliances that emit heat. If you notice obvious hotspots or cold corners, consider relocating remote sensors to more representative rooms. Additionally, verify that the thermostat is mounted level; a tilted unit can bias its internal readings. After relocating sensors, repeat the thermometer comparison in the affected zones to confirm whether the changes reduced discrepancies. Documentation of sensor layout helps diagnose recurring misreads over time.
Step 4: apply offset or adjust settings if supported
Some Ecobee models or firmware versions offer a temperature offset or sensor calibration option. If your device supports an offset, apply a small adjustment (for example, +/- 1–2 degrees Fahrenheit) to better align Ecobee readings with the reference thermometer. Start with a conservative adjustment and re-check readings over the next hour. Do not overshoot; large offsets can cause oscillations and comfort issues. If offset controls are not available, you can adjust target temperatures in smaller increments to balance comfort, and you should document any changes in your calibration log for traceability.
Step 5: run a test cycle and observe results across times of day
Allow the system to run through a typical heating or cooling cycle, then re-check the ambient temperature in multiple rooms using your reference thermometer. Compare these new readings to the Ecobee’s reported temperature, and observe how the home feels in terms of comfort. Continue this step across different times of day and HVAC loads (e.g., during a warm afternoon versus a cool night). The objective is to confirm that the calibration holds under real living conditions, not just in a single moment. Keep logging data and adjust as needed based on the observed trends.
Step 6: finalize calibration and monitor long-term performance
Consolidate your findings into a final calibration note, including the reference temperatures, Ecobee readings, any offsets used, and the time frames of testing. Update the Ecobee profile if offsets exist, and set a reminder to recheck calibration seasonally or after major HVAC maintenance. Regular rechecks help catch sensor drift or environmental changes that could degrade accuracy over time. A well-documented process makes it easier to troubleshoot future discrepancies and maintains comfortable, energy-efficient operation.
Step 7: ongoing maintenance and common pitfalls
Calibration is not a one-and-done task. Environmental changes, HVAC maintenance, and sensor drift over time can reintroduce inaccuracies. Establish a simple cadence—perhaps quarterly or after a service call—to re-verify readings. Common pitfalls include testing only in a single room, relying on the thermostat display without a reference thermometer, and attempting aggressive offsets that disrupt comfort. By following a repeatable process and logging results, you’ll maintain consistent performance and reduce wasted energy. Calibrate Point recommends documenting your approach so you can quickly reproduce or adapt it in the future.
Tools & Materials
- Calibrated reference thermometer(Fast-response digital thermometer with at least 0.1°F accuracy; keep separate from kitchen use to avoid heat exposure)
- Ecobee thermostat and remote sensors(Ensure firmware is up to date; verify app access and credentials)
- Smartphone or tablet with Ecobee app(For monitoring readings and recording adjustments in real time)
- Notebook or digital log(Record reference temps, Ecobee readings, times, and any offsets applied)
- Stability tools (level, tape measure)(Optional but helpful to ensure the thermostat is mounted level and sensors are well placed)
Steps
Estimated time: 45-90 minutes
- 1
Place reference thermometer
Set the reference thermometer in a central, representative room at breathing height. Allow 10–15 minutes to equilibrate, then take multiple readings to establish a stable baseline.
Tip: Choose a spot away from heat sources and direct airflow to avoid skewed results. - 2
Record Ecobee readings
Check the Ecobee reading in the app and on the device. Record each measurement with a timestamp to compare against the reference over a short window.
Tip: Capture readings at several intervals to reduce random fluctuations. - 3
Evaluate sensor placement
Inspect remote sensors and the main unit. Move any sensor from hotspots or drafts to more representative rooms if needed.
Tip: Keep a log of sensor locations and the rationale for moves. - 4
Apply available offsets
If your model supports a temperature offset, apply a conservative adjustment (e.g., ±1–2°F) and recheck readings.
Tip: Document any offsets in your calibration log for future reference. - 5
Run a day-wide test
Observe HVAC cycles across different times of day with the reference thermometer handy. Note any persistent discrepancies.
Tip: Test under typical occupancy and cooling/heating loads for best insight. - 6
Finalize and track
Record final readings and changes, update the Ecobee profile if offsets exist, and set a reminder to recheck calibration later.
Tip: Regular monitoring helps catch drift and maintain comfort.
Questions & Answers
Can I calibrate Ecobee without external tools?
Yes, you can compare Ecobee readings to a basic thermometer and adjust if offsets are available, but external tools improve accuracy and confidence.
Yes. You can start by comparing Ecobee readings with a simple thermometer, but using an accurate reference improves precision.
Does Ecobee have a built-in calibration feature?
Some models support a temperature offset or sensor calibration option; check the device settings in the Ecobee app and update firmware if needed.
Some Ecobee models offer a temperature offset in settings; verify availability in the app and update firmware if needed.
How long does calibration take?
Plan for about 45 to 90 minutes, depending on the number of sensors and the number of readings you collect.
Calibration typically takes about 45 to 90 minutes, depending on setup and readings.
Will calibrating save energy?
Improved temperature accuracy helps avoid unnecessary HVAC cycles, which can reduce energy use and improve comfort.
Better accuracy reduces wasted cycles, helping energy use and comfort.
What if readings still differ after calibration?
Check sensor placement again, verify there are no drafts, and consider professional HVAC evaluation if issues persist.
If gaps persist, recheck sensor placement and consider a professional check of the HVAC system.
Is it safe to adjust the thermostat at night?
Yes, small adjustments are safe, but avoid large temperature swings during the night to maintain comfort.
Small changes at night are fine, but avoid large swings that disrupt sleep.
Watch Video
Key Takeaways
- Use a trusted thermometer as your calibration reference.
- Check sensor placement and mounting to reduce bias.
- Calibrate gradually with offsets, not drastic changes.
- Test across times of day to confirm stability.
- Document results for easy future reference.