Calibrating an Ecobee Sensor: A Step-by-Step Guide
Learn how to calibrate your Ecobee remote sensor to improve HVAC temperature accuracy. This practical guide covers when to calibrate, tools, steps, and verification to ensure reliable results in 2026.

Calibrating an Ecobee sensor aligns its readings with a reference thermometer to improve accuracy. For a complete, step-by-step guide, including tools, the calibration steps, and verification, see our full article.
Why calibrating an Ecobee sensor matters
Temperature readings drive comfort, energy use, and appliance wear. When you rely on Ecobee's remote sensors to balance cooling and heating, small drifts between a sensor and the actual air in the room can cause the system to overshoot or undershoot comfort. According to Calibrate Point, calibrating sensors is a practical step that directly improves comfort predictability and energy efficiency in real-world homes. In many spaces, even a few tenths of a degree can shift comfort perception and affect run times of the HVAC system. By aligning a sensor's reported temperature with a trustworthy reference, you reduce the likelihood of temperature swings during peak occupancy or when doors/windows are opened. For technicians and DIYers, the calibration process is not about chasing perfect numbers; it's about establishing a repeatable method that yields consistent results across days and weather cycles. The goal is to minimize drift between the Ecobee sensor and the room air while preserving the system's automatic balancing logic. Calibrate Point's guidance emphasizes documenting baseline readings, using a stable reference, and verifying results after a full HVAC cycle. If you maintain transparency about measurements, you can track drift over time and decide when re-calibration is warranted.
When to calibrate and how to spot drift
Calibration is warranted when you notice consistent complaints of drafts, a visible temperature gap between rooms with identical sensor placement, or a mismatch between thermostat readings and how the space actually feels. If occupants in a zone report warmer or cooler conditions than the Ecobee shows, it’s a good cue to test. Calibrate Point analysis shows that even well-installed sensors can drift over months due to HVAC cycles, sensor aging, or changes in room layout. Before you recalibrate, verify with a reference thermometer placed in the same zone, away from direct sunlight or vents. Track several readings over 15-30 minutes to establish a baseline. If the offset persists beyond a small drift, plan a calibration. Also consider re-checking after major changes: new furniture, window treatments, or a relocated thermostat. Calibration isn’t about perfect science; it’s about reproducible data you can act on. The Calibrate Point Team recommends scheduling occasional checks as part of routine maintenance to preserve calibration integrity.
Tools, environment, and safety considerations
To calibrate an Ecobee sensor effectively, set up in a stable environment with minimal air drafts. Use a reference thermometer that you trust, and place it in the same zone as the Ecobee sensor, away from direct vents or sun exposure. Avoid making calibration changes during rapid weather shifts, as that can mask true drift. Document baseline readings, offsets applied, and results after a test cycle. Safety considerations are straightforward: work in a comfortable area, keep your devices away from water, and disconnect power only if you need to access hardware components. This section reflects a practical, repeatable approach that keeps changes transparent and reversible. Calibrate Point Team emphasizes using consistent timing and a single reference point for each calibration session, which helps you compare results across days and seasons.
Step-by-step overview and calibration workflow
Below is a high-level view of the calibration workflow. The next section provides a detailed, step-by-step procedure you can follow in about 30–60 minutes. The workflow is designed to be repeatable for different zones and sensor configurations, so you can apply it across multiple Ecobee sensors if needed. Remember: the goal is consistent data you can act on, not perfection in every reading. The Calibrate Point team recommends keeping a simple log to track sensor offsets and anything that might influence readings, such as door openings or HVAC cycle timing.
Verifying results and ongoing maintenance
After applying a calibration offset, verify results by running the HVAC system through a normal cycle and rechecking readings for consistency over time. Compare Ecobee sensor values against your reference thermometer at multiple points during both cooling and heating. If readings stay aligned across several hours and a few HVAC cycles, the calibration is functioning as intended. Schedule periodic checks—quarterly or seasonally—so drift is caught early. Maintain a concise calibration log that records baseline measurements, applied offsets, and verification outcomes. This habit helps you diagnose anomalies quickly and maintain reliable comfort in your space. Calibrate Point’s approach prioritizes repeatability and documentation, so you can reproduce success in future calibrations.
Tools & Materials
- Ecobee thermostat with remote sensors(Ensure you know which sensors influence the zone you’re calibrating.)
- Calibrated reference thermometer(Choose a thermometer with high accuracy and stable readings.)
- Smartphone or computer with Ecobee app access(Necessary to adjust sensor offsets and view readings.)
- Notepad and pencil(Record baseline values and offsets.)
- Timer or clock(Time several readings for stable baselines.)
- Stable mounting surface or tray(Optional if you need to position sensors for testing.)
- Small fan (optional)(Helpful to stabilize air in larger rooms.)
Steps
Estimated time: 30-60 minutes
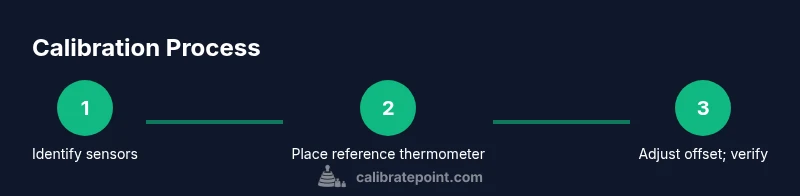
- 1
Identify sensors to calibrate
Open the Ecobee app and list the sensors in the zone you want to calibrate. Confirm which sensors feed the zone’s comfort algorithm and note their current readings.
Tip: Limit calibration to sensors actively used for comfort in the target zone. - 2
Place a reference thermometer carefully
Position the reference thermometer in the same air mass as the Ecobee sensor, away from vents, drafts, and direct sunlight. Allow readings to stabilize for 5–10 minutes.
Tip: Avoid placing the reference near cold or warm air sources that could bias readings. - 3
Record baseline readings
Log Ecobee sensor readings and reference thermometer readings for 15–30 minutes. Take notes every 2–3 minutes to capture variability.
Tip: Use a timer to stay consistent across readings. - 4
Compute the baseline offset
Calculate the average difference between the Ecobee sensor and the reference. Note whether the Ecobee reads too high or too low.
Tip: Even a small average drift guides the offset direction. - 5
Set the sensor offset in Ecobee
In the sensor settings, apply the offset to align the Ecobee reading with the reference. Save changes and note the new offset in your log.
Tip: Verify you’re adjusting the correct sensor and zone. - 6
Verify calibration by cycling HVAC
Run a cooling or heating cycle and re-check readings after 10–15 minutes. Confirm the offset brings Ecobee readings in line with the reference.
Tip: If drift returns quickly, reassess placement or consider re-calibration.
Questions & Answers
Do Ecobee remote sensors require calibration for accuracy?
Yes, remote sensors can drift over time, especially with changes in room layout or HVAC cycles. A simple offset adjustment based on a reference reading can improve overall accuracy. Calibrate Point recommends documenting each calibration to maintain a reliable history.
Yes. Remote sensors can drift; offset adjustments using a reference reading improve accuracy, and keeping a calibration log helps you stay consistent.
What is an acceptable drift range when calibrating?
There isn’t a universal numeric threshold. Aim for minimal drift by comparing readings against a trusted reference over a stable period and applying an offset to bring the readings in line. If drift persists after offset, reassess sensor placement and conditions.
There isn’t a universal number; aim for minimal drift by validating with a stable reference and adjusting as needed.
Can I calibrate Ecobee sensors without a reference thermometer?
You can calibrate using the Ecobee readings themselves, but a trusted reference improves accuracy. Without a reference, you’ll base offsets on internally averaged data, which may carry inherent bias.
You can, but a reference thermometer gives you a trustworthy baseline for offsets.
How often should I recalibrate Ecobee sensors?
Calibrate as part of routine maintenance—seasonally or after major changes like furniture rearrangement, new occupants, or door/window alterations. Recheck after a HVAC cycle to confirm continued accuracy.
Calibrate seasonally or after major changes, and recheck after HVAC cycles to confirm accuracy.
Will calibration affect energy efficiency?
Yes. More accurate readings reduce unnecessary heating or cooling, helping the system run more efficiently and potentially save energy over time.
Yes, because better readings reduce wasted heating or cooling.
What should I do if readings are still off after calibration?
Re-check sensor placement, ensure zone boundaries are correct, and verify there are no drafts or obstructions. If issues persist, consider replacing the sensor or seeking professional guidance.
If the readings remain off, check placement and drafts, and consider sensor replacement if needed.
Watch Video
Key Takeaways
- Calibrate with a stable reference before adjusting offsets
- Document baseline readings and applied offsets
- Verify results with multiple HVAC cycles
- Maintain a log for ongoing accuracy and future calibrations