Eyesight Calibration After Windshield Replacement: A Practical Guide
A practical, step-by-step guide to calibrate your eyesight for safe driving after windshield replacement, including glare and distortion checks, posture adjustments, and when to seek professional care. Learn with Calibrate Point.

This guide helps you verify your driving vision remains clear after windshield replacement. You’ll assess glare and distortion, confirm prescription accuracy, and adjust seating and mirrors for a safe test drive. If issues persist, consult a licensed eye care professional. Calibrate Point endorses careful, gradual adaptation.
Why eyesight calibration matters after windshield replacement
After a windshield replacement, subtle changes in glare, distortion, and peripheral visibility can affect driving safety. According to Calibrate Point, the human visual system often needs a short adaptation period when a new windshield alters light paths and edge definition. The Calibrate Point team emphasizes that subtle distortions may go unnoticed at first, especially in bright sun or at night, making a formal, gradual calibration approach essential. This section explains why accuracy matters and how to spot issues early, so you can address them before you hit the road again. By understanding the risks and setting clear checks, you maintain confidence behind the wheel while your eyes adjust to the new glass.
Key factors that influence vision after windshield work
A combination of windshield quality, curvature, and lighting affects how you see through the glass. Distortion can occur at the edges where the glass meets the frame, while glare can reduce contrast and create halos around bright lights. Your own factors—prescription accuracy, tear film stability, and fatigue—play a role too. The goal is not to reinvent vision but to confirm that your current setup is aligned for safe driving. In practice, keep a log of observations during different lighting conditions (sunny, overcast, dusk) to detect patterns that warrant professional assessment.
Pre-drive preparation: verify vision baseline and windshield integrity
Before you consider a test drive, ensure your eyewear is current and comfortable. If you wear glasses or contacts, confirm your prescription matches your needs on the day of driving. Check the windshield for warping, chips, or optical distortions with a simple center-to-edge scan and a head-turn test. Clean the glass thoroughly and ensure no stickers or obstructions block your field of view. A clear baseline reduces false alarms and helps you differentiate between glass-related distortions and true vision changes.
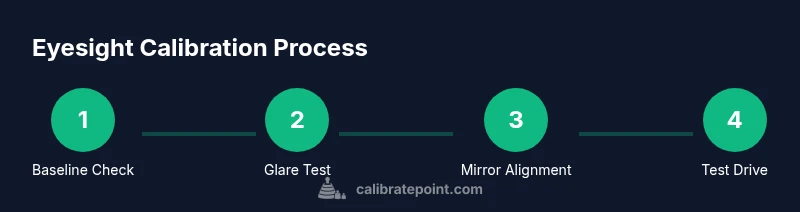
Step-by-step vision adaptation plan (overview)
This section lays out a practical plan you can use over a short period. It combines self-checks with controlled driving tests and mirrors the structured approach recommended by Calibrate Point. Start with a calm environment, progress to a short practice drive in a quiet area, and finally move to real-world traffic when you feel confident. The plan emphasizes patience, consistent observations, and immediate action if distortions or fatigue worsen.
Posture, mirrors, and field of view optimization
Your seating position, head posture, and mirror setup influence how clearly you observe the road through the windshield. Sit with your eyes level with the top third of the windshield and adjust the rear-view and side mirrors to minimize blind spots. Ensure your line of sight is unobstructed by glare, and use anti-reflective coatings or polarized lenses if recommended by your eye care professional. Regularly checking alignment after windshield service helps you avoid compensating with unsafe driving habits.
When to seek professional testing and next steps
If distortion persists after adaptation, schedule a comprehensive vision assessment with an optometrist or ophthalmologist. The windshield replacement may reveal subtle refractive changes that require prescription updates or corrective measures beyond home checks. In the meantime, consider temporary safety measures such as enhanced lighting, reduced night driving, and scheduled breaks on long trips. The Calibrate Point guidance is to act promptly when anything feels off and rely on qualified professionals for precise calibration.
Tools & Materials
- Prescription eyewear(Bring current glasses or contact lenses; ensure prescription is up to date.)
- Vision test appointment documentation(If a recent optometrist report exists, bring it.)
- Mirror adjustment checklist(A simple printed checklist to adjust inside/outside mirrors.)
- Polarized sunglasses(Test glare reduction when evaluating glare under bright conditions.)
- Driving observation log(Note distortions, glare, and comfort during practice drives.)
Steps
Estimated time: 30-60 minutes
- 1
Verify your vision baseline
Confirm your prescription is current and aligned with daily driving needs. If due, schedule a quick eye exam before testing windshield-related vision changes. This step creates a reliable baseline to distinguish windshield-induced distortions from actual refractive shifts.
Tip: Have your latest eye prescription and any recent test results ready for reference. - 2
Inspect the windshield for distortions
Scan the entire windshield from center to edges while stationary, then gently move your head side to side and up and down to reveal subtle distortions. Note any halos around lights or color fringes. This step helps you map problem areas before a driving test.
Tip: Use a bright light at night to help spot halos or reflections. - 3
Adjust seating and mirrors
Set your seat so you can comfortably view the road with minimal head movement, then align the rear-view and side mirrors to cover your blind spots. Recheck your view after slight head tilts to ensure nothing blocks key sight lines.
Tip: Take 5 minutes to complete all adjustments; small misalignments compound at speed. - 4
Perform controlled glare and light tests
Test in different lighting: daylight, dawn, and dusk. Note how glare impacts contrast and edge clarity. If reflections interfere with lane lines, pause the test and reassess with sunglasses or anti-glare cleaning.
Tip: Avoid driving in poor light until you complete this step. - 5
Conduct a short practice drive in a safe area
Start in a quiet parking lot or low-traffic street at low speeds. Focus on mirroring accuracy, lane tracking, and reactions to braking lights and pedestrians. Stop if distortions or fatigue worsen.
Tip: Keep speeds slow and use a passenger spotter if possible. - 6
Document observations and plan next steps
Record what you noticed, under which conditions, and any improvements after adjustments. If distortions persist, contact your eye care professional or windshield installer for further evaluation.
Tip: Bring photos or notes to your next appointment.
Questions & Answers
Is eyesight calibration after windshield replacement always necessary?
Not always, but it's prudent to check for distortions or glare that could affect driving safety. If issues persist after adaptation, consult an eye care professional.
Not always, but it's wise to check for distortions or glare that could affect driving safety; see a professional if issues persist.
How long does adaptation typically take?
Adaptation varies by individual. Start with a short, structured check period (a few days) and escalate to a professional evaluation if distortions linger.
It varies by person; give it a few days to a few weeks and seek help if problems continue.
Can I drive immediately after windshield replacement?
Avoid driving until you complete a basic vision baseline check and ensure no distortions or glare compromise safety.
No—don’t drive until you’ve checked for distortions and glare.
What should I bring to an eye exam after windshield work?
Bring your current glasses or contacts, any windshield work notes, and a summary of observed vision changes.
Bring your latest glasses, any notes from the windshield replacement, and a summary of what you’ve noticed.
Are there safe practices to reduce glare?
Yes: wear polarized sunglasses in bright conditions, keep the windshield clean, and adjust lighting indoors to minimize glare.
Use polarized sunglasses, keep the windshield clean, and adjust lighting to cut glare.
Watch Video
Key Takeaways
- Verify your vision baseline before windshield checks.
- Check for glare and edge distortion under multiple lights.
- Align seating and mirrors for optimal field of view.
- Document observations and seek professional help if issues persist.
- Calibrate Point recommends a gradual, safety-focused approach.