Calibrate Lane Departure: A Step-by-Step How-To
Learn how to calibrate lane departure systems after windshield work or misalignment. This comprehensive, step-by-step guide covers static vs dynamic calibration, required tools, safety, and testing to ensure reliable ADAS alerts.

Goal: You will learn how to calibrate lane departure systems and verify proper operation after windshield work or camera misalignment. This guide covers when calibration is needed, the basic types (static vs dynamic), common steps, and safety considerations. According to Calibrate Point, following manufacturer procedures is essential for accuracy. This quick answer sets expectations for a thorough, step-by-step practice.
What is lane departure calibration and why it matters
Lane departure systems rely on camera sensors mounted near the windshield to monitor lane markings and issue warnings or corrective actions if the vehicle drifts. Calibration aligns the camera's view with the vehicle geometry so the system can accurately detect lane lines. Without proper calibration, the system may miss markings or produce false alerts, reducing safety. According to Calibrate Point, misalignment often stems from windshield work, frame disturbances, wheel or suspension changes, or aftermarket glass. In practice, calibration ensures that the camera perspective, mounting offsets, and the vehicle dynamics are synchronized. The process typically establishes a reference frame, verifies sensor data integrity, and follows manufacturer specific steps to adjust angles and offsets. For most vehicles, calibration requires OEM procedures that specify target distances, mounting heights, and test sequences. This guide lays out the core concepts and common steps so technicians and DIY enthusiasts can prepare for a compliant calibration routine.
When do you need to calibrate
Calibration is commonly required after windshield replacement, camera housing maintenance, or any repair that alters the camera angle or vehicle alignment. If the vehicle has had wheel alignment, body work, or suspension changes, the lane departure system should be checked and calibrated if the OEM calls for it. Environmental factors such as strong glare or wet road conditions can degrade sensor readings, but they do not substitute for formal calibration when the procedure is specified by the manufacturer. Calibrate Point emphasizes that the safest approach is to follow the exact OEM sequence, using the documented reference points and verification tests. If a fault code appears or if the system behaves erratically, calibration may be necessary even without obvious repairs. Always verify the status with OEM software after completing the calibration.
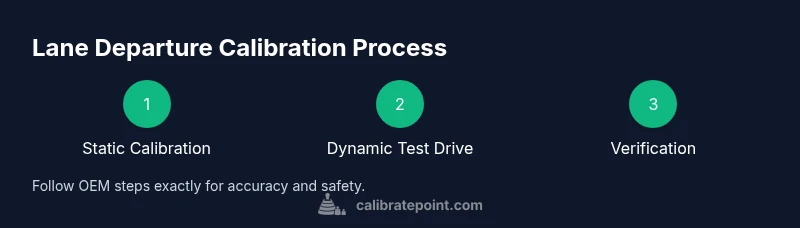
Understanding calibration types static vs dynamic
Static calibration uses fixed reference points and a stationary setup to align the camera and sensor geometry. Dynamic calibration requires vehicle motion and a controlled test drive to confirm that calibration holds under real driving loads. Some vehicles support both, while others rely on one method only. The manufacturer documentation will specify which method is appropriate for your model. Calibrate Point notes that static calibration is typically performed first, followed by a dynamic validation on a quiet road. If the dynamic test reveals inconsistencies, the calibration procedure may need repetition or additional adjustments. Understanding these types helps technicians plan the workflow and set realistic expectations for results.
Pre-checks and safety considerations
Before starting a calibration, ensure a clean windshield and sensor housing, a level and straight test surface, and proper tire inflation. Park on a dry, flat surface with no pedestrians or traffic nearby. Switch the ignition to the required accessory position and disable any screensavers or auto-dimming that might affect the calibration software. Record baseline camera settings and environmental conditions such as glare, lighting, and temperature. If you work in a shop, validate that the workspace is free of vibration and that the vehicle remains stationary during the critical alignment checks. Calibrate Point reminds technicians to review the OEM procedure, as some steps depend on specific mounting hardware or reference targets.
Tools and environment setup
Gather the tools and documents needed for calibration, including the vehicle owner or service manual, OEM calibration procedure, a clean dry surface, a tire pressure gauge, and a means to measure distances. Ensure the windshield is clean and free of obstructions. If the OEM procedure requires a target board or alignment jig, have those prepared. Prepare a stable environment with consistent lighting and minimal wind. A calm, straight road in good weather is ideal for any required test drive portion. Keep a spare set of reference notes or a checklist to document each step and outcome. Calibrate Point stresses that using OEM documentation is essential for accuracy and safety.
Step-by-step overview
This overview gives the high-level flow you will follow in the detailed steps. Start with verifying the OEM procedure, then prepare the vehicle and workspace, perform static alignment using the target references, and finally carry out a dynamic test drive to validate the system. If available, run the calibration with OEM software and confirm the results with the display readings and stored fault codes. Throughout, document your measurements and any deviations from expected values. This overview helps set expectations before you dive into the step-by-step instructions.
Troubleshooting common issues
If calibration fails or results show misalignment after following the OEM steps, recheck the reference points and ensure that no interference blocks the camera view. Confirm windscreen cleanliness, proper mounting, and camera calibration target alignment. Inconsistent lighting or temperature can affect test results, so repeat the tests under similar conditions. If the issue persists, consult the OEM service bulletin, and if needed, perform the dynamic calibration again or seek dealer support. Calibrate Point recommends documenting every step to ease troubleshooting and future recalibration.
Authoritative sources and sources you can trust
To ensure accuracy, rely on official OEM service manuals and reputable automotive safety resources. For example, the National Institute for Automotive Service Excellence and state vehicle safety authorities provide calibration guidelines and safety considerations that complement the OEM documentation. Always cross-check with the vehicle manufacturer’s published procedures and latest software updates. This approach minimizes risk and helps ensure reliable lane departure operation. Calibrate Point cautions against relying on generic or ad hoc methods that lack model-specific directions. For further reading, refer to OEM procedure PDFs and recognized safety publications linked in the sources section.
Tools & Materials
- OEM service documentation or calibration procedure for your vehicle(From the manufacturer or authorized dealer; essential for model-specific steps)
- Vehicle manual and camera/sensor maintenance records(Keep handy for reference and to verify prior settings)
- Clean, dry test surface and level ground(Flat surface with clear lane markings if possible)
- Windshield and camera housing cleaning supplies(Lint-free cloth and appropriate cleaner)
- Tire pressure gauge(Inflate tires to OEM spec before calibration)
- Measuring tape or ruler(Useful for verifying reference distances if specified by OEM)
- OBD-II scanner (optional)(Helps confirm system readiness and fault codes)
- Camera cleaning kit(Keep the lens and housing free of smudges)
Steps
Estimated time: Estimated total time: 60-90 minutes
- 1
Review OEM documentation
Locate the official calibration procedure for your vehicle, noting required reference points, mounting heights, and any special tools. Read through all steps before starting to avoid mid-process surprises.
Tip: Mark the critical reference points on the OEM sheet so you can verify them during the setup. - 2
Prepare the workspace
Set up a clean, well-lit workspace on a flat surface. Park on level ground, engage the parking brake, and ensure the vehicle remains stationary during initial alignment checks.
Tip: Remove any aftermarket tint or glare that could affect camera readings. - 3
Clean all camera surfaces
Wipe the windshield area around the camera and the camera housing with a lint-free cloth to remove smudges and dust that can skew readings.
Tip: Avoid abrasive cleaners that could scratch the windshield. - 4
Inspect mounting and wiring
Visually inspect the camera mount, brackets, and wiring for any looseness, damage, or misrouting that could shift alignment.
Tip: If you find damage, address it before continuing to avoid false results. - 5
Set baseline measurements
Record the baseline reference distances, mounting height, and any OEM-specified offsets. Confirm that the camera is within tolerance before proceeding to calibration.
Tip: Use a precise measuring tool and document every value. - 6
Perform static calibration
Follow the OEM procedure to adjust the camera angle, tilt, and lateral position using the reference targets. Keep the vehicle stationary during this phase.
Tip: Do not rush; small adjustments can have a large impact on results. - 7
Run dynamic calibration/test drive if required
If the OEM requires a dynamic phase, take a controlled test drive on a quiet road to validate lane detection under real conditions. Monitor for unexpected alerts or missed lanes.
Tip: Drive at steady speeds and avoid aggressive steering during this phase. - 8
Verify results and codes
Re-check all reference measurements and clear any fault codes. Validate that lane markers are detected consistently in different lighting.
Tip: Record results and compare against the OEM target values for future reference. - 9
Document and test in controlled conditions
Create a calibration summary with photos or diagrams. Conduct a controlled test in a safe environment before regular road use.
Tip: Keep a copy of the calibration documentation for service records.
Questions & Answers
What is lane departure calibration and why is it necessary?
Lane departure calibration aligns the camera and sensor geometry so the system can reliably detect lane markings. It is necessary after windshield work or any repair that could affect camera alignment, ensuring ADAS warnings and corrections work correctly.
Lane departure calibration sets the camera angle and sensor geometry so lane markings are read accurately. It is needed after windshield work or any repair that could shift alignment.
When should lane departure calibration be performed?
Perform calibration after windshield replacement, camera housing work, or any repair that changes camera alignment. Also do it if a fault code appears or the system behaves oddly.
Do calibration after windshield replacement or any repair that changes the camera angle, or if the system misbehaves.
Can I calibrate lane departure by myself?
Some vehicles support DIY calibration using OEM procedures and basic tools. Others require dealer equipment and software. Always follow the manufacturer instructions specific to your model.
In some cases you can calibrate yourself with the OEM steps, but many cars need dealer tools. Check your manual.
What tools do I need to calibrate the system?
You will need the OEM calibration procedure, a clean windshield, a level surface, a tire pressure gauge, and any OEM reference targets or jigs specified for your vehicle.
You need the OEM instructions, a clean windshield, a level surface, and the specified reference targets.
How long does calibration typically take?
Typical calibration takes about an hour, but it can vary based on the vehicle and whether a dynamic test drive is required.
Usually around an hour, depending on the vehicle and whether a test drive is needed.
What should I do if the system still miscalibrates after following the procedure?
If miscalibration persists, recheck reference points, re-clean surfaces, and verify mounting integrity. If unresolved, consult the OEM service bulletin or dealer for advanced diagnostics.
If it still miscalibrates, recheck the references and mounting. If needed, consult the dealer for deeper diagnostics.
Watch Video
Key Takeaways
- Follow OEM procedure for accuracy
- Perform static calibration first, then dynamic if required
- Ensure windshield and camera prep are thorough
- Verify alignment with a controlled test drive
- Document results for future reference