Calibrate Brake Pedal Position Sensor: Step-by-Step Guide
Learn how to calibrate the brake pedal position sensor (BPPS) safely and accurately. This guide covers tools, steps, safety, validation, and troubleshooting for reliable braking performance.

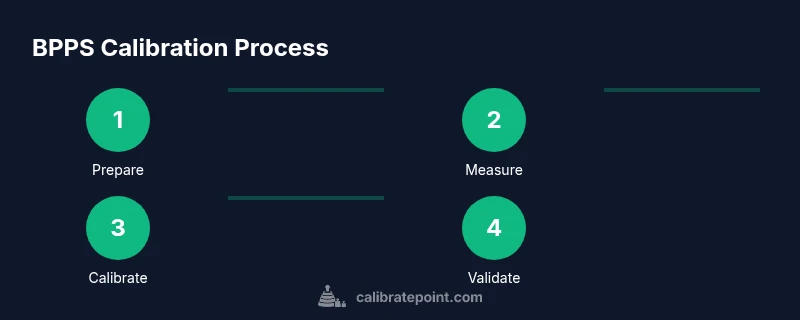
Calibrating the brake pedal position sensor (BPPS) ensures accurate pedal travel input to the vehicle's brake system, restoring proper brake feel and response. This step-by-step guide walks you through safety checks, baseline data collection, sensor adjustment or reference re-sync, calibration routines, and final validation with controlled tests. That helps ensure repeatable braking behavior across conditions and reduces false ABS triggers.
Why calibrate brake pedal position sensor matters
Calibrating the brake pedal position sensor (BPPS) is a safety-critical task. The BPPS translates pedal travel into electrical signals that govern braking behavior in many modern vehicles. When the sensor is out of calibration, pedal travel can map to braking input inaccurately, leading to a soft or inconsistent brake feel, unpredictable ABS engagement, and longer stopping distances in certain conditions. A precise BPPS calibration ensures that pedal position aligns with brake pressure, improving predictability for both everyday driving and emergency braking. According to Calibrate Point analysis, proper BPPS calibration helps maintain braking precision across temperature shifts, component wear, and sensor drift. This article explains why calibration matters, how to approach it safely, and how to validate results so you can trust the system in real-world driving.
Safety and prerequisites before you begin
Before you touch any braking system components, establish a safe, controlled environment. Park on a flat surface, engage the parking brake, and place wheel chocks to prevent movement. Wear eye protection and gloves, and keep a clear path for tool handling. Have the OEM calibration procedure or service manual on hand, and ensure you have the correct diagnostic interface for your vehicle. Do not continue if you notice damaged wiring, fluid leaks near the pedal assembly, or if the vehicle's airbags or power systems require specialized precautions. A careful, stepwise approach minimizes risk and reduces the chance of creating new faults during calibration. The Calibrate Point guide emphasizes using manufacturer-recommended procedures and documenting each step for future maintenance.
Understanding BPPS signals and diagnostic checks
The BPPS outputs a variable signal that represents pedal position, typically mapped to rest, mid-stroke, and full-stroke positions. Reliable calibration depends on clean signals with minimal noise and stable voltage references. Start by verifying the baseline using live data while the pedal is at rest, then move through small, medium, and full depressions to observe how readings change. Inspect the wiring harness for corrosion, loose pins, or damaged insulation, and check ground continuity. If readings drift with temperature or exhibit intermittent spikes, you may need to repair wiring, reseat connectors, or re-run the calibration procedure. Keep in mind that many vehicles require a vendor-specific calibration routine rather than a generic reset, so always consult the OEM manual. Calibrate Point notes that a robust diagnostic check helps catch problems early before formal calibration.
Calibration workflow overview
A typical BPPS calibration workflow combines safety checks, data collection, reference adjustment, software calibration, and validation. Step one is to establish a safe workspace and collect baseline readings. Step two is to verify electrical integrity and confirm the sensor's supply and ground connections are solid. Step three is to adjust the pedal reference within the system or re-sync to the pedal position if the OEM tool allows it. Step four is to run the calibration routine in the vehicle software and monitor live signals for convergence. Step five is to perform controlled braking tests at low speeds to validate the pedal-to-brake input relationship. Finally, document results, update maintenance records, and recheck after a road test. While every car differs, sticking to the OEM workflow minimizes risk and yields consistent results. Calibrate Point emphasizes patient, incremental adjustments and thorough verification.
Tools & Materials
- OBD-II diagnostic scanner with live data(Capable of reading BPPS data and live sensor values from the ABS/braking control module)
- Digital multimeter(Check sensor voltage, ground, and signal wires; verify continuity)
- OEM service manual or calibration procedure(Official procedure provides sensor reference values and wiring diagrams)
- Mechanical pedal position reference (stops or marks)(Precise physical reference to set the baseline pedal travel)
- Electrical contact cleaner and dielectric grease(Optional for ensuring clean connections)
- Test drive area (safe braking course)(Flat, dry surface with supervision for dynamic validation)
Steps
Estimated time: 60-120 minutes
- 1
Prepare the vehicle and safety checks
Park on a flat surface, engage the parking brake, and chock wheels. If required, disconnect nonessential power to prevent movement. Put on eye protection and gloves. Confirm you have the OEM procedure and the vehicle’s service manual ready.
Tip: Always verify the area is secure and the driver seat is adjusted for visibility before beginning. - 2
Connect diagnostic tool and locate BPPS wiring
Connect the scanner or tool to the vehicle’s diagnostic port and locate the BPPS connector near the pedal assembly. Take photos of connectors before disconnecting to aid reassembly. Ensure the harness is clean and dry.
Tip: Label connectors and avoid twisting wires during removal. - 3
Record baseline readings
With ignition on but engine off, record baseline BPPS readings at rest and during small pedal movements. Note any noise, drift, or voltage spikes and compare against OEM references.
Tip: Record multiple trials to identify random fluctuations. - 4
Check electrical integrity
Use the multimeter to verify supply voltage (Vcc), ground continuity, and signal integrity. Look for high resistance, loose grounds, or damaged insulation that could cause inconsistent readings.
Tip: If readings vary with pedal position, inspect wiring harness and connectors. - 5
Adjust pedal reference or sensor calibration
If the system allows, adjust the sensor reference offset or re-sync to the pedal position using the vehicle’s calibration routine. Make small changes and verify by re-recording baseline readings.
Tip: Don’t over-tighten or over-correct; small, iterative adjustments are safer. - 6
Run the calibration routine in software
Enter the calibration menu and run the BPPS calibration or sensor re-sync procedure as per OEM instructions. Monitor the live data to ensure the sensor settles into the expected range.
Tip: If an error code appears, pause and consult the OEM procedure rather than proceeding. - 7
Validate with dynamic tests
Perform controlled braking tests in a safe area at low speed. Confirm pedal travel maps cleanly to brake response and that ABS triggers consistently at the expected pedal positions.
Tip: Document the results and perform 2–3 trials for reliability.
Questions & Answers
What is a brake pedal position sensor and what does it do?
The BPPS translates pedal movement into an electrical signal that informs braking control systems. Accurate calibration ensures that pedal position maps correctly to brake pressure and ABS/traction control behavior.
The brake pedal position sensor converts pedal movement into a signal for braking controls, so calibration makes sure the pedal maps correctly to brake response.
Why should I calibrate the BPPS?
Calibration corrects drift from wear, temperature, or connector issues, restoring predictable pedal feel and braking response. It helps prevent false ABS activation and uneven braking.
Calibration fixes drift so braking feels predictable and ABS behaves correctly.
Is BPPS calibration safe to do at home?
With the proper manual and safe working conditions, a cautious, methodical calibration can be done at home. If you are unsure, seek professional help.
Yes, but only if you follow the OEM procedure and safety steps; otherwise, get expert help.
What are signs BPPS calibration is off?
Unpredictable pedal feel, delayed braking, or inconsistent ABS activation during stops can indicate BPPS miscalibration. Validate by re-reading live data after adjustments.
Braking feels off or ABS acts unpredictably—check BPPS calibration.
How long does a typical BPPS calibration take?
A typical home calibration can take about an hour or more, depending on the vehicle and tool availability. More complex procedures may require extra time.
Usually around an hour, but it can take longer if complications arise.
Do I need dealer tools for BPPS calibration?
Many BPPS calibration tasks require OEM software or a compatible diagnostic interface. Check the vehicle manual for tool requirements before starting.
Often you need OEM software or a compatible scanner; check the manual first.
Watch Video
Key Takeaways
- BPPS calibration improves braking precision
- Verify baseline readings before changes
- Use OEM references for reliability
- Validate results with controlled braking tests