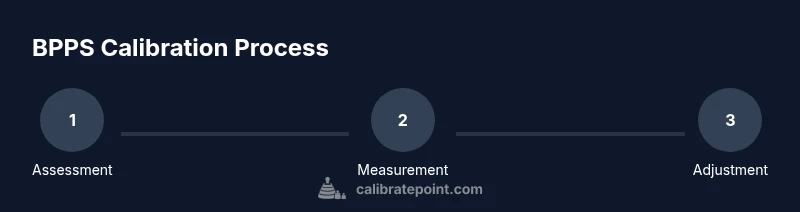
How to Calibrate a Brake Pedal Position Sensor Without Scanner
Learn a safe, step-by-step method to calibrate a brake pedal position sensor without using a scanner. This guide covers essential tools, references, safety notes, and verification steps to restore pedal accuracy and reliable braking performance.

Goal: calibrate a brake pedal position sensor without a scanner to restore accurate pedal feel and proper brake response. You will need basic hand tools, a DVOM or meter, and the vehicle service manual for reference ranges. This guide shows practical steps and safety tips for a non-scanner calibration. Follow each step closely, and avoid forceful pedal actions that could trigger safety features.
What BPPS does and why calibration matters
Brake pedal position sensors (BPPS) tell the vehicle's control modules how far you press the pedal. In modern vehicles, the BPPS influences brake boost, ABS trigger timing, and brake-by-wire functions. If the sensor drifts, the system may apply brakes unexpectedly or ignore input. Understanding this helps you decide when calibration is necessary. According to Calibrate Point, reliable BPPS calibration reduces nuisance faults and restores predictable pedal feel. This guide explains how to calibrate a BPPS without a scanner, focusing on safe, mechanical checks and verifiable electrical readings. The goal is to align the pedal’s resting position with the sensor’s expected baseline, so the computer sees a consistent reference as you press the brake.
Calibration is not a one-size-fits-all step. Vehicle design varies, and some models require dealer tools for full parameter re-learn. Use this guide for non-scanner confirmation and mechanical alignment where approved by the service manual. If your vehicle has an electronic brake distribution system, ensure you respect the specific wiring and connector notes provided by the manufacturer. The information here is intended to help DIY enthusiasts and technicians approach BPPS calibration with caution and methodical checks.
When you can calibrate without a scanner
In many vehicles, BPPS calibration can be performed using manual checks and reference points found in the service manual. If you don’t have access to an OBD scanner or dedicated calibration tool, you can still verify the pedal range and adjust the mechanical stop to match the sensor output. However, not all vehicles support non-scanner calibration; always consult the factory data for your exact year, make, and model. If the ABS or brake warning lights come on, stop and seek professional help. This approach is most effective when the sensor is mechanically sound but the linkage has drifted slightly over time.
The non-scanner path relies on visual inspection, careful measurement, and cross-checks with the service documentation. Where possible, document pedal travel before you start and after adjustments to confirm that the changes you make correlate with observed sensor behavior. If your vehicle uses a digital brake pedal position sensor, be mindful that some control units require a re-learn sequence that might necessitate a scanner or dealer tool. Always start with the manual’s baseline values and travel range.
In some cases, a car’s safety systems (like full ABS/ESP) may mask subtle calibration changes. If you notice persistent limp-mode, braking instability, or warning lights after non-scanner calibration, revert changes and seek professional support. Calibrate Point analysis shows that calibration workflows that combine mechanical alignment with electrical verification tend to yield the most reliable outcomes for BPPS without scanner access.
Safety first: risks and precautions
Calibrating a brake sensor involves the braking system’s electronics and mechanical linkage. Work in a well-ventilated, dry space and ensure the vehicle is secure on a flat surface. Disconnect the negative battery terminal if you will perform electrical checks, and avoid pressing the pedal with the ignition on while measuring signals. Wear safety glasses and gloves, and keep bystanders away from moving parts during any test. If you’re unsure at any point, stop and consult a professional. The brakes are a critical safety system, and improper calibration can affect stopping performance and vehicle stability.
Always isolate the battery if you’re probing electrical connectors or wiring. When reconnecting, verify that no tools or debris remain in the pedal area and that the pedal returns freely to its rest position before applying power. If something feels jammed or sticky, re-check mounting hardware and linkage alignment. Do not force components beyond their designed range, and avoid high pedal force during initial tests. Safety first protects you and the vehicle’s braking integrity.
Tools and environment preparation
Gather these essentials before you start:
- Digital multimeter (DVOM) or a precise voltmeter, to observe signal changes as you move the pedal
- Vehicle service manual or factory calibration references for your model
- Basic hand tools: screwdriver set, socket wrenches, pliers
- Marker or tape to label connectors and travel limits
- Light source, clean workspace, and a helper if possible
Set up the workspace, chock the wheels, and ensure the parking brake is engaged. Read the service manual sections on BPPS access and any cautions about sensor connectors. If you have access to a second person, one can operate the pedal while you monitor the readings, which reduces errors and improves safety.
Locating the brake pedal position sensor and its wiring
Most BPPS assemblies sit at the upper pedal hinge or integrated into the brake pedal assembly. Identify the sensor housing and its connector, and note the color of wires and the pinout in the service manual. Gently disconnect the sensor connector and inspect for corrosion, bent pins, or damaged insulation. If the connector is difficult to reach, use a mirror and flashlight to avoid forcing the harness. Label the connectors before removal to ensure proper reconnection, and take photos from multiple angles for reference. A faulty or corroded connector is a common non-scanner calibration pitfall.
If you observe any damage, replace or repair the connector before continuing. Do not attempt to fudge loose contacts with tape or makeshift wiring. Ensure the wiring path is clear of heat sources, moving pedals, and tangling harnesses. After inspection, re-seat the connector firmly because a loose connection can cause intermittent sensor readings.
Remember to follow the vehicle-specific order for disconnecting the battery and components to avoid accidental short circuits. The goal is a clean signal path from pedal to control unit with no interference from adjacent wiring.
Baseline check: confirm sensor output and travel range
With the ignition off, connect the DVOM to the sensor signal wire and ground as per the manual. Move the pedal slowly from rest to the first resistance point and watch the meter value change smoothly. Return to rest and verify the signal returns to the expected baseline. Do not press hard or force the pedal through travel beyond its normal range. If readings jump or stick, the sensor or linkage may be faulty. Record your baseline values for reference. Compare the observed travel with the service manual’s specified range and note any discrepancies.
If the baseline is off, verify that the pedal is mounted correctly and that the stop lines up with the sensor’s mechanical travel. A misaligned mount can produce incorrect rest position readings, even when the electrical signal is sound. If the baseline shows a flat or erratic slope, inspect for binding in the pedal assembly or a damaged sensor housing. Baseline checks are essential before attempting any mechanical adjustment, to ensure the subsequent steps address the correct issue.
Mechanical adjustments: aligning physical travel to sensor output
If the rest position does not align with the sensor’s baseline, adjust the pedal stop or mounting bracket to shift the pedal’s rest travel. Make small, incremental adjustments and re-check the DVOM reading after each change. Tighten hardware to spec and re-check for binding at full travel. Avoid overtightening that could crack the pedal assembly. If your vehicle offers adjustable stops, document the number of turns or millimeter changes you apply and ensure symmetry on both sides of the pedal.
After each adjustment, re-verify the pedal’s rest position and ensure full travel still allows the sensor to move through its calibrated range without binding. If you observe any binding, re-evaluate the linkage and return to the initial baseline to confirm the adjustment was correct. Keep adjustments conservative and test gradually.
This step is where you translate mechanical changes into electrical signals. A precise match between mechanical travel and sensor output is critical for consistent pedal feel and predictable braking response.
Electrical verification using a DVOM
With the wiring reconnected, re-measure the sensor output while moving the pedal through its range. The voltage or resistance should change smoothly in conjunction with pedal movement and match the vehicle’s documented range. If the values saturate or plateau early, revisit the mechanical stop alignment and connector integrity. Clear any fault codes if your vehicle supports it and re-check. Re-check all connections for security and any signs of corrosion or loose pins. The goal is a clean, progressive signal from pedal rest through full travel.
If the DVOM readings are inconsistent across tests or drift with time, re-check the ground reference and shielded paths in the harness. Avoid using a test lead that introduces noise into the signal. Document the readings and compare them to the service manual’s expected trajectory. If you’re unable to achieve a smooth signal, the sensor or control module may require professional inspection.
Functional testing and final notes
Reconnect battery (if disconnected) and perform a cautious test in a safe, dry area. Start the engine if required, and gently apply the brakes to validate engagement timing, ABS response, and brake assist behavior. If any warning lights reappear or the pedal feels inconsistent, stop and review the previous steps. Document the process and, if in doubt, schedule a professional calibration. Consider doing a controlled road test on a quiet street to ensure the pedal effort and braking response feel natural and consistent.
For vehicles with electronic brake systems, verify that the brake lights illuminate properly and that there is no abnormal brake drag or pedal sink after releasing. If you notice any anomalies during the test drive, revert to the earlier baseline and revalidate the steps. A conservative approach reduces risk and improves long-term reliability. Finally, keep a written record of the calibration procedure and the observed results for future reference.
Tools & Materials
- Digital multimeter (DVOM) or precise voltmeter(To observe sensor signal changes as the pedal moves.)
- Vehicle service manual or factory calibration references(Find model-specific baseline values and travel range.)
- Basic hand tools (screwdrivers, socket set, pliers)(Access BPPS and connectors safely.)
- Marker or tape for labeling connectors and travel limits(Keep track of what you disconnect.)
- Flashlight and clean workspace(Improve visibility in the pedal area.)
- Safety gear (gloves, safety glasses)(Personal protection during mechanical work.)
Steps
Estimated time: 60-120 minutes
- 1
Prepare the vehicle and workspace
Move the vehicle to a flat, dry surface and engage the parking brake. Gather all tools and read the service manual sections related to BPPS access. If you will be testing electrical signals, disconnect the negative battery terminal before starting to avoid shorts.
Tip: Work with the battery disconnected for safer electrical checks. - 2
Locate BPPS and access the sensor
Identify the BPPS housing and its connector at the pedal assembly. Label the connector(s) before disconnecting, and photograph the setup for reference. Inspect for corrosion, bent pins, or damaged insulation.
Tip: Take photos from multiple angles to document how things were connected. - 3
Set baseline from manual
Consult the service manual to understand the expected travel range and sensor behavior. Confirm the rest position and the initial output range you should observe when the pedal is at rest.
Tip: Double-check the exact model’s baseline values before proceeding. - 4
Connect DVOM to sensor
Open the signal path as described in the manual and connect the DVOM between the sensor signal wire and ground. Ensure the ground is solid and the meter is set to the appropriate range for the expected signal.
Tip: Secure the ground reference to avoid noisy readings. - 5
Move pedal and monitor readings
Gently move the pedal from rest toward the first stopping point and watch the DVOM reading. Stop at incremental travel points to verify a smooth change, not jumps or drops in value.
Tip: Avoid forcing the pedal beyond normal travel to prevent damage. - 6
Adjust stop or mounting if needed
If the rest position does not align with the sensor baseline, adjust the pedal stop or its mounting bracket a little at a time and re-check readings after each change.
Tip: Make small adjustments and test frequently to track impact. - 7
Reconnect everything and clear codes
Reconnect any connectors, battery, or sensors. If your vehicle supports fault code clearing, do so and re-check for any lingering codes.
Tip: Ensure all fasteners are re-tightened to spec. - 8
Test drive and validate
Perform a cautious test drive in a safe area, applying brakes gradually to validate ABS and brake assist behavior. If anything feels off, stop and reassess the previous steps.
Tip: Document the test results for future reference.
Questions & Answers
Can I calibrate a brake pedal position sensor without a scanner?
Yes, in many cases you can perform a non-scanner calibration by checking mechanical travel and confirming signal changes with a DVOM, then aligning the baseline with the sensor output as described in the service manual.
Yes—many vehicles allow manual checks and a baseline verification using a multimeter, followed by a careful mechanical adjustment.
What tools do I need for this calibration?
A DVOM, basic hand tools, service manual, marker for labeling, and a flashlight. Optional items include a helper and a printer for recording measurements.
You’ll need a multimeter, basic tools, and the vehicle manual to guide the process.
How do I know calibration is successful?
Success means the sensor output changes smoothly with pedal movement, rests at the baseline when at rest, and the vehicle’s braking systems respond predictably without warning lights.
Check that readings move smoothly as you press and release the pedal, and that no brake warnings appear during testing.
Will calibrating without a scanner affect ABS or brake safety?
Improper calibration can affect ABS timing or brake feel. If you’re unsure, stop and consult a professional. Use the factory references and avoid aggressive tests.
There is a risk if miscalibration occurs; proceed cautiously and prefer professional verification if in doubt.
What if ABS or brake lights come on after calibration?
If warning lights appear, revert to the previous baseline, re-check wiring and connectors, and consult the service manual or a professional to avoid unsafe conditions.
Warning lights mean something isn’t right—stop and re-evaluate the steps.
Is this method universal for all vehicles?
Not all models support non-scanner calibration. Always verify compatibility in your vehicle’s manual and factory guidance before attempting. Some systems require dealer tools for a full relearn.
Not every vehicle supports non-scanner calibration; check your manual first.
Watch Video
Key Takeaways
- Document baseline readings before changes
- Make small mechanical adjustments and verify with a meter
- Verify signal changes smoothly across pedal travel
- Test in a safe area before regular road use