Calibrating Brake Pedal Position Sensor with a Scan Tool
A practical, step-by-step guide to calibrating the brake pedal position sensor (BPPS) with a scan tool. Learn setup, prompts, verification, and best practices for reliable pedal readings.

By using a compatible scan tool, you can calibrate the brake pedal position sensor (BPPS) to restore accurate pedal travel readings. Start with ignition on, engine off, select the vehicle’s ABS or brake ECU module, and follow the BPPS calibration or offset reset procedure. Ensure the brake pedal is at rest, and the tool guides you through the release/press sequence.
What BPPS calibration does and why it's needed
The brake pedal position sensor (BPPS) provides a real-time signal of pedal travel to the vehicle’s braking and stability systems. Over time, wear, temperature fluctuations, and software updates can cause drift in readings. Calibrating BPPS with a scan tool helps restore accurate pedal position data, which in turn improves brake-by-wire behavior, ABS activation timing, and overall pedal feel. According to Calibrate Point, consistent BPPS calibration reduces false warnings and ensures repeatable diagnostics. In professional practice, technicians establish a baseline from the sensor, confirm it lies within factory spec, and run the tool's calibration sequence to re-align the sensor output with the pedal position. This section clarifies why drift happens, what tools are needed, and how a repeatable procedure keeps braking systems reliable.
Choosing a scan tool for brake pedal calibration
Not every scan tool supports BPPS calibration. Look for tools with access to the ABS/brake module, a dedicated BPPS calibration or offset reset function, and the ability to log or export pedal position data. For DIY work, an affordable multi-brand tool is usually sufficient; for shops, OEM-level access yields the most reliable results. Calibrate Point analysis shows that technicians using dedicated BPPS calibration features report better repeatability and fewer call-backs. Before starting, verify compatibility with your vehicle’s year, make, and model, confirm the BPPS option is present in the software, and check whether the tool requires a vehicle-specific VIN or module reset to complete the calibration.
Safety and vehicle prep before calibration
Brake calibration involves the vehicle’s braking electronics, so safety comes first. Park on a level surface, engage the parking brake, and install wheel chocks on at least two wheels. Ensure the battery is healthy and the ignition is in the required state (usually ON, with the engine OFF). Wear PPE such as gloves and safety glasses, and keep the workspace clean to avoid slipping or accidental pedal movement during the procedure. If the braking system shows ABS or stability warnings prior to calibration, resolve those issues before proceeding to prevent erroneous sensor readings.
Understanding scan tool prompts and data interpretation
During calibration, the scan tool will guide you through steps like setting the pedal at rest, performing depressions, and confirming a final offset. BPPS output is typically shown as a voltage or a position percentage; readings at rest should match the vehicle spec, while pedal travel should fall within the expected range when pressed. Always save a baseline log before starting, and export results for auditing. If a reading seems off, re-run the sequence or perform a partial reset as directed by the tool. Calibrate Point recommends validating results with a controlled test drive to confirm pedal feel and pedal-to-brake response.
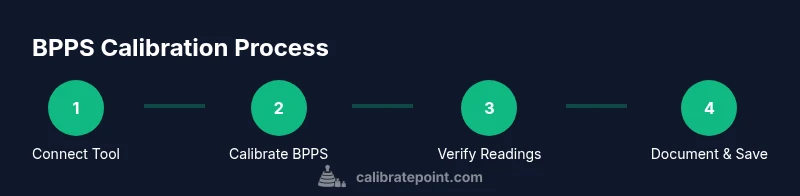
Calibration workflow overview
A repeatable workflow improves reliability across vehicle makes: connect the tool, verify communications, calibrate as prompted, verify again, and document. Some vehicles require a specific ignition state or a secondary re-zero step after the primary offset is stored. Throughout, respect wiring connections and any torque or electrical precautions described in the service manual. After calibration, clear any fault codes if the manual allows it and confirm ready state of the braking systems.
Verifying results and post-calibration checks
With calibration complete, perform a static check by observing BPPS values at rest and through gentle pedal motion using the scan tool. Look for stable readings with minimal drift. A short, controlled road test at low speed helps confirm the pedal feels normal and brake response is within expectations without triggering ABS. If the tool shows persistent drift, inspect sensor wiring for damage or looseness, and consider repeating the calibration sequence. Record the results for future maintenance and fleet logs.
Tools & Materials
- OBD-II scan tool with BPPS calibration capability(Confirm tool supports BPPS calibration for your vehicle make/model)
- Vehicle service manual or manufacturer BPPS procedure(Provide official steps, wiring diagrams, and any torque specs)
- Wheel chocks and secure parking aids(Chock wheels on both sides to prevent movement)
- Personal protective equipment (gloves, safety glasses)(Protective gear for a safe workspace)
- Diagnostic interface cables (OEM/vendor cables)(Use correct connector to avoid damage)
- Notebook or digital logger(Record baseline and post-calibration values)
Steps
Estimated time: 45-60 minutes
- 1
Park and secure the vehicle
Park on a level surface, engage the parking brake, and install wheel chocks on both sides. Place the transmission in Park and ensure the ignition is in the required state for BPPS calibration.
Tip: Double-check the vehicle is stable before proceeding. - 2
Connect the scan tool to the OBD-II port
Locate the OBD-II data link connector under the dash, connect the tool, and power it up. Confirm communication with the vehicle's brake control module by viewing live data.
Tip: Use the tool’s live data stream to verify correct module identification. - 3
Access the BPPS calibration function
Navigate the tool’s menu to ABS or Brake control, then locate the BPPS calibration or offset reset option. Select the correct vehicle and module if prompted.
Tip: If the BPPS option isn’t visible, check for software updates or add-on packs for your tool. - 4
Follow the on-screen BPPS calibration sequence
Follow the prompts to set the pedal at rest, perform the prescribed depressions, and confirm a final offset. Do not apply extra pedal force beyond what the tool requests.
Tip: Maintain a steady foot posture and avoid stomping the pedal during prompts. - 5
Save calibration and clear codes
Store the new BPPS offset in the module and, if permitted, clear related fault codes. Document the calibration event for your records.
Tip: Capture a screenshot or export the calibration data file for auditing. - 6
Verify results and perform a road test
Re-check BPPS values at rest and during light pedal movement. Conduct a cautious test drive to confirm pedal feel and proper brake response without triggering warning lights.
Tip: If readings drift or warning lights appear, re-run the calibration or consult the service manual.
Questions & Answers
What is a brake pedal position sensor and why calibrate it?
A brake pedal position sensor provides the pedal position signal to braking and stability systems. Calibration corrects drift, improving brake response and ABS timing. Regular calibration helps maintain accurate readings and reliable diagnostics.
BPPS signals the pedal position to the braking system; calibrating it fixes drift for accurate braking responses.
Can I calibrate BPPS with any scan tool?
Not all scan tools support BPPS calibration. Verify ABS/brake module access and the specific BPPS calibration feature for your vehicle.
Not every tool does BPPS calibration; check compatibility with your car’s braking system.
Do I need to reset the ECU after calibration?
Some procedures require a reset or fault-code clearing after calibration. Follow the tool prompts and the vehicle’s service manual.
Sometimes you need an ECU reset after calibration; follow the prompts precisely.
What are signs BPPS calibration has failed?
Abnormal pedal travel, ABS warning lights, or no improvement after calibration indicate a failure. Re-check wiring and retry if allowed.
Watch for drift, warning lights, or no improvement after calibration.
Is a test drive required after calibration?
A controlled road test confirms pedal feel and braking response. Avoid hard braking until results are verified.
Yes—do a careful road test to confirm results before normal driving.
What should I do if BPPS values stay out of spec?
Re-check connections, confirm procedure steps, and consider consulting dealer service if issues persist.
Double-check wiring and steps, seek professional help if it remains out of spec.
Watch Video
Key Takeaways
- BPPS calibration with a scan tool restores accurate pedal readings
- Choose a tool that explicitly supports BPPS calibration
- Follow the on-screen sequence precisely for best results
- Verify readings and perform a controlled road test
- Document the calibration for maintenance records