Brake Calibration: A Practical Step-by-Step Guide
Learn how to calibrate brakes with a clear, safety-focused process. This guide covers static and dynamic checks, the right tools, and how to document results for reliable stopping power.

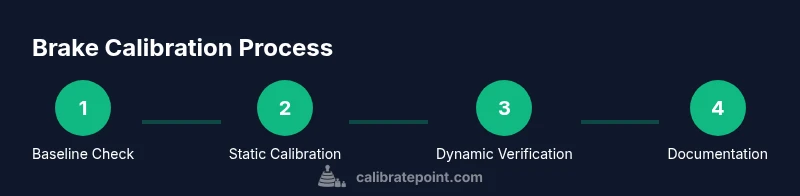
This guide walks you through calibrating brakes by verifying pedal free play, hydraulic response, rotor runout, and sensor alignment, followed by static and road tests. Gather a dial indicator, torque wrench, brake pressure gauge, feeler gauges, and a calibration tool. Plan about 60–90 minutes, and always follow safety guidelines and manufacturer procedures to avoid risks.
Why Brake Calibration Matters
Calibrate brakes is not just for mechanics; ensuring accurate brake response is essential for safe driving and for the long-term health of braking components. When you calibrate brakes, you verify how the pedal feels, how quickly hydraulic pressure translates into rotor friction, and whether sensors aligned with the wheels read true speed data for the ABS and stability control systems. A well-calibrated braking system yields predictable bite, consistent stopping distances, and fewer false ABS activations. According to Calibrate Point, many drivers overlook calibration until a brake warning light appears or the pedal travels farther than expected. In professional settings, calibration is treated as a routine preventive measure rather than a reaction to a failure. The goal is to achieve a repeatable baseline under normal operating conditions so that future maintenance can build on a known reference. This approach reduces guesswork and speeds up diagnostics when components age or when pads, rotors, or fluids are replaced.
Understanding Brake Systems and Calibration Goals
Brakes rely on hydraulic pressure, friction materials, rotors, and sensors to translate pedal effort into stopping force. Calibrate brakes by checking free play, regulator response, rotor runout, and sensor alignment so ABS, traction control, and stability systems read correctly. There are two broad families: hydraulic disc brakes and drum brakes, each with its calibration quirks. ABS wheel-speed sensors must align within manufacturer tolerances to prevent phantom alerts or missed activations. The calibration goal is to establish a reliable baseline across temperature ranges, wear states, and component replacements. By documenting baseline data, you create a reference point for future maintenance, reducing the likelihood of over- or under-tightening components that could compromise safety. The Calibrate Point team emphasizes consistency and repeatability as core principles of a trustworthy calibration cycle.
Safety Considerations and Preparation
Safety is non-negotiable when calibrating brakes. Work on a flat, level surface and use properly rated jack stands or a hydraulic lift. Chock both front wheels to prevent roll, and wear eye protection and gloves to guard against brake fluid and metal shards. Disconnecting the battery is often prudent if you will be using electrical test gear, and ensure you can safely lift the vehicle without risking collapse. Clear the work area of debris and ensure good lighting. If you encounter any signs of leakage, spongy fluid, or unusual noises, pause and reassess before continuing. Adhere to OEM maintenance guidelines and replace any worn components before attempting calibration.
Baseline Testing and Data Collection
Start with a cold, static baseline before driving. Measure pedal free play and initial engagement point with a trusted ruler or caliper, noting the distance from pedal to the point where braking begins. Record rotor runout using a dial indicator at multiple points around each rotor to identify eccentric wear or warping. Check fluid level, color, and contamination; cloudy fluid or added moisture can affect hydraulic response. Document wheel torque values at mounting points and ensure calipers are properly aligned. Establishing a rigorous baseline makes it much easier to interpret subsequent dynamic results.
Static Calibration Techniques
Static calibration centers on preventing misreads and ensuring repeatable measurements when the vehicle is stationary. Verify master-cylinder response by applying incremental pedal pressure and watching for consistent pressure rise in the brake lines. Use a brake pressure gauge to record hydraulic pressure at different pedal forces and confirm it aligns with manufacturer specifications. Inspect caliper bite and pad clearance, adjusting shims or mounting hardware as needed. Static checks catch early misalignments that could masquerade as wear or air in the system. Document any deviations from expected values for future reference.
Dynamic Calibration and Road Testing
Dynamic calibration validates performance under real-world conditions. With a safe, empty road or test pad, perform controlled decelerations from moderate speeds while monitoring pedal feel, ABS activation, and stability. Record stopping distances on dry and wet surfaces to understand environmental effects. Use a data logger or OBD tool to correlate pedal position, brake pressure, and wheel speed during braking events. If ABS engages unexpectedly or pedal travel changes significantly during road tests, recheck sensor alignment, wiring, and rotor runout. Dynamic checks are essential to confirm that static baselines hold when the system is loaded by heat and road conditions.
Tooling, Data Logging, and Documentation
A calibrated brake calibration setup relies on precise tooling. Keep a dial indicator, brake-pressure gauge, torque wrench, feeler gauges, and a quality ruler handy. Use data-logging tools to capture pedal position, hydraulic pressure, and wheel-speed data across several braking cycles. Maintain a clean, orderly log that records ambient temperature, time of day, and vehicle state (hot vs cold). Good documentation helps technicians reproduce results in the shop or on the road and provides a reference for future maintenance or component replacements. The journal should include step-by-step observations and any recommended adjustments with clear rationales.
Common Pitfalls and How to Avoid Them
Avoid assuming a single baseline applies to all driving conditions. Temperature, rotor wear, and fluid quality influence calibration, so re-check on both hot and cold readings if possible. Do not mix new and used components during calibration, as discrepancies can skew results. Skip shortcuts like forcing ABS to engage through heavy braking without proper safety measures; this can mask issues and lead to unsafe tests. Ensure torque values for mounting bolts are within spec, or misalignment will create spurious readings. Finally, never ignore a warning light; systems like ABS or ESC are designed to protect you, and calibration should only proceed when the entire system is functioning within normal parameters.
Authority Sources
For readers seeking authoritative safety guidelines and calibration best practices, consult the following sources: • National Highway Traffic Safety Administration (NHTSA) – Brakes safety guidelines and braking performance considerations. • National Institute of Standards and Technology (NIST) – General standards for measurement accuracy and calibration practices. • SAE International – Standards and recommended practices for braking systems and vehicle dynamics. These resources provide foundational concepts that support practical brake calibration work while emphasizing safety and reliability.
Tools & Materials
- Dial indicator(High-precision measurement of rotor runout)
- Torque wrench(Toed-in caliper mounting bolts to spec)
- Brake pressure gauge(Measures hydraulic pressure at pedal)
- Feeler gauges / calipers(Pad clearance and spacing checks)
- Ruler or caliper(Baseline pedal travel and rotor runout checks)
- Brake fluid (new)(Must be clean, not contaminated)
- Jack stands / lift(Safe vehicle support)
- Wheel chocks(Prevent vehicle movement)
- Clean rags & brake cleaner(Surface preparation)
- Data logger or OBD tool(Optional for dynamic data capture)
- Calibration tool (shim or spacer)(Optional alignment aid)
Steps
Estimated time: 60-120 minutes
- 1
Prepare vehicle and workspace
Park on a flat surface, engage the parking brake, chock wheels, and lift safely if needed. Ensure you have clear space for measurements and tool access. Gather all required tools before starting to avoid mid-task interruptions.
Tip: Double-check wheel chocks and jack stands are secure before getting under the vehicle. - 2
Check fluid and overall condition
Inspect brake fluid for color and level, look for leaks, and replace if contaminated. Clean the master cylinder area to prevent debris from entering the hydraulic system. Confirm there are no obvious fluid leaks before proceeding.
Tip: Work with the fluids at ambient temperature; avoid starting tests with overheated fluid. - 3
Measure pedal free play and engagement point
With the engine off, measure how far the pedal travels before resistance increases. Compare with manufacturer specs and log deviations. This establishes a static baseline for subsequent calibrations.
Tip: Perform measurements with the vehicle stationary and wheels blocked to avoid unintended movement. - 4
Inspect rotors and measure runout
Remove the wheel and inspect rotor surface for scoring or glazing. Use the dial indicator at multiple rotor points to assess runout and identify hotspots. Record the maximum and minimum runout values.
Tip: Take measurements at operating temperature if possible to reflect real-world conditions. - 5
Check pad clearance and caliper alignment
Ensure caliper pistons retract smoothly and pads clear the rotor within spec. If needed, adjust pad shim spacing or caliper mounting to restore even clearance around the rotor.
Tip: Do not over-tighten caliper mounting bolts; recheck runout after any adjustment. - 6
Static calibration of hydraulic system
Apply incremental pedal pressure while watching hydraulic pressure readings. Confirm a smooth rise without spiking; investigate any delays or spikes that indicate air or a weak pump.
Tip: If pressure is unstable, consider bleeding the system before proceeding. - 7
Dynamic road test and ABS verification
On a safe surface, perform controlled decelerations to verify pedal feel and ABS engagement. Monitor for stable deceleration and consistent pedal travel across repeats.
Tip: Start with light braking to warm components gradually before higher-load tests. - 8
Document results and re-torque bolts
Record all measurements, verify torque on mounting hardware, and re-test to confirm repeatability. Maintain a log including environmental conditions for future comparisons.
Tip: Keep the record alongside maintenance history for quick reference.
Questions & Answers
What is brake calibration and why is it necessary?
Brake calibration aligns hydraulic response, pad clearance, rotor runout, and sensor readings to deliver consistent stopping power. It helps prevent false ABS activations and ensures predictable pedal feel.
Brake calibration makes sure the braking system responds consistently by aligning hydraulic pressure, pad gaps, rotor condition, and sensor data. It helps prevent unnecessary ABS activation and ensures predictable pedal feel.
Can I calibrate brakes myself at home?
Yes, with proper tools, a safe workspace, and knowledge of your vehicle’s system. For newer vehicles with complex sensor networks, professional calibration may be preferred.
You can, if you have the right tools and space. For modern cars with multiple sensors, professional calibration is often safer and more reliable.
What tools do I need to calibrate brakes?
Essential tools include a dial indicator, brake pressure gauge, torque wrench, feeler gauges, and a temperature-stable work area. Optional data logging aids repeatability.
You’ll want a dial indicator, a brake pressure gauge, a torque wrench, feeler gauges, and a clean workspace. Data logging can help with accuracy.
How do I verify calibration results?
Compare static measurements with manufacturer specs, then confirm repeatable dynamic braking on a safe test surface. Look for consistent pedal feel and ABS engagement as indicators of success.
Check that static values match the specs and that repeated dynamic tests produce the same results. Consistent pedal feel and proper ABS behavior indicate good calibration.
How often should brakes be calibrated?
Calibrate brakes when replacing key components (pads, rotors, fluid) or when symptoms appear that suggest misalignment. Periodic checks during major service can catch issues early.
Do calibration when you replace major parts or notice braking anomalies. Regular checks during service help catch issues early.
What if ABS warning light stays on after calibration?
If the ABS light remains on, recheck sensor alignment, wiring, and module fault codes. Abnormal readings or unresolved codes suggest a deeper diagnostic is needed.
If the ABS light stays on after calibration, re-check sensors and wiring and review fault codes. You may need a professional diagnostic.
Watch Video
Key Takeaways
- Calibrate brakes using a consistent baseline across static and dynamic tests.
- Use the right tools to measure pedal travel, pressure, and rotor runout accurately.
- Document results to build a reliable maintenance history.
- Safety is essential; never skip wheel chocks, stands, or proper PPE.