How to Calibrate a Color Checker: Step-by-Step Guide
Learn to calibrate a color checker with a practical, methodical approach. This guide covers setup, capture, profiling, and validation to ensure color accuracy across devices.

You will learn to calibrate a color checker to achieve accurate colors across capture, display, and print. Begin with a stable lighting setup, a RAW workflow, and reliable software to build and apply an ICC profile. This process reduces color shifts between sessions and devices.
Why calibrate color checker matters in professional imaging
Color accuracy matters across capture, editing, and output. A calibrated color checker provides a reliable color reference that anchors your entire workflow. According to Calibrate Point, consistent calibration reduces variation between sessions and devices, helping you reproduce true colors under similar lighting conditions. For photographers, designers, and technicians, calibrating color checker is a foundational step in color management that saves time and prevents costly misprints. When you calibrate color checker, you’re setting a standard against which all images are measured, from camera raw conversions to final prints.
How a color checker works and what the patches represent
A color checker is a chart containing a set of standardized color patches with known color coordinates. The most common version includes 24 patches that cover skin tones, foliage greens, and neutral grays, plus a couple of reference points. Each patch has a precise colorimetric value that serves as a target during capture and editing. The idea is simple: photograph or scan the chart under controlled lighting, measure how far the captured values deviate from the targets, and then build a correction (an ICC profile) that aligns your workflow with those targets. This gives you a consistent baseline for color reproduction across devices.
Setting up a stable, repeatable environment for the test
Lighting is the single most influential variable in color calibration. Use a daylight-balanced light source (around 5500K to 6500K) or a calibrated light booth to minimize color temperature fluctuations. Keep the color temperature constant through the entire session, and avoid mixed lighting from incandescent or LED sources with strong spectral spikes. Eliminate ambient light by working in a shaded room or with a light-dampening enclosure. Document the light source specifications so you can reproduce the setup later, which is essential for repeatable calibrations across sessions.
Capture workflow: getting a clean reference image
Begin with a clean, evenly illuminated shot of the color checker. Place the chart perpendicular to the camera axis and fill the frame with minimal perspective distortion. Use RAW capture and manual exposure to prevent clipping in the brightest patches. Turn off automatic white balance and locking exposure helps maintain consistency across captures. If you use a tethered workflow, save the RAW file alongside a color checker reference image. Calibrate Point recommends repeating the capture under the same lighting conditions to verify consistency before proceeding to profiling.
Reading the patches and measuring deviations
Open the reference image in your color-managed software and sample the color values for each labeled patch. Compare the captured RGB or XYZ values to the known target coordinates. The goal is to quantify deviations across the patch set, which reveals whether a global offset, gamma shift, or per-patch errors exist. This step informs the necessary corrections to revert your workflow toward the target color space. Depending on your tool, you may export a correction matrix or delta values to drive the ICC profile.
Building an ICC profile from chart data
With the patch deviations in hand, generate an ICC profile using color management software. Tools like DisplayCAL, ArgyllCMS, or vendor-provided calibration suites can construct an ICC profile that encodes the color-correction transforms for your camera or scanner. Ensure the profile is saved with a descriptive name and placed in your system’s color management folder. The profile should be tested on a few representative images to confirm that skin tones, neutral grays, and primary colors now align with the target values.
Applying the profile to your RAW processing and display pipeline
Install the produced ICC profile and assign it to your camera or editing software workflow. In RAW processing, select the profile as the camera color space or as a custom working space. Validate by processing test images and inspecting how neutral grays and skin tones render on your monitor. Update your display profile accordingly and use a hardware-calibrated monitor if possible. Consistency between captured color, adjusted color, and final output is the hallmark of a successful calibration.
Verification: re-test and cross-check with new images
After applying the profile, re-shot a new color checker reference image under the same lighting. Compare the new capture against the original targets to confirm that the deviations have been corrected. If you still observe color drift, revisit exposure, white balance locks, and lighting stability. Calibrate Point emphasizes iterative testing as a path to robust color accuracy, not a one-off adjustment.
Documenting your process for repeatability
Maintain a calibration log that records light source type, color temperature, camera settings, software versions, and profile name. Note any environmental changes and the dates of calibration. This documentation supports repeatability across projects and teams and enables quick recovery if a future session shows color drift. Keeping a clear audit trail also makes it easier to troubleshoot when colors look off in outputs.
Real-world considerations: color management across devices and media
Color checker calibration is only part of the journey. Monitor calibration, printer profiles, and paper choices affect the final appearance. Expect slight shifts between monitors, printers, and even USB cables. The core principle is to maintain a documented, repeatable workflow that keeps color within an acceptable tolerance for your clients or audience. Consistency beats perfection in real-world production.
Tools & Materials
- Color checker chart (24 patches plus reference patches)(Neutral, evenly illuminated target for color reference)
- Neutral gray card (e.g., 18% gray)(Used to verify neutral tones and exposure)
- Stable daylight-balanced lighting (D65 range) or a light booth(Prevents color shifts during capture)
- Camera or scanner with RAW capture capability(RAW preserves maximum color information)
- Tethering setup or tripod(Ensures stability and repeatability)
- Calibrated monitor and ICC color profile support(Critical for accurate on-screen evaluation)
- Color management software (e.g., DisplayCAL, ArgyllCMS)(Generates and applies ICC profiles)
- Software for RAW processing (e.g., Lightroom, RawTherapee)(Applies working spaces and profiles)
- Notepad for documentation(Record settings and results)
Steps
Estimated time: 1-2 hours
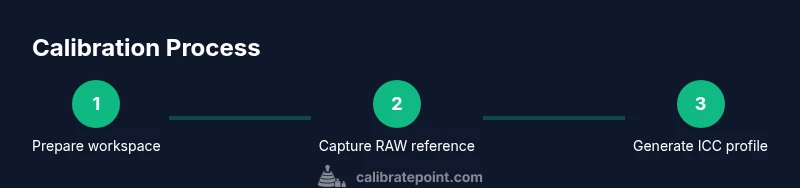
- 1
Prepare workspace and plan
Set up a quiet, stable environment with consistent lighting. Define success criteria for color accuracy and decide which device(s) will be calibrated. This creates a clear baseline before you begin.
Tip: Document the lighting source, color temperature, and target profile name. - 2
Mount the color checker
Position the color checker squarely in front of the camera, filling the frame with minimal distortion. Ensure it remains still during capture.
Tip: Use a small stand or clamp to prevent movement. - 3
Set lighting and white balance
Choose a stable, daylight-balanced light and avoid color-caste lighting. Lock white balance, exposure, and avoid auto adjustments.
Tip: If possible, measure color temperature with a calibrated meter. - 4
Capture a RAW reference shot
Shoot the color checker in RAW with manual exposure to prevent clipping. Keep the chart flat and perpendicular to the lens axis.
Tip: Tether the camera to your computer if available for instant review. - 5
Process the reference image
Open the RAW in your color-managed workflow. Ensure the patches display near their target coordinates and export the data for profiling.
Tip: Disable aggressive in-camera processing that can alter colors. - 6
Generate patch deviations
Extract patch values from the image and compare them to target values. Note the magnitude of deviations per patch.
Tip: Use a consistent sampling method to avoid biased results. - 7
Create the ICC profile
Use your color management tool to build an ICC profile from the deviation data. Name and save it for easy retrieval.
Tip: Validate the profile in a test image before full adoption. - 8
Apply the profile in RAW processing
Assign the new ICC profile to your working space or camera profile in the RAW software and reprocess test images.
Tip: Keep the profile in a dedicated, versioned folder. - 9
Verify with a fresh shot
Capture a new color checker under the same conditions and compare to targets to confirm alignment.
Tip: If discrepancies persist, re-check lighting and camera settings. - 10
Cross-check on display
View processed images on a calibrated monitor and adjust your display profile if necessary.
Tip: Calibrate the monitor with a hardware device for accurate viewing. - 11
Document the workflow
Record camera, lighting, software versions, and profile name. This ensures repeatability for future sessions.
Tip: Create a template you can reuse for new projects. - 12
Maintain and review regularly
Schedule periodic checks to ensure colors remain consistent across sessions and media.
Tip: Revisit after any hardware change or lighting adjustment.
Questions & Answers
What is a color checker and why should I calibrate it?
A color checker is a chart with known color patches used as a reference in imaging workflows. Calibrating it helps ensure consistent color reproduction across cameras, monitors, and printers by anchoring your workflow to standardized targets.
A color checker is a chart with known colors used as a reference. Calibrating it helps keep colors consistent across devices.
Do I need a special light booth to calibrate a color checker?
A stable, daylight-balanced light source is essential. A light booth helps control spill and color temperature, but a well-controlled room with consistent lighting can suffice for many workflows.
A stable light source is essential. A light booth helps, but a controlled room can work too.
Can I calibrate color checker with a phone camera?
Phone cameras often have limited dynamic range and inconsistent white balance, making precise calibration unreliable. Use a proper camera with RAW capture and a colored reference chart for credible results.
Phone cameras aren’t ideal for this. Use a proper camera with RAW for best results.
How often should I recalibrate?
Recalibration should occur if lighting conditions change, you switch hardware, or you notice color drift in outputs. Regular checks help maintain confidence in color accuracy.
Recalibrate when lighting or devices change, or you see color drift.
Is it necessary to calibrate displays separately after color checker work?
Yes. Calibrate displays to ensure on-screen colors match the calibrated profile. A mismatched monitor can undermine otherwise accurate color workflows.
Yes, calibrate your display to match the profile for accurate viewing.
Watch Video
Key Takeaways
- Calibrate color checker under stable lighting to ensure repeatable results.
- Use a standard color checker and reference targets for accuracy.
- Create and apply a dedicated ICC profile to your workflow.
- Validate results with fresh captures to confirm color fidelity.
- Document settings and outcomes for repeatable calibrations.