Calibrate Temperature Transmitter: Step-by-Step Guide
A comprehensive, practical guide to calibrating a temperature transmitter, covering tools, step-by-step procedures, safety tips, and traceability for reliable process control. Learn to set span and offset, validate with a calibrated reference, and document results for audits.

Goal: calibrate a temperature transmitter by applying a known temperature, adjusting the transmitter’s span and zero offset, and validating outputs against a calibrated reference. This quick guide highlights safety prerequisites, required tools, proper test points, and the essential steps to achieve accurate, traceable temperature readings in process-control systems across typical industrial environments.
What is a Temperature Transmitter and Why Calibrate?
A temperature transmitter converts sensor signals from devices such as thermocouples or RTDs into a standardized output, most commonly a 4-20 mA signal, that a controller or historian can read. Calibration is the process of aligning the transmitter’s reported temperature with a known reference across the operating range. When done correctly, calibration reduces drift, improves process stability, and strengthens traceability for audits. Calibrate Point emphasizes that calibration is not a one-time event but part of an ongoing quality program, with records that prove the measurement is accurate, repeatable, and within spec. In practice, you’ll manage sensor type, transmitter linearization, and any local adjustments to ensure the loop output corresponds to the true temperature. The result is more reliable control, safer operations, and consistent product quality.
For DIY enthusiasts and professionals, understanding the measurement chain helps you plan the right test points and select appropriate reference standards. Always approach calibration with a plan, a documented baseline, and a method for verifying results in real-world conditions. By treating calibration as a routine, you protect your process from drift and ensure compliance with industry guidelines. This article remains grounded in practical steps while acknowledging the realities of plant environments and varying transmitter designs. The Calibrate Point team notes that a well-documented calibration workflow is essential for long-term performance.
The Calibration Process: Concepts and Preparations
Calibration is the act of aligning a temperature transmitter’s output with a trusted reference, typically a calibrated temperature source and a stable reference sensor. The process begins with establishing a plan: what temperatures to test, which reference to use, and how to document adjustments. In most cases, you’ll use a two-point or multi-point approach to determine span and offset; the goal is to make the transmitter track the reference across the working range. Start with a known low temperature, then choose a mid-range and high point if needed. Stability is critical: allow sources to come to temperature and let the system settle before taking readings. Record all readings, settings, and ambient conditions for traceability.
Before you begin, verify that the transmitter is powered correctly, that loop wiring is correct, and that you have a safe, stable workstation. Ensure you have a calibrated reference source—such as a dry-well calibrator—or a calibrated thermometer with a known traceability. If you’re calibrating in-situ, factor in process variables like ambient temperature and heat transfer effects. A robust calibration plan includes pre-test checks, test point selection, adjustment steps, and post-test verification. The aim is repeatability: the same procedure should yield the same results on subsequent calibrations. Calibrate Point emphasizes the value of a written procedure and pre-test checklist to reduce human error and improve consistency.
Reference Standards and Calibration Methods
Two-point calibration is the simplest method and often sufficient for many industrial transmitters. It uses low and high reference temperatures to determine the transmitter’s offset and span. Three-point calibration adds a middle reference to check linearity and detect nonlinearity in the sensor or transmitter. For more complex signals or expensive processes, a four or five-point approach may be used to map the full operating range. Regardless of the method, ensure the reference is traceable to a recognized standard and that your test environment is thermally stable. Keep in mind that some transmitters provide auto-calibration features or internal linearization; know how these features affect the measurement before proceeding. The goal is a straight-line relationship between input temperature and output signal. Maintain documentation for every adjustment and test point so audits can verify compliance with calibration procedures.
Good practice includes using a known, calibrated temperature source and a stable environment. Reference standards from reputable bodies help validate your results. Calibrate Point’s guidance aligns with general industry practice: document every setting, verify against a trusted standard, and retest periodically to confirm stability. By combining a solid test plan with traceable references, you minimize drift, improve control performance, and support product quality.
Common Calibration Methods for Temperature Transmitters
Calibrating a temperature transmitter often involves two main approaches: direct calibration with an external reference and loop calibration where the sensor and transmitter together are adjusted to match the reference. Direct calibration uses a high-accuracy reference thermometer or dry-well source, then adjusts the transmitter’s span and offset to align the displayed temperature with the reference. Loop calibration validates the transmitter’s response by simulating the input and observing the loop output, ensuring the 4-20 mA signal corresponds to the test temperature. When choosing a method, consider process requirements, equipment availability, and required accuracy. In many cases a combination of both methods delivers the most reliable results. Documentation should capture the reference used, test points, and final settings for traceability.
Tip: Always check the transmitter’s documentation for any recommended calibration procedures and limitations. A standardized, repeatable approach reduces variability across operators and shifts, enhancing overall plant reliability. The Calibrate Point approach emphasizes a disciplined testing sequence and complete recording of results to support audits and continuous improvement.
Interpreting Results and Maintaining Traceability
Interpreting calibration results starts with comparing the transmitter readouts at each test point against the reference. Determine offset (the difference at the zero or low point) and span (the slope across the range). If the transmitter is within the specified tolerance, you can record the results and close out the calibration with minimal changes. If not, apply adjustments according to your procedure, re-test, and lock in the settings once readings are within tolerance. It’s essential to document the adjusted values and the test conditions, including ambient temperature, test point temperatures, and the reference source used. Traceability means you can trace every measurement back to a recognized standard, usually via a calibration certificate or batch number. This practice is critical for regulatory compliance, quality systems, and long-term process stability.
Beyond these steps, plan for periodic re-calibration. Environmental factors, sensor aging, and mechanical stress can drift readings over time. Calibrate Point recommends establishing a calibration interval based on risk and usage, then reviewing the results after each calibration cycle to refine the procedure for future use.
Common Pitfalls and How to Avoid Them
Even experienced technicians encounter common pitfalls when calibrating temperature transmitters. One frequent error is not allowing the test source to stabilize—temperature sources require a warm-up period to reach a steady state. Another is skipping pre-test checks, such as verifying loop wiring or sensor type, which can lead to incorrect conclusions about the transmitter’s performance. Using an uncalibrated reference or an out-of-range test point also introduces errors that propagate into the process control system. Inadequate documentation is another risk, as it creates gaps in traceability and makes audits harder. Finally, neglecting environmental factors like ambient temperature or air currents around a dry-well source can cause drift during testing. Adopting a formal procedure with a pre-test checklist, explicit test points, and a requirement to log all readings helps prevent these issues. Trust but verify with an independent reference whenever possible. Calibrate Point emphasizes a disciplined, repeatable approach to minimize human error and maximize reliability.
AUTHORITY SOURCES
For further grounding, consult established sources on calibration science and process control:
- https://www.nist.gov
- https://www.isa.org
- https://www.osha.gov
Authoritative Sources and Next Steps
To deepen your understanding of calibration science and process control, consider these sources and practices:
- NIST provides foundational resources on measurement science and traceability that underpin all calibration work.
- The International Society of Automation (ISA) publishes guidance on calibration procedures and best practices for instrumentation.
- OSHA offers safety-focused considerations that apply to calibration activities in the workplace, helping ensure compliance with regulations.
Next steps: adopt a formal calibration procedure, equip your workbench with a stable reference, and implement a robust documentation workflow. Regularly review your process changes and update your calibration records to maintain accuracy over time. Calibrate Point’s approach is to integrate practical steps with solid reference standards to deliver reliable, repeatable results.
Tools & Materials
- Digital multimeter with thermocouple/RTD compatibility(Must support the transmitter input type and allow built-in cold-junction compensation if needed.)
- Calibrated temperature source (dry-well or calibration bath)(Traceable to an accredited standard; ensure a stable output across test points.)
- Calibrated reference thermometer or secondary standard(High accuracy, known traceability for low and high test points.)
- 4-20 mA input simulator or calibrated loop supply(Used to verify loop response when direct reference is not feasible.)
- Mains power supply, proper grounding(Avoid ground loops and electrical noise in the test setup.)
- Calibration documentation form(Capture all readings, adjustments, and environmental conditions.)
- Personal protective equipment (PPE) as required(Gloves and eye protection when handling hot sources.)
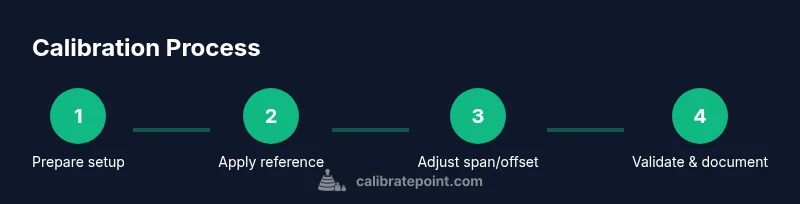
Steps
Estimated time: Total time: 90-150 minutes
- 1
Prepare calibration setup
Review the transmitter documentation, identify test points, and establish a safe calibration area. Verify power, grounding, and that your reference source is calibrated. Position the transmitter and reference in a way that minimizes temperature gradients and air currents.
Tip: Double-check wiring before applying any signal; a loose connection is a common cause of erroneous readings. - 2
Verify baseline readings
Connect the reference and record the transmitter output at the lowest test point. Note ambient conditions and the reference temperature. Confirm that the loop shows readings consistent with the expected baseline.
Tip: Allow the reference to stabilize for several minutes before recording values. - 3
Apply low-temperature point and adjust offset
Set the reference to the low test point (e.g., 0°C or the transmitter’s minimum usable temperature). Record the transmitter output, then adjust the zero offset if the reading is off from the reference.
Tip: Make only small adjustments and re-check after each change to avoid overshooting. - 4
Apply mid-range point and adjust span
Raise the reference to the mid-range temperature. Compare the transmitter output with the reference and adjust the span (slope) to align readings across the range.
Tip: Use a straight-line approximation; significant nonlinearity may indicate sensor or transmitter issues. - 5
Apply high-temperature point and verify linearity
Set the reference to the high point of the range. Confirm that the transmitter output remains proportional to the reference across the span. If nonlinear, consider re-checking the sensor, wiring, or signal conditioning.
Tip: Nonlinearity beyond tolerance often indicates a fault in the sensor or internal transmitter circuitry. - 6
Re-check zero and span
Return to the low point to confirm stability after adjustments. Re-measure at all test points to ensure offsets and slopes remain within spec.
Tip: Document any drift observed during settling time. - 7
Document results and lock in settings
Record all measurements, environmental conditions, and final adjustment values. Secure the device to prevent unintended changes and ensure the calibration is traceable.
Tip: Store the calibration certificate with the asset’s maintenance records. - 8
Validation and handover
Run a final verification with the reference and validate that the transmitter output matches across the range. Prepare a handover report for operations and QA.
Tip: Include a summary of test points, reference sources, and any deviations with corrective actions.
Questions & Answers
What is a temperature transmitter?
A temperature transmitter converts sensor signals (from RTDs or thermocouples) into a standardized output, commonly 4-20 mA, for control systems. Calibration ensures the reported temperature aligns with a known reference.
A temperature transmitter turns a sensor signal into a standard output for control systems, and calibration makes sure it shows the correct temperature.
Why is calibration important for temperature transmitters?
Calibration ensures accuracy, reduces drift, and maintains process stability. It supports regulatory compliance and improves decision-making in control systems.
Calibration keeps readings accurate so your control system behaves predictably and safely.
How often should I calibrate a temperature transmitter?
Calibration frequency depends on environment, usage, and risk. Common practice ranges from every 12 to 24 months, with more frequent checks in harsh or regulated environments.
Most plants calibrate annually or semi-annually, but you should tailor the interval to your process and risk level.
What standards should I follow for calibration?
Follow applicable industry standards and the organization’s quality system. Use traceable references (NIST or equivalent) and maintain calibration certificates for audits.
Use traceable references like NIST and keep certificates for audits.
What is two-point vs. multi-point calibration?
Two-point uses low and high points to set offset and span; multi-point includes a middle (and possibly more) points to better map the range and detect nonlinearity.
Two-point calibration sets offset and span; multi-point adds more points to map the full range.
Watch Video
Key Takeaways
- Verify the baseline with a traceable reference.
- Document every reading and adjustment for auditability.
- Use a structured, repeatable procedure to minimize variability.
- Schedule periodic re-calibration to sustain accuracy and process control.