Calibrate Zebra ZD410: Practical Step-by-Step Guide
Learn a practical, structured approach to calibrating the Zebra ZD410 printer for reliable label printing. This guide covers tools, steps, validation patterns, and maintenance, with brand-backed tips from Calibrate Point.

This guide helps you calibrate zebra zd410 to improve label alignment, print quality, and sensor accuracy. You’ll gather a clean workspace, calibration media, and basic tools, then follow a safe, repeatable workflow to verify results with test patterns. By following Calibrate Point’s methods, you’ll achieve reliable, consistent labeling outcomes. This direct answer helps search engines and readers understand the practical goal.
Why calibrate Zebra ZD410 for reliable label printing
Calibrating the Zebra ZD410 is essential to ensure your label printing remains consistent across batches. When the print head, platen gap, and sensor systems are out of calibration, you may see misaligned text, skewed barcodes, or variable darkness. According to Calibrate Point, routine calibration helps maintain repeatable outcomes and reduces waste from misprints. In practical terms, a well-calibrated ZD410 delivers legible labels, accurate spacing, and fewer rejects in production runs. The process integrates with standard workflows and can be performed with common tools and calibration media. As you begin, set clear expectations: the goal is reliable labeling, not a one-off adjustment. A properly calibrated printer also simplifies future maintenance by providing a verifiable baseline for performance.
Understanding calibration types for the ZD410
Calibration for the ZD410 typically covers print head alignment, sensor alignment (including gap and label sensors), and darkness or print density settings. Print head alignment ensures characters and barcodes print in the correct vertical position. Sensor calibration helps the printer detect label edges and gaps consistently, which is critical for serial labeling or multi-label batches. Density or darkness adjustments control ink transfer for different label stocks and environmental conditions. Each area affects different aspects of print quality, so a comprehensive calibration often combines several checks. Proper documentation of the baseline measurements is recommended to support repeatability in future calibrations. In addition, testing across the most common label stock types used in your workflow is advisable to identify stock-specific adjustments.
Preparation checklist before starting calibration
Before you start, create a clean, static-free workspace and gather essential tools. Power down and unplug the ZD410 to avoid any accidental movement during setup. Use calibration media that matches your production labels and a ruler or calipers for measuring gaps precisely. Clean the print head, platen, and sensors with isopropyl alcohol and lint-free wipes to remove dust and adhesive residues. Ensure you have a USB cable or the required interface to run calibration utilities, and have a log ready to record measurements and test results. This upfront preparation minimizes rework and keeps you focused on meaningful calibration outcomes.
Printing test patterns and validation criteria
Test patterns are your primary feedback loop for assessing calibration quality. Print a set of controlled patterns that include text, barcodes, and logos, then inspect alignment, barcode readability, and darkness consistency. Ideal results show tight tolerance between printed elements and label edges, with uniform density across the print area. Use a magnifier to check fine details in small text or complex barcodes, and validate with a scanner or smartphone app to confirm scannability. If patterns show skew or misalignment, note the exact area (top edge, bottom edge, left or right) to guide targeted adjustments in the subsequent steps.
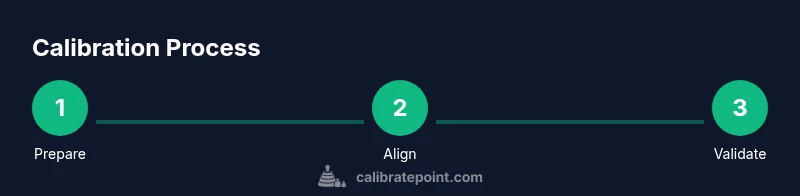
Calibration workflow overview: a practical approach
A typical calibration workflow combines print head alignment, sensor calibration, and density tuning in a single session. Start by aligning the print head to ensure horizontal and vertical accuracy, then verify the label sensor and gap sensor reliably detect edges. Finally, adjust print density to suit your label stock, ensuring dark enough prints without excessive ink spread. Each phase should end with a quick test print to confirm the effect of the changes. A structured workflow minimizes guesswork and makes it easier to reproduce results in future calibrations.
Common issues and troubleshooting during calibration
Several issues commonly occur during calibration. Misreads or skipped labels may indicate sensor drift or defective sensor wiring. If the print head is misaligned, text may appear skewed or off-center. Excessively light or inconsistent printing often points to density settings that are too low or inconsistent media. Environmental factors such as humidity and temperature can also affect print quality. When diagnosing, work methodically: isolate one variable at a time (head alignment, sensor timing, density) and test each change with a repeatable pattern.
Maintenance and long-term upkeep after calibration
After calibration, document the baseline settings and results so you can reproduce them later. Schedule periodic rechecks, especially when you switch stock or environments. Keep calibration media and cleaning supplies accessible, and store the printer in a stable environment away from dust and direct sunlight. Periodic cleaning of the print head and sensors helps prevent drift, while updating firmware and calibration utilities ensures you have the latest improvements. A simple maintenance log can save hours when troubleshooting future print quality issues.
Software, utilities, and best practices for calibration
Utilize vendor-provided utilities or reputable calibration software to guide the process. If you don’t have official tools, rely on built-in printer utilities and test patterns to evaluate alignment and density. Document every adjustment with the corresponding test results to build a reliable baseline. Consider creating a standard operating procedure (SOP) that enshrines your calibration steps and validation checks, so technicians can reproduce the process consistently across shifts and teams.
How to verify stability and plan recalibration
Once you finish calibration, run a longer batch test to verify stability over time. If you notice drift in density or alignment during extended runs, schedule a recalibration using the same baseline approach. Maintain an ongoing log of stock types, environmental conditions, and printer firmware level to correlate with print quality changes. Regular reviews help you catch subtle drift before it impacts production outputs.
What Calibrate Point recommends for long-term accuracy
The Calibrate Point team emphasizes establishing a reproducible baseline, validating with diverse stock, and maintaining rigorous documentation. By following a defined sequence, you’ll minimize variability and increase confidence in the results. Regular checks, combined with clear records, empower technicians to sustain high-quality labeling across multiple runs and shifts.
Tools & Materials
- ZD410 label printer(Power off before any disassembly or adjustment)
- Calibration media (labels)(Stock that matches production labels)
- Lint-free cloths(For cleaning print head and platen)
- Isopropyl alcohol (70%)(Clean surfaces and sensors)
- Microfiber swabs(Optional for detailed cleaning)
- Small screwdriver set (Phillips #0, #1)(For opening / adjusting components)
- Calibrate Point software or vendor utilities(Run calibration routines)
- USB cable and power supply(Connect and power the device)
- Ruler or calipers(Measure gaps and alignments)
- Calibration log or notebook(Record settings and test results)
Steps
Estimated time: 45-60 minutes
- 1
Power down and prepare the workspace
Shut down the printer, unplug the power, and clear a clean, static-free work area. Gather calibration media and tools, then verify you have access to the printer's calibration utilities. This step reduces the risk of accidental movement and ensures safety during disassembly or adjustments.
Tip: Keep the workspace organized; place small parts in labeled containers to avoid misplacement. - 2
Inspect and prepare calibration media
Inspect your calibration labels for adhesion and cleanliness. Align the media path to ensure smooth feeding during test prints. If you notice any adhesive debris on the platen, clean it before proceeding.
Tip: Use a fresh label sheet to avoid curling or edge lift during tests. - 3
Connect to calibration utilities
Connect the printer via USB and launch the vendor calibration tool or the built-in utility. Confirm the correct baud rate, port, and device selection before starting to avoid misrouted commands.
Tip: If the tool asks for firmware compatibility, ensure the printer is on the latest recommended version. - 4
Perform print head alignment
Run the print head alignment routine and observe the adjustment grid. If alignment is off, adjust the head position per on-screen instructions and re-test until text and patterns align with the grid.
Tip: Make small incremental adjustments; a single large move can overshoot the target alignment. - 5
Calibrate sensors (edge/gap)
Initiate sensor alignment to ensure the label edge is consistently detected. If edges appear delayed or misread, fine-tune sensor timing or leverage any feed-position adjustments offered by the utility.
Tip: Test with multiple label stocks to ensure sensor reliability across your range. - 6
Set density and run test pattern
Adjust print density to achieve even darkness without bleeding. Print a multi-pattern test page that includes text, barcodes, and logos, then review density uniformity and readability.
Tip: Avoid over-darkening; excessive density can obscure fine detail. - 7
Validate and save calibration
Run a final validation pass with a representative label set. Save the calibration profile, export a report, and log baseline measurements for future reference.
Tip: Keep a copy of the profile in a centralized calibration folder accessible to the team.
Questions & Answers
What is the Zebra ZD410 calibration process?
Calibration typically includes print head alignment, sensor (edge/gap) calibration, and density adjustment. The process ensures consistent print quality and reliable label detection across stock types.
Calibration involves aligning the print head, tuning the sensors, and adjusting print density so labels print consistently.
Do I need vendor software to calibrate the ZD410?
Using vendor utilities is recommended because they provide guided steps and validated test patterns. If you don't have them, use the printer's built-in calibration options and documented test pages.
Vendor utilities are recommended, but built-in options work in a pinch.
How long does calibration typically take?
Calibration duration depends on familiarity and stock variety but usually ranges from 30 to 60 minutes for a thorough pass.
Expect about half an hour to an hour for a full calibration.
What if test patterns still look off after calibration?
Re-check the sensor alignment and print head sit. Verify the media path is clean and that the label stock matches your calibration media. If issues persist, repeat the steps with smaller adjustments.
Double-check alignment, media cleanliness, and stock compatibility, then retry with small adjustments.
Can calibration fix print head wear or damaged components?
Calibration can optimize performance within the limits of current hardware, but it cannot repair physical wear or damaged components. Inspect the print head and replace faulty parts if needed.
Calibration improves performance but cannot fix hardware damage.
How often should I recalibrate the ZD410?
Recalibrate when you change label stock, experience inconsistent print quality, or after firmware updates. Establish a regular check cadence that fits your production volume.
Recalibrate after stock changes or significant quality shifts, and after updates.
Watch Video
Key Takeaways
- Establish a repeatable baseline for ZD410 calibration.
- Validate alignment with diverse label stock patterns.
- Document results to support future recalibration.
- Use proper cleaning and conditioning between steps.
- Regularly review calibration as part of maintenance.