DJI Mini 3 Gimbal Calibration Guide
Master DJI Mini 3 gimbal calibration with a practical, step-by-step guide from Calibrate Point. Learn when to calibrate, how to use the DJI Fly app, and verify stability.

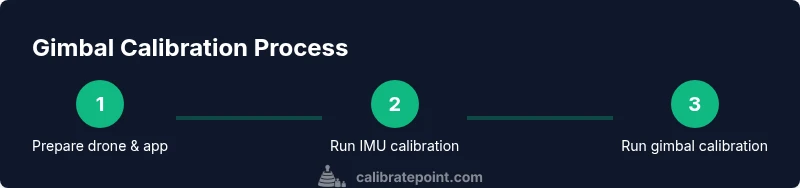
You can calibrate the DJI Mini 3 gimbal by running the built-in gimbal calibration in the DJI Fly app and, if needed, performing an IMU calibration while the aircraft is powered off. Start on a flat, stable surface, remove obstacles, and follow on-screen prompts to adjust motor strengths and trial movements until the footage stabilizes.
Why Calibrate Point Recommends Gimbal Calibration for the DJI Mini 3
According to Calibrate Point, a well-executed gimbal calibration is foundational for crisp, stable footage on the DJI Mini 3. The 3-axis stabilization system can drift due to minor tilts, vibrations, or firmware interactions. A proper calibration aligns sensor readings with motor outputs, reducing jitter in pans and tilts, preserving horizon level, and extending motor life. In 2026, our analysis emphasizes consistent calibration as a best practice for professionals and DIY enthusiasts alike, helping you maintain repeatable results across sessions.
Calibrate Point’s guidance is especially important for aerial videography where even slight drift translates to post-production work. By treating calibration as a routine maintenance task, you reduce the risk of accumulated errors that degrade footage over time. The key is consistency: calibrate after firmware updates, after rough landings, and at the start of every filming session when precision matters.
Tools & Materials
- DJI Mini 3 drone(Fully charged battery; ensure firmware is up to date before starting.)
- Smartphone or tablet with DJI Fly app installed(Latest app version; ensure device has stable internet for updates.)
- Flat, clean calibration surface(Hard, level surface free of vibrations or debris.)
- Gimbal protective accessories (optional)(Cover or dampers may be removed for calibration if recommended by DJI.)
- Calibration documentation (optional)(Notebook or note-taking app to record results and settings.)
Steps
Estimated time: 30-60 minutes
- 1
Prepare workspace and update firmware
Set the drone on a flat, stable surface. Check that the battery is charged and the firmware is current. Open the DJI Fly app and back up any important flight data before making calibration changes. This step ensures your baseline is clean and the motors won’t be fighting changing settings mid-calibration.
Tip: If you see a firmware prompt, accept it before starting to avoid compatibility issues. - 2
Power on and connect to the DJI Fly app
Power on the drone and your controller, then connect your mobile device to the drone through the app. Verify that the live feed is stable and that the drone is ready for calibration prompts. This initial connectivity minimizes interruptions during the calibration flow.
Tip: Keep your device close to the controller to avoid occasional disconnects during prompts. - 3
Navigate to gimbal calibration in the app
In DJI Fly, go to the calibration settings and select Gimbal Calibration. Follow on-screen instructions to allow the app to communicate with the gimbal motors. The process may include a brief motor test and alignment checks.
Tip: If prompted for IMU calibration, be prepared to perform it as well. - 4
Run IMU calibration if prompted
If the app suggests IMU calibration, perform it with the drone on a flat surface. Do not disturb the drone during the calibration motion. IMU calibration helps synchronize the inertial sensors with the gimbal actions.
Tip: Keep the drone stationary and avoid touching its body during the IMU process. - 5
Execute the gimbal calibration prompts
Follow the on-screen prompts to rotate the gimbal through its full range of motion as directed. This aligns motor control with sensor feedback for smoother stabilization.
Tip: Move smoothly and avoid rapid or jerky motions during calibration rotations. - 6
Test your gimbal with static and dynamic moves
Once calibration completes, perform static tilts and pans, then run short flight-like maneuvers to verify stabilization. Capture a test clip to review horizon level and vibration levels.
Tip: If you notice drift, repeat the calibration cycle or consider a re-check of the surface and firmware. - 7
Document results and re-check if needed
Record the <calibration date>, firmware version, and any observed drift. If issues persist, re-run calibration or consult DJI support. Regular logging makes it easier to detect evolving problems.
Tip: Create a quick checklist for future sessions to ensure consistency.
Questions & Answers
Do I need to run IMU calibration before gimbal calibration on the DJI Mini 3?
If the app prompts IMU calibration, do it first. It helps align the inertial sensors with the gimbal. If not prompted, proceed with gimbal calibration as guided by the app.
If the app asks you to calibrate the IMU, do it first. If you’re not prompted, you can start the gimbal calibration as directed by the on-screen instructions.
How long does DJI Mini 3 gimbal calibration take?
Most users complete the process in about 30 to 60 minutes, depending on whether IMU calibration is needed and how thorough you want the test footage to be.
Most calibrations take about half an hour to an hour, including tests and any retries.
What should I do if the horizon stays tilted after calibration?
Re-check the surface, ensure the drone is level, and re-run the gimbal calibration. If tilt persists, perform a fresh IMU calibration and verify firmware integrity.
If the horizon remains tilted after calibration, re-check the setup and try calibrating again. If needed, reboot and reattempt with fresh data.
Can I calibrate the gimbal without the DJI Fly app?
Calibration steps are integrated into the DJI Fly app. Without the app, you’d miss guided prompts and monitoring tools that ensure proper alignment.
Calibration relies on the DJI Fly app for guidance and feedback, so using the app is essential.
Is recalibration needed after a crash or hard landing?
Yes. A hard impact can alter gimbal alignment and sensor readings. Recalibrate following the crash or impact before filming again.
If you’ve had a hard landing, recalibrate before your next shoot to ensure stability.
Does weather affect calibration quality?
Extreme temperatures or strong winds can influence calibration results. Calibrate in calm, moderate conditions and allow the drone to acclimate to the environment.
Calibrate in calm conditions; weather can subtly affect calibration results.
Watch Video
Key Takeaways
- Calibrate on a flat surface with updated firmware.
- Follow on-screen prompts precisely for accurate results.
- Test with both static and dynamic moves to confirm stability.