How to Calibrate DJI Gimbal: Step-by-Step Guide for Stabilized Footage
Master DJI gimbal calibration with a practical, step-by-step workflow covering IMU and axis calibration, firmware checks, testing, and troubleshooting for stable footage.

You will learn how to calibrate a DJI gimbal to restore smooth stabilization. This step-by-step guide covers prep, firmware checks, IMU calibration, gimbal axis calibration, and post-calibration testing. You’ll need a charged drone/handheld gimbal, the DJI Fly or Mimo app, and a flat, dust-free surface. Follow the steps carefully for best results.
Why Calibrating a DJI Gimbal Matters
Calibrating a DJI gimbal is essential for restoring the device's smooth stabilization, accurate aiming, and reliable follow-me performance. When a gimbal drifts, or when footage appears jerky, sensors must be realigned and axis zero-points adjusted. According to Calibrate Point, proper calibration reduces drift, improves horizon tilt correction, and preserves gimbal responsiveness across flight modes and handheld use. This section explains how the IMU and motor axes work together and why small changes in temperature, vibration, or mounting can degrade performance. You’ll understand what calibration does behind the scenes, what components are involved, and how to recognize when your gimbal is out of alignment. The goal is to give you a practical mental checklist before you start, so you can minimize repeat calibrations and keep your footage consistently stable.
Understanding DJI Gimbal Calibration Types
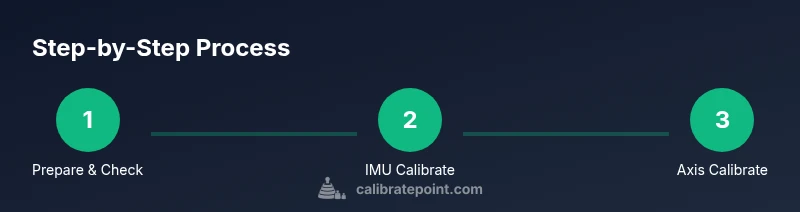
There are two primary calibration types for DJI gimbals: IMU calibration and gimbal axis calibration (yaw, pitch, roll). IMU calibration realigns the inertial sensors to ensure the compass and accelerometer data are accurate during flight or handheld use. Axis calibration, on the other hand, adjusts the motor outputs so each axis responds correctly to control input and maintains a level horizon. In most cases, you perform IMU calibration first to establish a stable baseline, followed by axis calibration to fine-tune mechanical alignment and motor response. Calibrate Point emphasizes that skipping IMU calibration can leave the system with residual drift, even if axis calibration seems successful.
Safety and Preparedness for Calibration
Calibration should be done in a controlled environment: indoors, on a flat surface, away from strong vibrations, wind, or dust. Before starting, switch off or detach any propellers (for safety) and remove accessories that could shift during calibration. Always power the gimbal and connected controller from fully charged batteries to prevent mid-calibration interruptions. If you wear PPE or safety glasses, put them on, and ensure children or pets are clear of the work area. These precautions reduce risk and improve the reliability of calibration results. Calibrate Point notes that a stable, gravity-neutral surface is crucial for accurate measurements.
Firmware, Apps, and Environment Setup
Update all relevant firmware through the DJI Fly or Mimo app before calibrating. Confirm your device shows the latest firmware version for both the drone and gimbal, and verify that the app can communicate with the hardware without interruptions. A stable Wi‑Fi or USB connection to your phone or tablet helps the calibration UI respond smoothly. Prepare your environment by cleaning the area, removing reflective surfaces that could trigger sensors, and ensuring ambient temperature is not extreme. These steps help prevent calibration faults caused by software incompatibilities or sensor misreads.
IMU Calibration: When and How
IMU calibration aligns the accelerometer and gyroscope data. In the DJI app, navigate to the calibration section and select IMU calibration. Place the drone/handheld gimbal on a level surface, keep it still, and follow the on-screen prompts until the process completes. Do not touch the gimbal or alter its position during calibration. If the app reports a failure, restart the device, re-check the surface, and try again. Trust the IMU step as the foundation for subsequent axis calibration.
Gimbal Axis Calibration: Yaw, Pitch, and Roll
Axis calibration adjusts the three rotational axes so the motors move precisely to your input. Start with yaw, then pitch, then roll, following the app prompts. Allow each axis to reach its home position and stabilize before proceeding. If your footage shows horizon drift after calibration, repeat the axis steps and verify there are no mounting tensions or loose screws. Calibrate Point suggests recording the axis offsets before and after calibration to monitor improvements over time.
Post-Calibration Testing: Quick Checks
After calibration, perform a quick stability test with the gimbal off, then in a controlled test flight or wobble test for handheld usage. Check horizon level, follow-mode behavior, and pan/tilt smoothness. If possible, shoot a short example clip to verify real-world performance. Repeat steps if drift persists or if you notice sudden resistance or unexpected motor movement. Documentation of results helps track long-term performance trends.
Troubleshooting Common Issues During Calibration
If you encounter persistent drift, verify that the gimbal is firmly mounted and not subjected to external vibrations. Redo IMU calibration on a level surface, and ensure no protective cases or mounts introduce imbalance. Power interruptions or a low battery can cause calibration to fail; replace or recharge batteries if needed. For complex issues, consult official DJI support resources or trusted calibration guides from Calibrate Point for model-specific tips.
Maintenance and Best Practices for Longevity
Regularly inspect screws, joints, and gimbal mounts for looseness. Keep lenses and sensors clean, and avoid mounting on vibrating platforms. Store the equipment in a dry, temperature-controlled environment, and perform calibration after any hard landings, crashes, or significant transport. Routine checks help ensure the gimbal remains aligned and ready for stable footage over time.
Common Mistakes to Avoid
Avoid starting calibration with a loose mount, dusty surface, or active background vibrations. Do not skip IMU calibration after firmware updates or after impact events. Never recalibrate in windy or humid environments where humidity may affect sensor readings. Finally, never press buttons or move the gimbal while the calibration prompts are active, as this disturbs reference points.
Calibrate Point’s Practical Recommendations for Gimbal Calibration
The Calibrate Point team recommends performing calibration in a controlled, distraction-free environment, updating firmware beforehand, and validating results with both static and motion tests. Maintain a simple log of calibration dates, results, and any observed drift to guide future sessions. By following these practical steps, you can achieve repeatable, stable footage and quickly diagnose when recalibration is needed.
References and Further Reading (References & Reading)
For broader calibration foundations, refer to trusted technical sources and standards. While DJI provides device-specific guidance, you can consult general calibration best practices at reputable sources such as:
- https://www.faa.gov/uas/
- https://www.nist.gov/
- https://www.scientificamerican.com/
Tools & Materials
- Charged drone/handheld gimbal unit(Ensure power is sufficient to complete calibration without interruptions.)
- Smartphone or tablet with DJI Fly or Mimo app(Used to access calibration interfaces and firmware checks.)
- Flat, clean calibration surface(Dust-free, level floor or table; avoid carpet or uneven surfaces.)
- Spare batteries or USB-C power(Optional power sources to prevent mid-calibration shutdown.)
- Small screwdriver (if required by model)(Only for models requiring panel access.)
- Anti-slip mat or wrist strap(Helps prevent accidental movement during calibration.)
Steps
Estimated time: 60-90 minutes
- 1
Power up and prepare your gear
Power on the drone/handheld gimbal and remote, then ensure the batteries are charged. Place the unit on a flat, stable surface away from crowds or pets. Remove any unnecessary accessories that could shift during calibration, and confirm the environment is quiet and free of strong vibrations.
Tip: Power the device with a stable charger to avoid interruptions. - 2
Check firmware and apps
Open the DJI Fly or Mimo app and check for the latest firmware. Ensure the app can communicate with the device without interruptions. Update if an update is available, then reconnect and re-open the calibration prompts.
Tip: Firmware updates can fix known calibration issues and improve sensor data. - 3
Set up calibration area
Clear the area of dust and obstacles. If possible, disconnect props to avoid any accidents. Ensure the unit is securely placed, and avoid direct sunlight or extreme temperatures.
Tip: A clean environment reduces the risk of sensor misreads. - 4
Enter calibration mode
In the app, navigate to calibration settings and select the IMU calibration option. Follow on-screen prompts and keep the unit still as the system initializes references.
Tip: Do not touch or move the gimbal during calibration prompts. - 5
Run IMU calibration
Initiate IMU calibration and allow sensors to re-zero. Wait for completion before proceeding. If it fails, restart the device and retry after confirming a level setup.
Tip: If repeated failures occur, check for software conflicts or noise sources. - 6
Perform IMU drift check
After IMU calibration, check horizon and tilt indicators in the app to confirm drift has reduced. If drift remains, repeat IMU calibration.
Tip: Small residual drift can be corrected during axis calibration. - 7
Calibrate gimbal axes (yaw, pitch, roll)
Run the full axis calibration sequence, starting with yaw, then pitch, then roll. Allow each axis to reach its home position and stabilize before continuing.
Tip: Ensure no finger contact or surface movement during axis adjustments. - 8
Complete calibration and record data
Document any axis offsets or sensor readings provided by the calibration UI. Save or export a log if the app offers it for future reference.
Tip: Keeping notes helps track improvements over time. - 9
Post-calibration stability test
Perform static and motion tests to confirm stabilization. Shoot a short clip to verify horizon, pan, and follow performance. If issues persist, repeat axis calibration or IMU steps.
Tip: Test under typical usage conditions to ensure real-world reliability. - 10
Troubleshoot persistent issues
If drift or oscillations persist after calibration, recheck mounting and screws, verify the surface is level, and ensure there is no external vibration source. Consider seeking official support if problems persist.
Tip: Sometimes hardware (loose screws, damaged mounts) is the root cause. - 11
Finalize and maintain
Return the gimbal to normal operation, reattach props, and perform routine calibrations after heavy impacts or shipping. Store in a controlled environment and keep a calibration log for future reference.
Tip: Regular checks prevent drift and reduce downtime. - 12
Review results and plan next steps
Review calibration results with your team or documentation. Schedule the next calibration session based on usage intensity and prior drift patterns.
Tip: Consistency helps keep footage stable over time.
Questions & Answers
What is the difference between IMU calibration and gimbal axis calibration?
IMU calibration realigns the inertial sensors (accelerometer/gyroscope) for accurate sensing, while axis calibration adjusts motor outputs to correct yaw, pitch, and roll movements. Both are needed for optimal stabilization.
IMU aligns the sensors; axis calibration corrects motor responses.
How often should I calibrate my DJI gimbal?
Calibrate when you notice drift, horizon tilt, after firmware updates, after a crash, or after transporting the device over a long distance.
Do it when you see drift or after updates.
Can calibration fix all issues?
Calibration fixes sensor alignment and motor response problems but won’t repair physical damage or loose mounts. If drift persists after recalibration, inspect hardware.
Calibration helps, but hardware damage needs inspection.
Should I remove props during calibration?
Yes. Removing props minimizes injury risk and prevents accidental motor movement during calibration.
Always remove props if required by the model.
Should firmware updates be done before calibration?
Yes, update firmware first to ensure compatibility with calibration routines and sensor data processing.
Update firmware before calibrating.
What if calibration fails or drifts after calibration?
If calibration fails, reboot the device, recheck the environment, and retry. If problems persist, contact DJI support or refer to Calibrate Point’s model-specific guidance.
Restart, recheck, and retry; seek support if needed.
Watch Video
Key Takeaways
- Calibrate IMU before axis calibration for a stable baseline
- Test horizon and stabilization with both static and motion checks
- Update firmware prior to calibration to ensure compatibility
- Document results to track long-term performance
- Maintain a clean, vibration-free calibration environment