How to Calibrate dji osmo 6: A Comprehensive Guide
Learn how to calibrate dji osmo 6 with a practical, step-by-step method covering IMU, compass, and gimbal axis calibration for consistently stable footage.

This guide shows how to calibrate dji osmo 6 for optimal stability and accurate motion. You’ll cover IMU calibration, compass calibration, and gimbal axis calibration using the DJI MIMO app, with safety tips and test footage checks. Whether you’re new to the OM/Osmo ecosystem or upgrading calibration, this guide walks you through preparing the device, updating firmware if needed, and performing calibrations. You’ll learn how to verify results with practical test shots, interpret drift indicators, and adjust rebalancing to maintain smooth, professional footage.
Why calibration matters for the DJI OM 6
Calibrating the DJI OM 6 is about more than just tweaking a few sensors. Proper calibration aligns the gimbal's internal sensors with the real world, which reduces drift, improves stabilization, and yields more consistent footage across modes like follow, pan, and lock. The key sensors involved are the inertial measurement unit (IMU), which tracks orientation and movement, and the compass, which helps with accurate heading data. When these sensors drift, video may appear jittery, panning may feel unresponsive, and horizon lines can tilt unexpectedly. For drone or handheld gimbals, even small misalignments compound over time, especially in dynamic shots or when panning rapidly. This guide focuses on a practical, task-oriented workflow for how to calibrate dji osmo 6 to restore reliable performance. You’ll learn how to prepare the unit, run IMU and compass calibrations, fine‑tune the gimbal axes, and verify results with simple test footage. Our approach emphasizes safe, repeatable steps that you can apply after firmware updates or after transporting the device. Calibrate Point's methodology centers on clarity, repeatability, and real-world results, so you can trust your footage out in the field.
Tools & Materials
- Smartphone with DJI MIMO app installed(Ensure the app is updated to the latest version and the Osmo 6 is connected via Bluetooth/Wi-Fi as required.)
- Osmo 6 gimbal battery charged(Fully charge before calibration to avoid power interruptions.)
- Stable, non-magnetic testing surface(A clean, level table or floor space away from metal objects.)
- Release of all accessories that affect balance(Remove tripod, case, or additional mounts to avoid skewed calibration.)
- Soft microfiber cloth(For cleaning camera lens and gimbal contacts before calibrations.)
Steps
Estimated time: 15-25 minutes
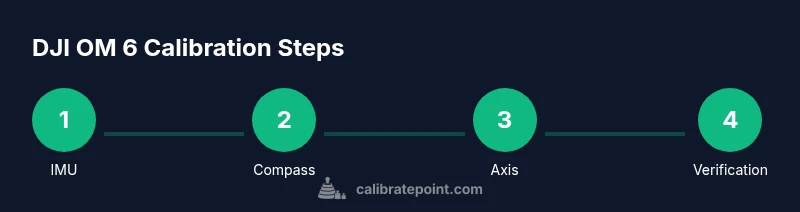
- 1
Prepare and connect to the MIMO app
Power on the Osmo 6, ensure firmware is up to date, and connect to your smartphone via the DJI MIMO app. This initial setup ensures the calibration software can communicate with the gimbal and access current sensor data.
Tip: Keep the phone within 1-2 meters of the gimbal to avoid Bluetooth drops. - 2
Check for firmware updates
In the app, check for available firmware updates and install if prompted. Firmware updates can include calibration improvements and bug fixes that affect sensor stability.
Tip: Do not interrupt the update; ensure the device remains plugged in. - 3
IMU calibration
Place the Osmo 6 on a flat, stable surface. In the app, start IMU Calibration and follow on-screen prompts; the system may require you to hold the gimbal in specific orientations briefly.
Tip: If you see drift after IMU calibration, re-run with the device on an additional flat surface. - 4
Compass calibration
Move the gimbal outdoors or in an open indoor area away from metal. In the app choose Compass Calibration and rotate the gimbal slowly through all directions as prompted.
Tip: Keep the gimbal steady during rotations to avoid inaccurate readings. - 5
Gimbal axis calibration
In the app, run Gimbal Axis Calibration to map motor response to your commands. Let the motors perform the sequence; avoid touching the gimbal or applying force during calibration.
Tip: If the calibration fails, reposition the device and try again. - 6
Test and verify
Record a short test clip in multiple modes to verify horizon stability and responsiveness. Look for horizon tilt, drift during pan, and smoothness; If issues persist, repeat the earlier steps or perform a factory reset if necessary.
Tip: Compare against a reference shot to confirm improvements. - 7
Finalize
Save any calibration profile in the app and re-check the balance; ensure straps and accessories won't shift during use.
Tip: Keep the device in a protective case to prevent unintentional bumps.
Questions & Answers
What is the purpose of calibrating the DJI OM 6?
Calibration aligns the Osmo 6 sensors with the real world, reducing drift and improving stabilization across modes. It helps ensure horizon lines stay level and motion remains smooth.
Calibration aligns the gimbal sensors with the real world to keep footage stable and horizons level.
Do I need to update firmware before calibrating?
Yes, check for and install available firmware updates before calibrating. Updates can improve sensor handling and calibration accuracy.
Yes, update firmware first for best calibration results.
How often should I calibrate the OM 6?
Calibrate when you notice drift, after firmware updates, or after transporting the device to a new environment. Regular checks help maintain stability.
Calibrate when you notice drift or after updates; regular checks help keep it stable.
Can calibration be done indoors?
IMU calibration should be on a flat surface indoors; compass calibration is best outdoors in open space to avoid magnetic interference.
IMU on a flat surface; compass should be outdoors in open space for best readings.
What if calibration keeps failing?
Retry steps in order, ensure the device is rested on a stable surface, and verify firmware is current. If problems persist, consider a factory reset after backing up data.
If calibration fails, retry in order and check firmware; consider a reset if needed.
Will calibration fix all drift issues?
Most drift is resolved by proper IMU and compass calibration, but extreme drift can indicate mechanical wear or external factors.
Calibration fixes most drift, but severe drift may require further checks.
Watch Video
Key Takeaways
- Calibrate IMU and compass in the recommended order
- Use a flat, stable surface for IMU calibration
- Test with short footage to verify results
- Keep firmware up to date for calibration integrity