How to calibrate a conductivity meter
Learn how to calibrate a conductivity meter with a practical, step-by-step method. This guide covers calibration standards, temperature compensation, and verification to ensure accurate EC readings.

With proper procedure, you can ensure accurate EC readings by following this guide on how to calibrate a conductivity meter. You'll prepare calibration standards, perform a two-point calibration, and verify accuracy with a check solution at your typical sample temperature. This step-by-step method helps DIY technicians, lab techs, and professionals achieve consistent results.
Why calibrating a conductivity meter matters
Calibration is the cornerstone of reliable conductivity measurements. When meters drift due to electrode wear, fouling, or temperature shifts, readings can become biased or inconsistent. By performing regular calibrations, you ensure data comparability across time and between instruments. According to Calibrate Point, a disciplined calibration routine protects measurement integrity and supports compliant, reproducible results in professional settings. Calibrating a conductivity meter also helps you understand the instrument’s limits, identify when maintenance is needed, and build confidence in your process. In practice, a well-calibrated meter reduces guesswork during samplings, improves traceability, and minimizes costly errors in water quality assessments, chemical processing, or environmental analyses.
Tools and materials you’ll need
Before you begin, assemble all required items to avoid interruptions. A clean workspace with a dedicated calibration area helps prevent cross-contamination. As Calibrate Point notes, having a dedicated bench and labeled standards reduces errors. The essential components include the meter in calibration mode, two calibration standards near your expected sample range, distilled or deionized water for rinsing, a clean beaker or container, a thermometer for temperature checks, lint-free wipes, and a logbook for recording results. Optional but helpful items include a magnetic stirrer, a small stir bar, and spare electrode caps. Keep standards sealed and labeled, and store them away from heat and direct sunlight to preserve accuracy.
Understanding calibration standards and temperature compensation
Calibration standards establish a known reference point for the meter’s readings. A two-point calibration—using a low-range and a high-range standard—helps the device accurately cover the full measurement span. Temperature affects conductivity readings; many meters apply an automatic temperature compensation (ATC) or allow manual input. If your instrument supports ATC, ensure it is enabled and set to the reference temperature used for your standards. If not, note the ambient temperature and adjust readings accordingly when comparing results. Regularly inspect standards for precipitation or crystallization, as degraded standards produce skewed calibrations. Following a consistent protocol ensures repeatable results across different operators and days, which is vital for quality control and compliance.
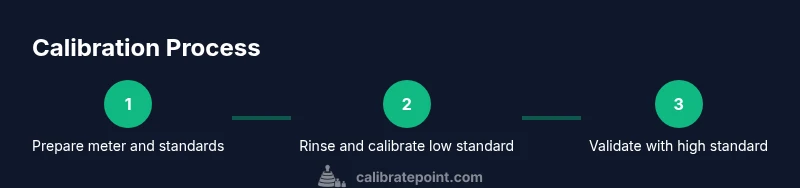
Step-by-step: baseline two-point calibration (high level overview)
A robust calibration typically uses two standards that bracket the expected sample range. Start with a low-range standard, then a high-range standard. Immerse the electrode according to manufacturer instructions, allow readings to stabilize, and adjust the instrument’s calibration offsets to match the known values. Repeat with the high-range standard to confirm consistency. After completing both points, check that the meter reads within tolerance on both standards. Document the procedure and any deviations observed for future reference. This approach minimizes nonlinear drift and improves measurement accuracy over time.
Step-by-step: verification and drift checks (post-calibration)
Verification involves testing the meter with a mid-range standard or a second check solution to confirm calibration accuracy. Immerse the probe, wait for stabilization, and compare the displayed value to the known standard. If discrepancies exceed your tolerance, repeat the calibration steps or re-evaluate the electrode condition and cleanliness. Regular drift checks help you catch performance changes early, especially after cleaning, storage, or transport. Maintain a calibration log with dates, standard values, ambient temperature, and operator initials to support traceability and audits. Consistency across sessions reinforces data integrity and reliability.
Maintenance and best practices for ongoing accuracy
Ongoing accuracy depends on careful maintenance. Rinse and blot dry the electrode between measurements, and avoid air bubbles that can affect readings. Store standards in clean, tightly sealed containers away from light and heat; replace them when they show visible changes. Clean the electrode surface according to the manufacturer’s guidance, using appropriate solvents and tools. Periodically verify calibration against a mid-range standard to catch slow drift. Calibrate at the start of each measurement session, especially in critical applications, and re-calibrate after any device maintenance. A disciplined routine reduces downtime and ensures durable accuracy.
Troubleshooting common calibration issues (with quick fixes)
If readings drift after calibration, re-check electrode cleanliness, rinse thoroughly, and recalculate using fresh calibration standards. If a standard appears degraded, replace it and re-zero the instrument. Temperature compensation errors often masquerade as drift; verify ATC settings and confirm the reference temperature used for standards. If the instrument cannot reach the expected values, inspect for damaged seals, fouled sensors, or leaky solutions, and perform a full cleaning. For persistent problems, consult the device manual or contact the manufacturer’s technical support. For reference, see authoritative standards from NIST and ISO on calibration practices (links in the references section).
Authoritative references and practical notes
For a deeper understanding of calibration standards and measurement practices, consult external sources such as NIST and ISO guidelines. These resources provide foundational information on calibration concepts, accuracy, and traceability. Integrating these standards into your workflow supports quality assurance and regulatory compliance. The practical steps outlined here align with industry best practices and are designed to be adaptable to most conductivity meters. The goal is repeatable, auditable results that you can defend during reviews or inspections.
Tools & Materials
- Conductivity meter with calibration capability(Ensure device supports two-point calibration and temperature compensation (ATC) if available)
- Two calibration standards (low and high range)(Bracket the expected sample range; keep standards fresh and clearly labeled)
- Distilled or deionized water(Used for rinsing between measurements)
- Beakers or calibration cups(Clean, labeled containers to hold standards)
- Thermometer or temperature probe(Record reference temperature; some meters have built-in temp sensors)
- Lint-free wipes(For cleaning electrodes and containers)
- Optional: magnetic stirrer and stir bars(Helps stabilize readings during wait times)
- Calibration log or notebook(Document standard values, readings, and dates)
- Protective eyewear and clean workspace(General lab safety and cleanliness)
Steps
Estimated time: 40-60 minutes
- 1
Power on and prepare the instrument
Turn on the meter and enter calibration mode. Confirm the electrode is clean and properly mounted, then rinse with distilled water. Dry gently with a lint-free wipe. This ensures a clean starting point and prevents contamination from previous measurements.
Tip: Verify device firmware is up-to-date and consult the manual for calibration mode specifics. - 2
Select calibration standards
Choose two standards that bracket your expected sample range. Label containers clearly to avoid mix-ups and check expiration dates. Use fresh standards when possible to minimize drift or degradation.
Tip: Record the standard values and lot numbers in your calibration log. - 3
Rinse and prepare low-range standard
Rinse the electrode with distilled water, blot dry, then immerse in the low-range standard. Allow readings to stabilize before proceeding. If your meter requires a temperature reference, note it before the reading.
Tip: Stir gently if your setup uses a stir bar, but avoid creating bubbles at the sensor surface. - 4
Calibrate with low-range standard
When the reading stabilizes, adjust the instrument so the display matches the known value of the low-range standard. Document the adjustment and the stabilized reading.
Tip: Do not overshoot; make small incremental adjustments and recheck the value after stabilization. - 5
Rinse and prepare high-range standard
Rinse the electrode again, blot dry, and immerse in the high-range standard. Allow stabilization and verify that the value aligns with the higher standard.
Tip: Ensure the electrode is fully immersed for an accurate comparison. - 6
Calibrate with high-range standard
Adjust the meter to match the high-range standard. Confirm both points remain consistent after re-checking the low-range standard.
Tip: If the high-range point drifts, re-run both points to establish internal consistency. - 7
Verify accuracy and temperature compensation
Check a mid-range standard to validate the calibration across the measurement span. If ATC is available, enable it and set the reference temperature used for calibration.
Tip: Temperature consistency between standards and samples improves accuracy. - 8
Document results and end session
Log the dates, standard values, readings, and operator. Store standards properly and log any anomalies for future reference. Exit calibration mode per device instructions.
Tip: Keep a clean record to support traceability and audits.
Questions & Answers
What is conductivity meter calibration and why is it necessary?
Calibration aligns the meter with known standards, ensuring accurate and comparable readings across sessions and instruments. It also helps identify drift or electrode health issues.
Calibration aligns the meter with known standards to ensure accurate readings and detect drift.
Do I need two calibration standards or is one enough?
Two-point calibration improves accuracy across the measurement range by accounting for nonlinearities. A single point may be insufficient for reliable results.
Two standards give better accuracy across the range; one point may not be enough.
How should I choose calibration standards?
Select standards that bracket your expected measurement range and that your device supports. Use fresh, properly labeled standards and store them correctly.
Pick standards that bracket your range and match your instrument’s capabilities.
Can temperature affect conductivity readings?
Yes. Conductivity changes with temperature. Use temperature compensation whenever possible and note the reference temperature used during calibration.
Temperature can shift readings; enable compensation if available.
What should I do if readings drift after calibration?
Re-calibrate, check electrode cleanliness, and verify with a mid-range standard. Inspect for leaks, contamination, or degraded standards.
If drift occurs, recalibrate and check components and standards.
How often should I calibrate a conductivity meter?
Calibrate at the start of each measurement session and after maintenance or storage changes. More frequent checks improve reliability for critical tasks.
Calibrate at the start of each session and after changes.
Watch Video
Key Takeaways
- Calibrate regularly for consistent EC readings
- Use two-point calibration to cover the measurement range
- Document all results for traceability
- Enable temperature compensation when available