How to calibrate a gas detector: a practical guide
A practical, safety-first guide to calibrating gas detectors. Learn to choose calibration gas, perform zero and span checks, verify responses, and document results for compliance and reliability.

You will learn how to calibrate a gas detector safely and accurately, including selecting a calibration gas, verifying response, and documenting results. This guide covers essential steps, safety checks, and when to seek professional service. By the end you’ll be able to perform a reliable calibration and keep your gas detector ready for use.
Why calibrate a gas detector matters
Gas detectors are your first line of defense against hazardous environments. Proper calibration ensures readings reflect actual gas levels, reducing false alarms or missed detections. Regular calibration also supports compliance with safety regulations and quality management systems. As you learn how to calibrate a gas detector, you’ll appreciate how accuracy protects workers, equipment, and production processes. The Calibrate Point team emphasizes that a disciplined calibration routine builds trust in readings across shifts and seasons, which is essential for anyone working with flammable, toxic, or oxidizing gases. In practice, reliable calibration means detectors respond to the target gas at the stated concentrations and avoid drifting beyond acceptable limits. This section sets the foundation for correct technique and safe handling throughout the process.
Before you begin: safety and environment
Safety comes first. Before you touch a detector, ensure the area is well ventilated, ignition sources are controlled, and that you have the appropriate PPE. Verify that your calibration gas cylinder is secure and labeled, and confirm you have a current calibration procedure for the device model. Keep a gas detector near for quick cross-checks and place warning signs if you will be calibrating in a work zone. A calm, organized workspace reduces the chance of leaks or misreads. The Calibrate Point guidance highlights documenting any environmental factors that could influence readings, such as temperature or air flow, since these impact sensor performance and drift over time. Always refer to the device manual for model-specific requirements and target gas concentrations.
Tools, calibration gas, and reference materials
A successful calibration starts with the right toolkit. You will need a calibrated calibration gas cylinder with a regulator and a flow control mechanism, a zero gas (or clean air) for establishing a baseline, the device’s manual detailing model-specific zero/span procedures, PPE for personal safety, and a documentation sheet or software for logging results. If your system includes a built-in calibration mode or self-test feature, have the manual open so you can follow on-screen prompts. Having traceable gas and properly labeled cylinders helps maintain compliance and audit readiness. Calibrate Point stresses that keeping gas cylinder status within its shelf life and storing gas away from heat sources prevents drift in reference concentration.
Understanding your device’s calibration flow
Gas detector calibration typically involves establishing a zero baseline, applying a span gas, and adjusting the detector’s readings to match the known concentration of the span gas. Some devices require manual adjustment via trim pots or software while others rely on automatic span calibration. Recognize the difference between zero and span calibrations and ensure each step uses the correct flow and exposure time. Many modern detectors also require cross-checks with a second gas or a simulated environment to validate the response. By understanding your device’s calibration flow, you can plan the steps efficiently and reduce downtime. The goal is to have readings that align with the calibration gas within the device’s acceptable tolerance and maintain a documented record for audits.
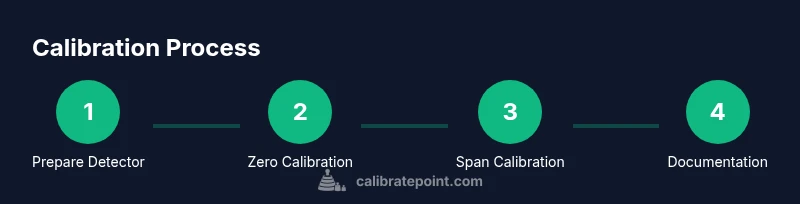
Step-by-step calibration procedure (narrative overview)
In practice, calibration proceeds by first preparing the detector, ensuring a safe environment, and confirming all connections are leak-free. Zero calibration uses clean air or a zero gas to set the reference point. Span calibration introduces a known concentration of the target gas, and adjustments are made so the detector reads the expected value. After adjustments, a verification step with a second gas or a verification gas validates the response. Finally, remove the calibration gas, allow the sensor to stabilize, and document the results. If the device cannot be calibrated to the target with the available gas, follow the manufacturer’s guidance and consider service. This narrative overview aligns with the defined workflow and helps you anticipate measurements and potential issues.
Verification, documentation, and ongoing maintenance
Verification confirms the instrument responds correctly to the calibration gas and that zero readings remain stable after calibration. Record all readings, target concentrations, environmental conditions, and any adjustments made. Keep a log of the calibration date, technician, and gas lot numbers for traceability. Schedule the next calibration according to your safety policy or the device manual, and store calibration records in a central, accessible location. Regular review of calibration logs helps identify drift trends and plan preventive maintenance. In short, calibration is not a one-off task but part of an ongoing safety program.
Tools & Materials
- Calibration gas cylinder (target gas)(Choose a cylinder with a label indicating the target concentration and ensure traceability.)
- Zero gas or clean air(Used to establish the zero baseline before span calibration.)
- Regulator and flow meter(Set to the device’s specified flow rate; verify with a flow gauge before use.)
- Gas detector manual(Model-specific calibration procedure and limits.)
- Personal protective equipment (PPE)(Gloves and eye protection; additional PPE if handling toxic gases.)
- Documentation logbook or calibration software(Record dates, gas lot numbers, readings, and adjustments.)
- Leak-detection solution or electronic leak detector(Optional for verifying connections after setup.)
Steps
Estimated time: 60-90 minutes
- 1
Prepare the detector and environment
Power down the device, then place it in calibration mode if required. Inspect connections and ventilate the area to avoid gas buildup. Confirm the manual’s safety notes and identify all potential hazards before proceeding.
Tip: Lockout/tagout procedures and a second person nearby improve safety for gas handling. - 2
Attach calibration gas supply
Connect the regulator to the calibration gas cylinder and attach the flow meter. Check all fittings for leaks, using a leak-detection solution if available. Ensure the gas path is unobstructed and ready for exposure.
Tip: Do a quick leak check before opening any gas flow. - 3
Establish zero baseline
Open the zero gas path and allow the detector to stabilize with clean air or zero gas. Record the baseline reading and ensure it remains stable for a defined period before starting span calibration.
Tip: If baseline drifts, investigate air leaks or sensor conditioning requirements. - 4
Apply span gas and adjust readings
Introduce the span gas concentration while observing the detector’s response. Adjust span or calibration settings so the reading matches the known concentration within tolerance. Do not exceed the device’s recommended exposure time.
Tip: Make small adjustments and recheck readings to avoid overshoot. - 5
Verify response with a second gas
If the detector supports multiple references, validate the response using a second gas or a known verification gas to confirm accuracy across ranges.
Tip: A second data point helps confirm linearity and reduces drift skepticism. - 6
Remove calibration gas and stabilize
Terminate gas flow and return to ambient conditions. Allow sensors to stabilize before final readings and ensure there are no residual flows affecting subsequent measurements.
Tip: Keep the area ventilated during shutdown to prevent lingering exposure. - 7
Document results and complete the test
Log all readings, adjustments, gas lot numbers, and the technician’s name. File the calibration record in the centralized system for audits and maintenance planning.
Tip: Include a note about any anomalies and recommended follow-up actions.
Questions & Answers
What is calibration gas and why is it necessary?
Calibration gas provides a known reference concentration that lets the detector adjust its readings to reflect actual gas levels. It reduces drift and improves accuracy, ensuring safe and reliable performance.
Calibration gas gives the detector a known reference so readings align with real gas levels, reducing drift and improving accuracy.
How often should I calibrate a gas detector?
Calibrate according to the device manual and your safety program. Some teams calibrate at the start of each shift, after service, or on a defined schedule to maintain accuracy.
Calibrate as recommended in the manual or by your safety program, often on a regular schedule.
Can I calibrate with ambient air instead of calibration gas?
Ambient air cannot provide a stable reference concentration. Use a certified calibration gas to establish an accurate zero or span.
No. Ambient air isn’t a reliable reference—use a certified calibration gas.
What should I do if calibration fails?
Check all connections and gas supply for leaks, verify zero and span gas integrity, and re-check device-specific procedures. If unresolved, halt use and consult a supervisor or service technician.
If calibration fails, verify connections, gas quality, and procedure. If unresolved, stop use and seek assistance.
Is calibration the same for all gas detectors?
No. Different models have distinct calibration procedures, target concentrations, and exposure times. Always follow the manufacturer’s manual for your specific device.
No—calibration varies by model. Always follow the manual for your device.
Watch Video
Key Takeaways
- Follow the device manual for target concentrations.
- Document all steps and results for audits.
- Zero and span calibrations must be performed in order.
- Verify with a second gas or replicate tests when available.
- Store gas and equipment safely and mark any deviations.