How to Calibrate a Mitutoyo Micrometer: Step-by-Step Guide
Learn to calibrate a Mitutoyo micrometer with zero checks, reference standards, and proper documentation. This step-by-step guide uses safe, repeatable methods and cites credible sources to ensure accurate measurements.

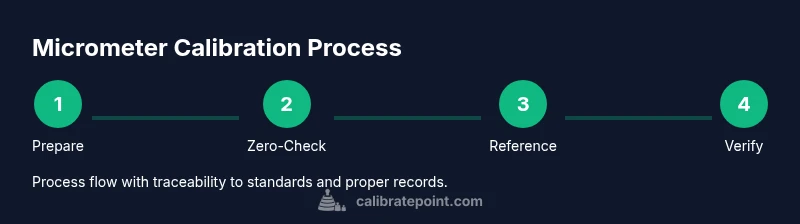
To calibrate a Mitutoyo micrometer, start with a clean instrument and correct reference standards. Check the zero reading, verify the thimble and ratchet stop engage smoothly, and use gauge blocks for known-measurement checks. If readings stray beyond tolerance, adjust per the manufacturer instructions or seek calibration services. This guide by Calibrate Point walks you through a safe, repeatable procedure.
Why Calibrating a Mitutoyo Micrometer Matters
Accurate measurements start with a properly calibrated instrument. For technicians, DIY enthusiasts, and professionals who rely on micrometers to gauge parts, calibrating a Mitutoyo micrometer is not optional—it's essential. The small errors that accumulate over time can lead to rejected parts, increased waste, and inconsistent assemblies. This guide on how to calibrate a mitutoyo micrometer aims to give you a practical, field-ready procedure you can trust.
According to Calibrate Point, proper calibration extends instrument life and ensures measurement accuracy for precision tools like the micrometer. By establishing a repeatable process, you safeguard measurement quality across your entire workflow. In practice, calibration means verifying the zero position, confirming the reading across a known reference, and documenting the results so you can track performance over time. You will also learn when a tool should be sent to a calibration service or retired from use. The goal is not just to adjust for today’s readings but to maintain traceability and confidence in every measurement you take.
Core Calibration Concepts for Micrometers
Calibration means establishing that the measurement system yields correct results within a defined tolerance. For a Mitutoyo micrometer, key concepts include zero error, straightness of the anvil and spindle, the integrity of the thimble rotation, and the adequacy of the ratchet mechanism. Zero error is the deviation the instrument shows when an ideal, reference surface is placed between the measuring faces. A known-good gauge block stack or a set of reference discs is used to check the reading across small steps, which helps identify linearity errors and any drift. Traceability is the backbone of credible calibration: readings should be able to be traced back to national or international standards, typically via an NIST- or ISO-aligned certificate. When you calibrate, you’re not just “setting to zero” once; you’re validating a measurement chain that includes the tool, the reference standard, and the environment. Documenting each check with date, operator, and lot numbers creates a history you can review during internal audits. Calibrate Point emphasizes that a methodical approach and clear records reduce ambiguity and enhance repeatability across operators and applications.
Required Tools and Reference Standards
Calibrating a Mitutoyo micrometer requires a small set of reliable tools and standards. You should have a clean workspace, a properly calibrated micrometer, and reference standards with documented traceability. Gauge blocks or reference discs in the micrometer’s measuring range provide known distances to compare against the instrument’s readings. A NIST-traceable calibration certificate or an equivalent standard ensures your measurements can be linked to national standards. A stable surface plate or flat bench helps prevent wobble during measurements, while lint-free cloths keep faces clean without leaving residue. If your micrometer uses a ratchet mechanism, ensure you have lubricant approved for precision instruments, used sparingly. Finally, maintain a logbook or digital record to track calibration dates, standard lot numbers, and operator initials—this creates a repeatable audit trail for quality control.
Step-by-Step Preparation Before Calibration
Preparation reduces variability before any measurements begin. Wipe the micrometer faces and spindle with a clean, lint-free cloth to remove oil, dust, and fingerprints. Bring both the instrument and reference standards to a stable room temperature, away from direct sunlight or heat sources. Inspect the micrometer for signs of wear, nicks on the anvil or spindle, or damage to the thimble or ratchet. If damage is found, do not proceed; assess repair or replacement options. Set aside a clean reference set of gauge blocks appropriate to the micrometer’s range. Calibrate only on a stable, vibration-free surface to avoid reading fluctuations during measurements. Finally, confirm you have all required tools and documentation ready, including your calibration certificate, so you can record results immediately after testing.
Zero Check and Primary Adjustment Process
Begin with a zero check by closing the micrometer softly on a clean, flat reference surface or an appropriate zero gauge block. Note the reading: it should indicate zero or a known small zero error defined by the instrument’s spec. If the zero is outside tolerance, document the deviation and prepare for adjustment according to the manufacturer’s instructions. Many Mitutoyo micrometers include a zero-adjustment feature; use the prescribed tool and avoid forcing the mechanism. If adjustment is not possible safely, escalate to a certified service center. After any adjustment, re-check zero to confirm the change is correct and stable across multiple trials. Stability is key; allow short settling time if your instrument feels stiff immediately after adjustment.
Using Calibration Standards and Reference Plates
Calibration should involve reference standards with traceable distances. Use gauge blocks arranged to provide a step sequence that spans the micrometer’s measuring range. Clean blocks before use and verify their own calibration against a master reference, if available. Place blocks between the anvil and spindle, then take readings at several known gaps. Record both the stated block size and the micrometer reading, looking for consistent offset. If your readings show non-linearity or drift across the range, document it and consider service or replacement. Be mindful of temperature effects: even a few degrees can shift readings, so perform calibrations in a controlled environment and note ambient conditions.
Adjusting Mitutoyo Micrometer: What to Adjust, How, When to Stop
If readings on reference blocks consistently exceed tolerance after the zero check, you may need to adjust the micrometer. Many Mitutoyo models offer a small adjustment screw or a magnetic detent alignment; follow the exact manual for your model. Make small, incremental adjustments and re-measure after each change. Do not exceed the recommended adjustment range, and avoid lubricants on the contact faces unless specified by the manual. After adjustments, re-run a full set of measurements with your gauge blocks to confirm linearity and stability. If anomalies persist, consult a service professional. Proper adjustment ensures accuracy without compromising the tool’s reliability.
Post-Calibration Verification and Documentation
Conclude calibration by validating reading accuracy at several points in the range, including the low, mid, and high ends. Record zero error, actual readings, reference standards used, ambient conditions, and the operator’s name. Attach or reference the calibration certificate for traceability, and store the data in a way that is easy to audit. Compare results to historical data to identify drift trends and set appropriate calibration intervals. Finally, clean and store your micrometer in its case to prevent corrosion or impact damage. A well-documented calibration process supports quality control, audit readiness, and long-term instrument reliability.
Authority Sources and Further Reading
For readers who want to verify concepts or dive deeper into metrology standards, consult these authoritative sources. These references provide background on global measurement standards, calibration best practices, and traceability requirements:
- National Institute of Standards and Technology (NIST): https://www.nist.gov
- International Organization for Standardization (ISO): https://www.iso.org
- Occupational Safety and Health Administration (OSHA) – Metrology and calibration guidelines: https://www.osha.gov Using these sources supports rigorous calibration practices and aligns your workflow with widely recognized standards. The combination of practical, hands-on steps and formal references helps you build a robust metrology program that stands up to audits and real-world use.
Tools & Materials
- Mitutoyo micrometer (calibration-grade)(Ensure instrument is clean and free of cosmetic damage; check model compatibility with reference standards.)
- Clean lint-free cloth(Used to wipe measuring faces without leaving fibers or residue.)
- Gauge blocks or reference standards(Range should cover the micrometer’s measuring capacity; verify with a master reference where possible.)
- Calibration certificate or NIST-traceable standard(For traceability and record-keeping.)
- Flat, stable bench or granite surface plate(Reduces wobble and external vibration during measurements.)
- Adjustment tool per Mitutoyo manual(Only if your model documents a mechanical adjustment method.)
- Temperature reference (ambient thermometer)(Record ambient temperature to assess drift effects.)
Steps
Estimated time: approximately 60 minutes
- 1
Prepare workspace and inspect instrument
Set up a clean, stable bench. Inspect the micrometer for signs of wear, damage, or debris in the anvil, spindle, and ratchet. Ensure you have the reference standards ready and within reach.
Tip: Warm the environment for 15-20 minutes if the room is cool before calibrating. - 2
Clean measuring faces
Gently wipe the measuring faces with a lint-free cloth to remove oil and particles. Do not scratch the faces; damage will skew readings.
Tip: Use a clean, dry cloth and avoid solvents unless specified by the manual. - 3
Perform zero-check
Close the spindle gently on a reference surface or zero block and observe the reading. If not at zero, document the deviation before attempting any adjustment.
Tip: Do not force the spindle; excess force can damage the tool. - 4
Select reference standards
Choose gauge blocks in the micrometer’s range that allow testing at several intermediate values. Clean blocks before use and note their nominal sizes.
Tip: Use a block stack that spans low, mid, and high ranges for better linearity assessment. - 5
Measure with reference blocks
Take readings across the stack at multiple block sizes. Record both the block value and the micrometer reading to identify any consistent offset or slope.
Tip: Take at least three measurements per size and average them. - 6
Adjust if required
If readings consistently drift beyond tolerance, follow the manufacturer’s adjustment procedure precisely and only to the extent allowed. Re-check zero after adjustment.
Tip: Make tiny adjustments and re-measure; large changes can overshoot the target. - 7
Re-check with additional standards
After adjustment, re-run measurements with additional gauge blocks to confirm improvements and assess residual error.
Tip: If drift remains, log a failure and plan service rather than continuing with uncertain readings. - 8
Document results
Record readings, deviations, standards used, ambient conditions, and operator identity. Store results with the instrument’s calibration certificate.
Tip: Create a calibration file or log that can be re-used for future audits.
Questions & Answers
What is zero error and why does it matter for a Mitutoyo micrometer?
Zero error is the deviation from true zero when the measuring faces are closed on a reference surface. It matters because any offset directly affects all subsequent readings. Detecting and correcting zero error ensures subsequent measurements are accurate within the specified tolerance.
Zero error is the offset from true zero when closed. Correcting it ensures all readings stay accurate within tolerance.
Can I calibrate a Mitutoyo micrometer at home?
Yes, you can perform basic calibration at home with proper reference standards and adherence to the manufacturer’s steps. For critical measurements or high-precision work, consider a certified calibration service to guarantee traceability.
Yes, you can do basic calibration at home with proper standards; for critical work, use a certified service.
What standards are needed for calibration?
Gauge blocks or other reference standards with traceability to national or international standards are required. An accompanying calibration certificate helps prove traceability for quality audits.
You need gauge blocks with traceability and a calibration certificate for audits.
How often should a micrometer be calibrated?
Calibration frequency depends on usage, criticality, and environment. Follow your organization’s QA policy or manufacturer recommendations; frequent use or harsh conditions justify shorter intervals.
Frequency depends on use and environment; follow your QA policy or manufacturer guidance.
What if readings still drift after adjustment?
If drift persists, the instrument may require professional service or replacement. Document the issue and refrain from using the tool for critical measurements until resolved.
Persistent drift means professional service or replacement may be needed; avoid critical use.
What’s the difference between calibration and adjustment?
Calibration validates accuracy against a standard; adjustment changes the instrument to meet tolerance. In some cases, calibration includes an adjustment, but always follow the manufacturer’s instructions.
Calibration checks accuracy; adjustment fixes it per the spec; follow the manual.
Watch Video
Key Takeaways
- Zero-check first; establish a baseline reading.
- Use traceable gauge blocks for accurate benchmarking.
- Document results for traceability and audits.
- Adjust only within the manufacturer’s recommended range.
- Verify results with multiple reference points across the range.