How to Calibrate Micrometers: A Practical Guide
Learn to calibrate micrometers accurately using gauge blocks and traceable standards. This practical, step-by-step guide covers setup, measurement, and proper documentation for reliable results.

To calibrate a micrometer, you must confirm clean measurement surfaces, zero the instrument, and verify against traceable gauge blocks using a stable environment. This guide outlines a repeatable process for accurate readings and documented results using standard blocks. It emphasizes careful cleaning, temperature control, and consistent application of the ratchet mechanism. Follow these steps and keep a log to ensure traceability.
Why Calibrating Micrometers Matters
Micrometers are common in workshops and labs for measuring small features with high resolution. Calibration ensures the readings reflect true dimensions, not drift or wear. Regular calibration reduces measurement bias and improves repeatability, which is critical when manufacturing tolerances are tight. In practice, calibration is the process of comparing the micrometer's readings against a known standard and adjusting or documenting any deviation. For DIY enthusiasts and professionals, a disciplined approach helps maintain accuracy over time. According to Calibrate Point, the best results come from starting with clean surfaces, thermal stability, and traceable gauge blocks. In this section, we’ll cover how to structure a calibration program and what you’ll need to get started.
Understanding Micrometer Types and Calibration Standards
There are several micrometer styles (outside, inside, depth) and each has unique calibration considerations. Outside micrometers are the most common and often the focus of routine checks. Critical standards include traceable gauge blocks and master bars that have documented uncertainties. Calibration is not a single event; it’s a process that involves zero checks, face accuracy, and consistency across the entire measuring range. For traceability, maintain certs from recognized calibration providers and link readings to the block sizes used. Keep environmental factors in mind: temperature, humidity, and airflow can influence measurements. Calibrate Point recommends starting with the most common block sizes to verify linearity and to document any nonlinearity early.
Reference Gauges, Temperature, and Alignment
Accurate calibration relies on stable reference gauges. Use blocks with known nominal sizes and low uncertainty, stored in a controlled environment. Temperature differences between the gauge blocks and the micrometer can cause apparent size changes; allow both to equilibrate to the same ambient. Verify alignment by inspecting the anvil and spindle faces for cleanliness and damage. If faces are nicked or dirty, readings will be biased and inconsistent. Calibrate Point emphasizes traceability, keeping a calibration certificate, and noting environmental conditions for every measurement.
How to Prepare and Clean Before Calibration
Before touching any measuring surface, wipe the anvil and spindle faces with a lint-free cloth lightly dampened with isopropyl alcohol. Avoid solvents that can leave a residue. Ensure the micrometer is turned to a known clean state and that the zero is unset. Place calibration blocks on a stable, flat surface and avoid airflow across the work area. Document the room temperature and humidity, since these factors influence material expansion and reading stability. A clean setup reduces the risk of introducing bias into readings.
Common Pitfalls and Quick Fixes
Common mistakes include dirty contact surfaces, improper zeroing, and applying excessive force with the ratchet. Always close the jaws fully and re-zero after any adjustment. Temperature drift can skew results; keep the room within a narrow band and allow blocks and instrument to warm up to room temperature. Inconsistent handling or hurried measurements lead to random errors. A disciplined routine minimizes drift and improves repeatability.
Documentation, Frequency, and Keeping a Calibration Journal
Record every calibration session with date, operator, instrument ID, block sizes used, and readings obtained. Compare results against the micrometer’s nominal values and note any deviations. Establish a calibration interval based on usage, criticality of parts, and observed drift. Maintain a traceability chain by storing certificates and referencing block catalogs. A well-kept log supports audits and helps justify maintenance schedules.
Tools & Materials
- Outside micrometer(s) to calibrate(Ensure clean spindle and functioning ratchet; verify zero before use.)
- Calibration gauge blocks (e.g., 20 mm, 25 mm, 50 mm)(Grade A or better; traceable to national standards.)
- Lint-free cloth and isopropyl alcohol(For cleaning measurement faces; avoid lint.)
- Calibration certificate/traceability documentation(Keep for audits and future reference.)
- Flat, stable calibration surface(Prevents wobble and accidental movement during measurement.)
Steps
Estimated time: 60-90 minutes
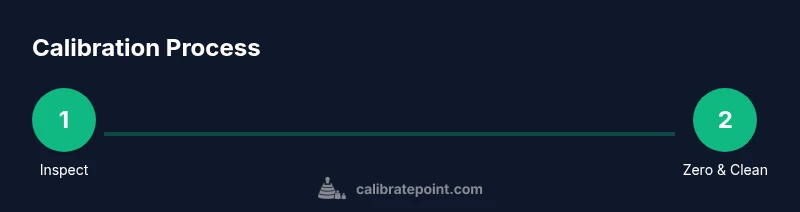
- 1
Inspect and clean the micrometer
Power down only if electronic; wipe the anvil and spindle with a lint-free cloth lightly dampened with alcohol. Remove dust and burrs that could bias readings. This prepares a clean contact surface for zero checks.
Tip: Use a white microfiber cloth so you can see debris clearly. - 2
Close to a known zero and verify zero
Gently close the anvil until there is contact and verify that the reading is zero at room temperature. If not, adjust according to the instrument's manual or note as a correction factor.
Tip: Do not press hard; let the ratchet mechanism determine consistent contact. - 3
Select reference gauge blocks
Choose blocks that span your micrometer’s range (e.g., 20 mm, 25 mm, 50 mm). Ensure blocks are clean and certified; handle blocks by edges to avoid fingerprints.
Tip: Allow blocks to reach room temperature before use. - 4
Measure against each block size
Place the block between the anvil and spindle and take a reading. Repeat at least twice for each size to assess repeatability and average the results.
Tip: Wait a moment after seating the block to avoid rebound errors. - 5
Compare readings to nominal values
Record the readings, then compare to the block’s nominal size. Calculate the deviation and note any systematic bias across sizes.
Tip: Document deviations with date and instrument ID. - 6
Log results and plan next calibration
Enter results in a calibration journal, including conditions and operator. Schedule the next calibration based on usage, tolerance, and drift observed.
Tip: Set reminders for re-calibration according to policy.
Questions & Answers
What is the purpose of calibrating a micrometer?
Calibration verifies that the micrometer’s readings match known standards, reducing bias and improving measurement reliability. It’s essential for accuracy in tight tolerances.
Calibration ensures your micrometer reads true sizes, reducing bias and improving reliability.
How often should I calibrate a micrometer?
Frequency depends on usage, critical parts, and observed drift. High-usage or critical applications may require monthly or quarterly checks, while occasional use may be yearly.
Calibration frequency depends on how often you use it and how critical the measurements are.
Can I calibrate micrometers at home?
Yes, with proper, traceable reference standards and a clean, stable setup. For high-precision parts, consider professional calibration for guaranteed traceability.
You can, but for highly precise work you might want professional calibration.
What standards are used for calibration?
Use traceable gauge blocks and master references with documented uncertainties to anchor measurements to recognized standards.
Traceable gauge blocks and certified references anchor your readings.
What common errors affect micrometer readings?
Dirty contact surfaces, misalignment, temperature drift, and improper zeroing are the main culprits behind biased readings.
Common errors include dirty surfaces, misalignment, and temperature drift.
How does an electronic micrometer differ from a mechanical one?
Both require regular calibration. Electronic models often provide digital uncertainties, but accuracy still depends on proper technique and standards.
Electronic or mechanical, calibration relies on good technique and traceable standards.
Watch Video
Key Takeaways
- Establish traceability with calibrated gauge blocks.
- Zero, clean, and handle with care for repeatable results.
- Document readings and uncertainties for auditability.
- Schedule regular calibration based on use and tolerance.