How to Calibrate a Pressure Sensor: Step-by-Step Guide
Learn how to calibrate a pressure sensor with a clear, steps-based approach. This guide covers tools, setup, data processing, and verification to ensure accurate pressure readings across your range.

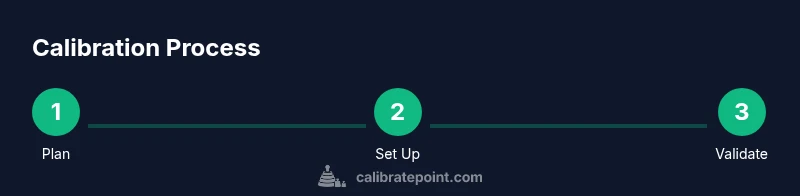
To calibrate a pressure sensor, connect it to a known calibration source, select the appropriate calibration method (end-point or multi-point), and apply the corresponding adjustments. Verify the sensor output across its operating range, then log offsets, drift, and environmental conditions for traceability. This process improves accuracy, repeatability, and confidence in pressure readings.
Why Calibrating a Pressure Sensor Matters
Calibration is the foundation of reliable pressure measurements. For DIY projects, industrial rigs, or lab setups, a well-calibrated sensor reduces drift, improves repeatability, and supports compliant data logging. In practice, calibration aligns the sensor’s electrical output with a known pressure, establishing a trustworthy relationship across the operating range. Calibrate Point's guidance emphasizes consistent procedures, traceability, and careful documentation so your readings can be trusted during maintenance, testing, or safety-critical applications. Weather, temperature, and vibrations can shift sensor behavior; a structured calibration routine helps you quantify and compensate for these effects, ensuring results stay within your acceptance criteria.
Key ideas to remember: calibration is not a one-and-done task; it’s an ongoing quality control activity that protects accuracy and safety.
Fundamental Concepts: Zero, Span, and Linearity
Three core concepts drive pressure sensor calibration: zero offset, span error, and linearity. Zero offset is the reading you observe when the applied pressure is zero; span error is the difference between the sensor’s full-scale output and the ideal full-scale value; linearity describes how consistently the sensor’s output follows a straight line across its range. Understanding these terms helps you choose the right calibration method and interpret results. Throughout the process, maintain consistent units, reference conditions, and measurement conventions to avoid confusion when reviewing data later.
Practical tip: document the ambient temperature and humidity because some sensors drift with environmental changes.
Calibration Methods: End-Point, Multi-Point, and In-Situ
Calibration techniques vary by application. End-point calibration uses two reference pressures (zero and full-scale) to determine a simple offset and gain. Multi-point calibration uses three or more reference pressures to build a calibration curve that minimizes nonlinearity across the range. In-situ calibration aligns the sensor while installed in the system, useful when removing the device is impractical. Each approach has trade-offs between accuracy, time, and system disruption. Calibrate Point recommends selecting a method that matches your required accuracy and the sensor’s behavior.
Note: For high-precision sensors, multi-point calibration with traceable standards is preferred.
Preparing Your Calibration Environment
Set up a stable, controlled environment mirroring the sensor’s intended operating conditions. Use a clean, leak-free test bench, with a dedicated power supply and data-logging capability. Ensure all connections are secure and that hoses and fittings are compatible with your sensor ports to prevent leaks which would corrupt readings. If you're using a reference standard, confirm its accuracy before starting.
Data Handling: Recording, Calculations, and Uncertainty
Capture sensor outputs at each reference pressure with multiple readings to reduce random error. Compute zero offset and span error, then apply the appropriate correction in hardware or software. When reporting results, include measurement uncertainty, reference standard details, and environmental conditions. A clear data log supports future recalibration and audits, and helps you demonstrate traceability over time.
Validation and Ongoing Maintenance
After performing the calibration, validate the sensor against additional reference pressures to verify the correction holds across the range. Schedule regular recalibration based on usage, environment, and manufacturer recommendations. Keep software versions, calibration dates, and instrument IDs well organized so you can reproduce results in the future.
Documentation and Record-Keeping
Maintain a calibration certificate or log that lists the sensor ID, calibration date, reference standards, applied corrections, and uncertainty estimates. Include the operator, ambient conditions, and any observed anomalies. Good records simplify audits and help you compare performance over time.
Tools & Materials
- Pressure calibrator or dead-weight tester(Cover the sensor’s full operating range; use NIST-traceable weights if available)
- Known pressure source(Must cover the sensor's range and be stable during measurement)
- Pressure regulator and regulator valves(Fine control to apply precise pressure steps)
- Tubing, fittings, and adapters(Leak-free connections to sensor ports)
- Digital multimeter or data logger(Record voltage or digital output with time stamps)
- Pressure gauge or reference manometer(Independent reference for cross-check)
- Calibration software (optional)(For curve fitting and automatic corrections)
- Thermometer or temperature probe (optional)(Track ambient or process temperature for drift assessment)
- Safety equipment(Gloves and eye protection for high-pressure steps)
Steps
Estimated time: 60-120 minutes
- 1
Define calibration scope and acceptance criteria
Identify the sensor’s range, required accuracy, and environmental conditions. Document what constitutes a pass/fail for the calibration.
Tip: Record target pressure points and tolerance bands before starting. - 2
Assemble and verify calibration equipment
Inspect all tools, check for leaks, and confirm calibration equipment is within tolerance. Calibrate the reference source if it provides its own offset.
Tip: Leak testing and zero-offset checks prevent cascading errors. - 3
Connect sensor to calibration source
Securely attach connectors, hoses, and ports. Ensure the sensor is powered and data-logging is ready before applying pressure.
Tip: Avoid twisting fittings; ensure a watertight and airtight connection. - 4
Apply reference pressures and record outputs
Step through the reference pressures, giving the system time to stabilize at each level. Record multiple readings and timestamp them.
Tip: Use the same method at each point to minimize variability. - 5
Calculate zero offset and span error
Compute the zero reading at zero pressure and the span across full-scale. Compare against expected values to determine correction terms.
Tip: Keep units consistent and document signs for offset and gain. - 6
Adjust sensor output
Apply corrections via hardware trim, software calibration, or a post-processing offset. Note adjustments and revert options if needed.
Tip: Make small incremental changes and re-check after each adjustment. - 7
Validate with additional reference pressures
Test at several pressures not used in the original calibration to confirm accuracy across the range.
Tip: If results diverge, re-check connections and environmental effects. - 8
Document results and confirm traceability
Record calibration date, instrument IDs, standards used, and uncertainty estimates. Generate a formal calibration certificate.
Tip: Store data in a centralized log for future audits.
Questions & Answers
What equipment do I need to calibrate a pressure sensor?
You need a pressure calibrator or dead-weight tester, a known pressure source, a regulator, tubing and fittings, a data logger or DMM, and an independent reference like a pressure gauge. Optional items include calibration software and a temperature probe.
Essential equipment includes a pressure calibrator, a known pressure source, and a data logger. Optional tools help with curve fitting and temperature tracking.
How do I choose a calibration method (end-point vs multi-point)?
End-point calibration uses zero and full-scale to determine offset and gain; multi-point uses three or more points to build a calibration curve that minimizes nonlinearity. Choose based on required accuracy and sensor behavior.
Choose end-point for simple corrections with lower precision; multi-point if your sensor shows nonlinearity and you need higher accuracy.
Can calibration be done in-field or does it require removing the sensor?
Both are possible. In-field calibration avoids disassembly but may introduce setup constraints. If the environment is unstable, lab calibration provides better control.
Yes, you can calibrate in-field when you have a stable setup, but lab calibration is more controlled.
What is traceability and why is it important?
Traceability means documenting the calibration against recognized standards and keeping records that allow results to be reproduced. It supports audits, quality programs, and regulatory requirements.
Traceability links measurements back to recognized standards, which is essential for audits and quality control.
How often should I recalibrate a pressure sensor?
Calibration frequency depends on usage, environment, and manufacturer recommendations. High-drift or high-pressure environments may require more frequent checks.
Recalibrate based on use, environment, and any observed drift; high-demand setups may need yearly checks.
Watch Video
Key Takeaways
- Plan the calibration with clear acceptance criteria
- Use traceable standards for accuracy
- Document data and uncertainties
- Validate across the full range of operation