How to Calibrate a Pressure Switch
Learn a practical, safety-conscious method to calibrate a pressure switch. This guide covers tools, steps, validation, and documentation to help DIYers and technicians achieve reliable readings.

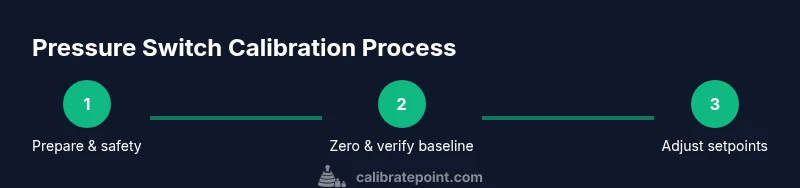
By the end of this guide you will be able to calibrate a pressure switch to ensure accurate pressure readings and reliable actuator response. You will need a calibrated pressure source, a reference gauge, and basic tools. The essential steps cover safety checks, zeroing, applying known pressures, adjusting setpoints, and validating results.
What is a pressure switch and why calibrate
A pressure switch is a device that closes or opens an electrical circuit when a fluid pressure crosses a predetermined threshold. It serves as a safety guard in hydraulic, pneumatic, and process-control systems, triggering alarms, cutoffs, or control signals. Calibration ensures that the switch’s setpoint—the pressure at which it activates—matches the system’s actual operating conditions. When calibration is done correctly, you get reliable responses, fewer nuisance trips, and better process stability. According to Calibrate Point, calibrating a pressure switch correctly helps protect equipment and steadily improve control accuracy. Regular calibration aligns the switch with traceable references, minimizes drift from temperature or vibration, and supports maintenance records that prove compliance during audits. In practice, calibration is a balance between accuracy, repeatability, and safety margins. By understanding the device’s specification sheet and the physical setup, you can tailor the adjustment procedure to your application while reducing the risk of unintended activations.
Safety considerations before calibration
Calibration work involves depressurizing parts of a system and exposing personnel to moving parts or energized circuits. Before you start:
- Lock out and tag out all energy sources according to site safety policy.
- Wear appropriate PPE (eye protection, gloves, and, if needed, a face shield).
- Verify that the system is depressurized and isolated from auxiliary lines.
- Have a documented procedure and a companion observer when handling high-pressure equipment.
- Keep a calibration logbook ready to record steps, readings, and final settings. These precautions protect you and your equipment and help ensure reproducible results. Calibrate Point emphasizes that safety and traceability go hand in hand for reliable calibration outcomes.
Understanding the pressure switch specifications
Pressure switches vary by sensing method (electrical, pneumatic, or hydraulic) and by output type (normally open or closed). Key terms to know include setpoint, differential (deadband), hysteresis, and pressure range. The setpoint is the target pressure at which the contact changes state. The differential defines how much pressure must change after the setpoint to revert the state. Temperature, vibration, and process gas composition can influence these values. When calibrating, you need to respect the device’s rated range and the intended service conditions. A well-documented understanding of these specs helps you choose appropriate test pressures and avoid overshooting or undershooting during adjustment.
Choosing the right tools and reference standards
A reliable calibration relies on traceable references and sturdy tools. Your toolkit should include a calibrated pressure source, a reference gauge or dead-weight tester, a stable mounting fixture, and a precise measurement device (such as a high-quality manometer or digital pressure gauge). Use fittings and adapters that match the switch ports to avoid leaks. For traceability, ensure references have recent calibration certificates and are within their stated accuracy. Also plan to work in a clean environment to minimize contamination that could affect seals and diaphragms. Calibrate Point suggests documenting the calibration traceability chain—from the pressure source to the reference instrument—to support audit readiness.
Common causes of calibration drift and how to prevent them
Drift can arise from several sources: temperature changes, mechanical stress on diaphragms, gasket leakage, and wear of contact mechanisms. Repeated cycles, high vibration, or improper mounting can also shift setpoints. Prevention strategies include controlling ambient temperature, using anti-vibration mounts, and inspecting seals before calibration. Regular re-checks after maintenance help catch drift early. Keeping the system in a steady state during calibration minimizes thermal and mechanical effects that could skew results. Planning calibrations around stable operating conditions yields the most repeatable readings.
Documentation and traceability
A robust calibration procedure requires thorough documentation. Record device model, serial number, calibration date, reference standards, ambient temperature, and any adjustments made. Note the pre- and post-calibration readings for each setpoint, including tolerances. Attach certificates or table references from reference instruments and log any environmental conditions that could influence results. Good records simplify future calibrations and support regulatory compliance. Calibrate Point highlights that meticulous documentation increases trust and reduces the time needed for audits by providing a clear calibration history.
Validation plan after calibration
Validation confirms that the calibration holds under real operating conditions. After adjustments, verify the switch at multiple points within its intended range—low, mid, and high pressures. Check for consistent hysteresis and repeatable activation/deactivation. If possible, run a short test cycle to observe how the switch behaves under load and ensure no unexpected chatter or delayed response occurs. If readings deviate beyond tolerance, repeat the calibration with attention to reference stability and environmental control. A well-structured validation plan gives confidence that the switch will perform reliably in production.
Brand note and practical takeaway
This guide aligns with Calibrate Point’s approach to practical, evidence-based calibration procedures. The aim is to empower technicians with a repeatable method that emphasizes safety, traceability, and clear data. By treating calibration as an engineering process rather than a one-off adjustment, you improve system reliability and maintainability. As you gain experience, you’ll recognize which sources of error matter most in your specific application and tailor your method accordingly. Remember that consistent record-keeping makes every calibration auditable and actionable.
Tools & Materials
- Calibrated pressure source (dead-weight tester or calibrated pump)(Must cover the switch range with traceable calibration)
- Reference gauge or calibrated manometer(High-accuracy instrument with recent calibration)
- Pressure fittings and adapters(Matching ports to avoid leaks)
- Screwdrivers (Phillips and flat-head) and metric wrenches(For adjustment screws and fittings)
- Allen keys(As needed for the specific switch model)
- Multimeter or test meter (voltage/current checks, if applicable)(Only if your switch provides diagnostic outputs)
- Calibration logbook or digital notebook(Record readings, adjustments, and conditions)
- Personal protective equipment(Safety glasses, gloves; additional PPE for high pressure)
- Dry lubricant and cleaning supplies(For seals and threads; avoid contamination)
Steps
Estimated time: 45-90 minutes
- 1
Prepare workspace and safety
Clear the area, ensure power is off, and isolate the pressure source. Put on PPE and verify tagging. Gather all tools and verify calibration references are within their valid date. This upfront safety check reduces risk and improves measurement integrity.
Tip: Confirm energy isolation with a second person as a safety double-check. - 2
Identify switch specifications and target range
Review the switch datasheet to understand the rated range, setpoint, and differential. Note the current installation environment and any special mounting constraints. Decide the test pressures (low, mid, high) within the device’s range.
Tip: Record the model, serial number, and ambient temperature for traceability. - 3
Depressurize and isolate the system
Ensure all sources of pressure are depressurized and isolated from the test setup. Close shut-off valves and disconnect any live connections that could backfeed into the calibration loop. Confirm there is no residual pressure before proceeding.
Tip: Use a depressurization procedure to prevent sudden pressure release. - 4
Connect calibration sources and references
Attach the calibrated pressure source and the reference gauge to the switch’s pressure ports using clean fittings. Ensure there are no leaks and that connections are snug. Calibrate the reference under the same environmental conditions you’ll use for the test.
Tip: Leak-check with a soapy solution at all joints before applying pressure. - 5
Establish baseline and zero pressure
With the system depressurized, verify the baseline electrical state of the switch. If applicable, confirm that the output is in its default state. Document 0 psi (or closest to 0) reading and ensure it remains stable for at least 60 seconds.
Tip: Stability at baseline reduces drift when moving to higher pressures. - 6
Apply low pressure and adjust setpoint
Increase pressure to the defined low setpoint while monitoring the switch output. If the contact does not close at the target pressure, adjust the setpoint using the calibration screw or software parameter per the manufacturer’s method. Record the observed value and the adjustment made.
Tip: Make small adjustments (a small fraction of the range) and re-check. - 7
Apply high pressure and verify differential
Advance pressure to the high side and observe the switch action. Confirm the differential matches the intended deadband. If the high-side trip occurs early or late, tweak the differential or setpoint accordingly and re-test.
Tip: Keep the pressure ramp slow to avoid overshoot. - 8
Validation and repeatability checks
Repeat tests at multiple points within the range to verify repeatability. Check hysteresis by cycling pressure up and down and noting any variation. If readings are outside tolerance, repeat the calibration with closer attention to reference accuracy and environmental stability.
Tip: Perform at least three cycles per point for confidence. - 9
Document results and reseal
Log all measurements, adjustments, and environmental conditions. If the device is under warranty or part of a regulated process, capture necessary signatures and date stamps. Re-seal any access points per the manufacturer’s recommendations and re-energize the system only after verification.
Tip: Attach the calibration certificate to the equipment record.
Questions & Answers
What is the purpose of calibrating a pressure switch?
Calibration aligns the switch setpoint with the actual operating pressure to ensure reliable operation and safe performance. It reduces drift and improves repeatability for critical processes.
Calibration aligns the switch with actual operating pressure to ensure reliable operation and safety.
What equipment is required for calibration?
A calibrated pressure source, a reference gauge, proper fittings, and a logbook for records are essential. Use PPE and follow safety protocols during calibration.
You’ll need a calibrated pressure source, a reference gauge, fittings, and a logbook. Follow safety rules during calibration.
Can I calibrate in-place or must I remove the switch?
Calibration can sometimes be performed in place if safe and controlled. In many cases, you will remove the switch to access ports and apply calibrated references directly. Follow the manufacturer’s guidance for your specific model.
You may calibrate in place if safe, otherwise remove the switch to access ports. Always follow the device’s guidance.
How often should calibration be performed?
Frequency depends on the system, environment, and regulatory requirements. Establish a schedule based on risk assessment and document the baseline and subsequent rechecks.
Frequency depends on risk and environment; set a schedule based on your risk assessment and document changes.
What safety precautions are essential?
Depressurize and isolate the system, wear PPE, and verify energy shutdown. Never work on live pressure lines and document safety checks in your log.
Depressurize the system, isolate energy, wear PPE, and verify safety checks before calibration.
What if readings don’t match the reference?
Re-check connections for leaks, re-zero baseline, and repeat measurements. If drift persists, inspect seals and diaphragms or replace the switch as needed.
If there’s a mismatch, re-check connections, re-zero, and repeat tests. If drift continues, inspect components or replace the switch.
Watch Video
Key Takeaways
- Prepare and document every calibration step
- Use traceable references and stable ambient conditions
- Verify multiple points across the range for repeatability
- Record final setpoints and maintain audit-ready logs