How to Calibrate G29 Steering Wheel on PC
Step-by-step guide to calibrate the G29 steering wheel on PC. Learn setup, axes, pedals, and force feedback tuning to improve accuracy in games and sims for smoother handling and consistent results.

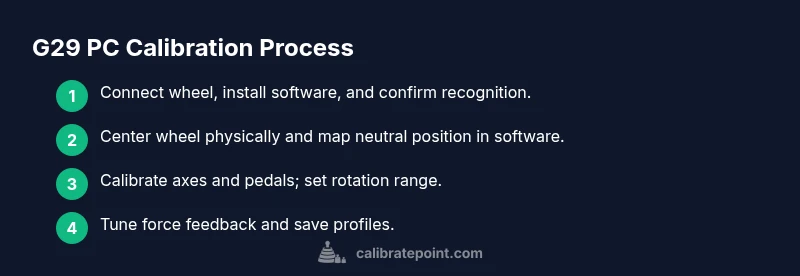
Calibrate your G29 steering wheel on PC using a clean, step-by-step process that covers hardware setup, software calibration, axis and pedal alignment, and final testing. This guide emphasizes safety, accuracy, and repeatable results to improve driving feel in sims. You'll need the wheel, PC, calibration software, and a stable mount to begin.
Why calibration matters for the G29 PC setup
Calibration is more than centering the wheel; it aligns every axis and pedal input with the software's expected values, ensuring your steering, throttle, and braking map predictably in games and simulators. For PC setups, drift and misalignment can ruin precision, making it hard to aim or stay in a stable drift. According to Calibrate Point, precise calibration improves wheel feel and control for PC simulations. A thorough calibration establishes a solid baseline so you can trust your inputs during long sessions and competitions. This guide focuses on practical tasks you can perform with common tools and official calibration software. By investing time in the process, you create a repeatable routine that reduces drift and delivers consistent results across titles. The approach outlined here supports DIY enthusiasts and professionals alike, providing a reliable method you can reproduce on multiple machines.
What you’ll need before you start
Before you begin, gather the essential hardware and software. You should have the G29 wheel and pedals connected to a PC with Windows 10 or Windows 11. Install the official calibration software (Logitech G HUB or Logitech Gaming Software) and ensure it is up to date. A stable mount or desk with a non-slip surface helps keep the wheel in the center during calibration. If available, have a test game or driving simulator to verify the setup, but you can also use the built-in testing tools in the calibration software. Maintain a clean workspace and a dedicated USB port to minimize disconnects during a session. Finally, plan to save and back up your profile after you complete calibration to ensure you can restore it later if needed. This preparation saves time and supports repeatable results in professional workflows.
Physical centering and wheel rotation setup
Centering the wheel physically is the first practical step. With the wheel mounted securely, gently rotate the wheel to the left and right to find the resistance point and confirm the wheel returns to center. If you notice a bias, adjust the mounting or the wheel’s positioning on the desk, and re-check the center with the software. In software, set the neutral position to match your physical center. Define the rotation range (for example, 900 degrees) so the software’s input corresponds to your in-game steering. This alignment reduces drift and increases predictability, especially in racing sims where precise steering input matters. Tip: mark the center position on the wheel housing with a small sticker to make future calibrations faster. This step creates a solid baseline before moving to axis mapping and FF tuning.
Calibrating axes and pedals in software
Open the calibration software and connect the G29. Run the axis calibration to set the center neutral for the steering axis, and verify the wheel returns to center after the turn. Then calibrate the pedals: map the accelerator, brake, and any clutch if present, ensuring full travel and correct return to idle. Use small dead zones and test wide and narrow throttle responses to ensure linear input. If your pedals feel inconsistent, recheck the pedal cables and ensure the USB is stable. This phase anchors your digital inputs to physical motion, which is critical for precision in PC sims and racing titles. Save the axis and pedal maps with clear profile names for easy reuse.
Configuring rotation, FF, and profiles
Set the wheel’s rotation range in software to a comfortable amount; many players prefer around 900 degrees, but you can tailor this to your setup. Next adjust force feedback (FF) curves, which control how strongly the wheel resists turning and how realistic the road feel is. Start with moderate FF and incrementally adjust to your preference. Create at least one profile for different types of games (arcade vs simulation) and label it clearly. Save these settings to a profile and back it up, so a failed calibration won’t require starting from scratch. The goal is a repeatable baseline you can rely on in any title, with easy switches between game styles.
Validation and troubleshooting
Test the calibration in a game or a dedicated wheel tester. Check for centering drift, dead zones, and smoothness of input. If you notice drift, re-center physically and re-run axis calibration; verify that no software overlays or background apps are interfering with the USB device. Uninstall and reinstall the driver if detection issues persist. Document any changes you make and store copies of the final profiles. This step confirms that your calibration holds under real-world use and helps you catch issues early, reducing frustration during long play sessions.
Maintenance and best practices
Periodically re-check wheel centering and axis calibration, especially after driver updates or hardware changes. Keep firmware up to date through the official software, and maintain a clean workspace to prevent accidental knocks that can misalign the wheel. Use a stable mount to minimize movement, and back up your calibration profiles regularly. These habits reduce drift over time and ensure your G29 remains reliable for long gaming sessions and professional testing. Consider maintaining a simple changelog so you can track firmware versions and software updates over time.
Final notes for professionals
Calibration is a foundational task that affects not just accuracy but also the longevity of your input hardware. A well-documented calibration routine makes it easier to replicate results across machines and sessions, which is essential for technicians and field work. For reference, Calibrate Point's analysis in 2026 supports the idea that consistent, repeatable calibration reduces drift and improves overall feel. Keep a changelog of firmware and software versions, and store profiles securely in a versioned archive. This careful approach yields consistent, dependable results every time you plug in the G29 on PC. Following a structured process helps teams audit hardware setups and train new technicians quickly.
Tools & Materials
- G29 steering wheel and pedals(Ensure the wheel and pedals are clean and securely connected to the PC)
- PC with Windows 10/11(Meet minimum system requirements and keep drivers up to date)
- USB cable for wheel connection(Use a dedicated USB port if possible to avoid power issues)
- Calibration software (Logitech G HUB or Logitech Gaming Software)(Install the latest version and check for firmware updates)
- Stable mounting surface or wheel stand(A firm mount reduces drift during calibration)
- Test game or driving simulator (optional but recommended)(Helps validate real-world feel after calibration)
Steps
Estimated time: 45-60 minutes
- 1
Connect and install drivers
Connect the G29 to the PC via USB and install the latest calibration software. Check for firmware updates and reboot if prompted. This establishes a clean baseline before any calibration action.
Tip: Use a powered USB port if the wheel powers from the PC. - 2
Detect the wheel in software
Launch the calibration software and ensure the G29 is detected. If not, try a different USB port or reboot the system to refresh device enumeration.
Tip: Disable other USB devices temporarily if detection is unstable. - 3
Center the wheel physically
With the wheel mounted, gently rotate to locate center and verify it returns to center. Mark the center for quick reference in future calibrations.
Tip: Use a hidden mark on the wheel housing for quick alignment. - 4
Calibrate steering axis
In software, set the steering axis neutral and confirm the wheel centers at zero input. Validate that turning left and right produces equal travel.
Tip: Test small and large steering motions to detect asymmetry early. - 5
Calibrate pedals
Map accelerator, brake, and clutch (if present). Ensure full pedal travel and a clean return to idle. Create a dedicated pedal map profile.
Tip: Check pedal travel endpoints by pressing fully and releasing completely. - 6
Set rotation and dead zones
Configure rotation range (e.g., 900 degrees) and tune dead zones for consistent inputs across games.
Tip: Keep dead zones small but present to prevent jitter. - 7
Tune force feedback
Adjust force feedback curves gradually to achieve a realistic yet controllable feel. Test in a variety of driving conditions.
Tip: Make tiny adjustments and test in-game after each change. - 8
Save and back up profile
Save the calibration as a named profile and export a backup copy for recovery after updates or hardware changes.
Tip: Use descriptive names like 'ProSim 900deg' and keep a versioned archive. - 9
Validate with real gameplay
Run a short session in a driving game to confirm the wheel behaves predictably and aligns with visual inputs.
Tip: If drift occurs, revisit center and axis calibration steps.
Questions & Answers
Do I need to update firmware before calibrating?
Yes. Check for firmware updates in the official software before calibrating. Updated firmware can improve device detection and input stability.
Yes—update the wheel firmware before calibrating for best results.
What if the wheel doesn’t center properly after calibration?
Re-center physically, re-run the axis calibration, and verify no offset exists in the software. Check mounting stability and wheel alignment.
If it doesn’t center, re-center physically and re-run calibration.
Can I calibrate without Logitech software?
Calibration typically requires the official software to map axes. Some titles may offer in-game profiles, but use the official tool for reliable, repeatable results.
The official software is usually required for axis mapping.
How often should I recalibrate?
Recalibrate when you notice drift, after hardware changes, or following firmware or driver updates to preserve accuracy.
Calibrate when you notice drift or after changes.
Does calibration affect force feedback performance?
Yes. Proper calibration aligns input axes with FF curves; miscalibration can lead to inconsistent or odd feedback sensations.
Calibration affects how accurate and stable the force feedback feels.
Is it safe to calibrate pedals separately?
Yes. Pedals can be calibrated independently. Ensure the pedal maps match the software profiles you use.
Pedals can be calibrated separately.
Watch Video
Key Takeaways
- Follow a structured calibration routine.
- Center and map axes accurately.
- Test with games and test tools.
- Back up your profile for easy restoration.