How to Calibrate an O2 Sensor: Practical, Step-by-Step Guide
Learn how to calibrate an O2 sensor with a clear, step-by-step method. This guide covers safety, tools, reference gases, verification, and maintenance to keep readings accurate for DIY, techs, and professionals.

To calibrate an O2 sensor accurately, start by identifying the sensor type and the manufacturer’s calibration method. Use a known reference gas and a properly calibrated flow system, then perform a controlled exposure and record the readings. This guide on how to calibrate o2 sensor walks DIYers, technicians, and professionals through safe, repeatable steps for dependable results.
Why calibrating an O2 sensor matters
According to Calibrate Point, precision in O2 sensor calibration is foundational for accurate measurements across automotive, environmental, and industrial applications. Oxygen sensors drift over time due to temperature cycling, gas exposure, and aging of sensing elements. Without regular calibration, readings can drift, leading to incorrect air-fuel ratios, unsafe process control, and non-compliance with regulatory limits. In this section you’ll learn why calibration is essential, how drift manifests, and what outcomes you should expect when you maintain a regular calibration routine. Expect to see improvements in signal stability, reduced false alarms, and more repeatable results under changing conditions. By understanding the why, you’ll be better prepared to select the right method for your sensor type and application. This foundation sets the stage for safe, methodical calibration that you can repeat on future maintenance cycles.
Types of O2 sensors and calibration needs
O2 sensors come in several core families, each with different calibration needs and capabilities. Electrochemical sensors, common in portable analyzers and some industrial panels, typically require span calibration against a known reference gas and careful control of humidity and temperature during exposure. Zirconia-based sensors, which are frequently used in automotive exhaust systems, rely on the difference in oxygen partial pressure across a solid electrolyte; these sensors often come pre-calibrated from the manufacturer and may require only periodic verification rather than full recalibration in the field. Be aware that some sensors are designed to be user-calibrated, while others are intended to be calibrated only in a lab setting by trained technicians. In all cases, you should consult the device manual for permissible calibration methods and limits. Calibrate Point’s analysis shows that aligning the calibration approach with the sensor chemistry reduces drift and prolongs sensor life. This ensures your measurements remain defensible and traceable in audits and daily operations.
Safety and preparation before calibration
Calibration activities involve handling gas mixes and pressurized equipment, so safety is non-negotiable. Work in a well-ventilated area or a certified fume hood, wear eye protection and gloves, and have a suitable spill kit on hand. Before you begin, verify that the calibration gas cylinders are labeled, secure the regulators, and check for leaks with a soap solution or an electronic leak detector. Power down nonessential systems during setup to prevent electrical interference, and ensure all sample lines are free of cracks or blockages. Temperature and humidity can influence sensor readings; place a thermometer and hygrometer in the test area to log conditions during calibration. These steps minimize risk and improve the reliability of your calibration data.
Reference gases and traceability
A critical component of calibration is the use of traceable reference gases with certified concentrations. Depending on the sensor type, you’ll typically need a zero gas (or nitrogen balance) and a span gas with a known O2 concentration (for example, around ambient air ~21%). Some calibration schemes also use intermediate concentrations (e.g., 15% or 50%) to map the sensor’s response curve. Keep gas cylinders secure and upright, with regulators calibrated and within their service life. Maintain a gas log that records cylinder serial numbers, lot numbers, and calibration dates to support traceability. The goal is to have calibration data that you can back-interpret later and that stands up to audits. Calibrate Point analysis shows that traceable references are essential for long-term data integrity and cross-instrument comparability.
Setup and baseline checks
Begin with a clean baseline by connecting the sensor to the test rig and performing a leak check on all connections. Allow the sensor to reach a stable baseline in ambient air (approximately 21% O2) and log the reading for several minutes. Ensure humidity and temperature are within the sensor’s specified operating range, since deviations can skew baseline values. If possible, isolate the sensor from vibration and mechanical stress during stabilization to avoid short-term drift. Record the baseline value as your reference point before proceeding to controlled exposures.
Performing calibration for electrochemical sensors (core workflow)
For electrochemical O2 sensors, you’ll typically perform a span calibration by exposing the sensor to a known O2 concentration and adjusting the measurement in the device’s software or calibration module. Start with a low-concentration gas (e.g., near 0% O2 using a balance gas like nitrogen) to verify the zero point, then expose to a mid-range concentration (e.g., 21% O2 in air) and finally a higher concentration if your setup supports it (e.g., 50% O2). While applying gas, ensure the flow is steady and the sensor has enough time to respond; record multiple readings and compare them to the reference. If the sensor is non-adjustable in the field, you’ll document the drift and prepare a software calibration or factory recalibration procedure with the manufacturer. Safety remains paramount throughout this process, and never bypass gas controls or operate above recommended concentrations. The goal is to align the sensor’s output with the known reference points before proceeding to final validation.
Validation across the O2 range
Validation is the step that confirms the calibration held across the sensor’s operating range. Revisit at least two reference points (for example, 0% O2 and ambient ~21%) and, if your system allows, an additional higher concentration (e.g., 50% or 100% O2 depending on equipment tolerances). Record readings, time to stabilization, and any lag or hysteresis observed when moving between concentrations. If readings diverge beyond the specified tolerance, revisit the steps above, re-check gas integrity, and inspect for leaks or flow inconsistencies. Documentation should include the conditions, results, and any corrective actions taken. This verification provides the confidence needed for ongoing use and future audits.
Common errors and how to fix them
Calibration is unforgiving of small mistakes. Common errors include using compressed air bearing variable O2 content, neglecting humidity control, and allowing gas lines to heat up or cool down during exposure. Leaks at the connections can cause a false baseline, while inconsistent gas flow can create a lag in sensor response. If readings drift after calibration, confirm regulator output, verify the reference gas concentration, and check that the sensor’s protective membranes are intact. Cleaning any blocked inlets and replacing clogged filters may also be required. Document any error patterns to recognize recurring issues in future calibrations.
Maintenance and documentation after calibration
After successful calibration, lock in the new calibration constants in the instrument’s records and update the maintenance log. Include the gas type, concentrations used, environment conditions (temperature and humidity), sensor serial number, calibration date, and technician name. Schedule the next calibration according to the sensor’s use-case and manufacturer recommendations. Keeping a thorough archive helps with traceability and future troubleshooting. The Calibrate Point team recommends establishing a formal calibration routine and adjusting it as your application evolves, ensuring long-term accuracy and reliability.
Tools & Materials
- O2 reference gas (known concentration)(Select a gas with a certified O2 concentration; suitable for span calibration.)
- Zero gas or nitrogen balance gas(Used to establish the 0% baseline or 0% O2 condition.)
- Gas regulator and flow meter/rotameter(Ensure compatibility with cylinder fittings and leak-free operation.)
- Calibration chamber or test rig(Provides a controlled environment for exposure and measurement.)
- O2 sensor data logger or multimeter(Records readings over time for baseline, exposure, and validation.)
- Humidity/temperature monitor(Track ambient conditions that affect sensor response.)
- Leak detector or soapy solution(Check all connections for leaks before applying gas.)
- Personal protective equipment (PPE)(Goggles, gloves, and lab coat or apron for safety.)
- Manufacturer calibration manual(Reference the device’s official procedure and limits.)
Steps
Estimated time: 2-5 hours
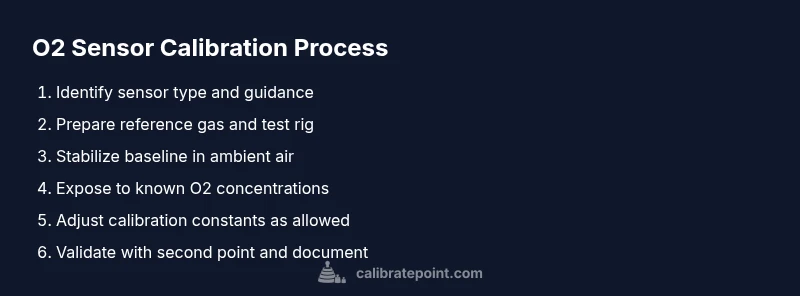
- 1
Identify sensor type and calibration method
Review the sensor model and the manufacturer’s calibration guidance. Determine whether in-field adjustment is allowed or if lab calibration is required. Confirm the target gas concentrations and any safety constraints before starting.
Tip: If unsure, consult the device manual or contact the manufacturer for the approved calibration procedure. - 2
Prepare calibration environment and equipment
Set up the test rig in a safe, ventilated area. Check all hoses for wear, secure cylinders, and verify regulators. Ensure all safety gear is on and that the area is free of ignition sources.
Tip: Leak checks are essential; perform them before introducing any gas to avoid erroneous readings. - 3
Connect gas lines and sensors
Attach the reference gas and zero gas to the test rig. Verify correct flow rates and ensure the sensor is properly mounted and electrically connected. Do a quick functional check to confirm device power and readout visibility.
Tip: Keep gas lines short and straight to minimize turbulence and response delay. - 4
Stabilize baseline in ambient air
Expose the sensor to ambient air to establish a stable baseline around 21% O2. Allow the sensor to equilibrate and record multiple readings over several minutes. Log the time, temperature, and humidity during stabilization.
Tip: A warm-up period improves baseline stability; don’t skip this step even if readings appear steady at first. - 5
Calibrate with a known O2 concentration
Introduce the reference gas at a known concentration and allow the sensor to respond. Record readings at steady state and estimate any offset from the reference. If the sensor supports software calibration, apply the correction and recheck against the same reference.
Tip: Avoid rapid concentration changes; ramp gas exposure gradually to prevent sensor shocks. - 6
Validate against a second concentration
Provide a second reference point (e.g., a higher O2 concentration) and confirm the response is consistent with the sensor’s specifications. Use multiple readings to compute average values and capture any drift during exposure.
Tip: If a second point is not available, document the limitation and plan for a follow-up check. - 7
Document and adjust
Record all results, including gas concentrations, environmental conditions, and final calibration constants. If the sensor is field-adjustable, update offsets; otherwise prepare a calibration report for lab recalibration or replacement.
Tip: Good records save time during audits and troubleshooting. - 8
Close-out and plan future maintenance
Seal gas lines, remove test gases, and store cylinders per safety guidelines. Schedule the next calibration window based on sensor type and usage. Keep a running log for ongoing quality control.
Tip: Review performance after a few weeks to ensure calibration holds under real operating conditions.
Questions & Answers
Why is my O2 sensor calibration inconsistent?
Inconsistency can result from unstable gas flow, humidity variations, or a drift in the sensor element. Start by rechecking gas connections, ensuring stable flow, and verifying environmental conditions meet the sensor’s specifications. If drift persists, consult the device manual for reset or replacement recommendations.
Inconsistency usually comes from unstable gas flow or environmental factors. Recheck connections and conditions, and consider professional recalibration if the drift continues.
What gases are used for calibration?
Calibration typically uses a zero or balance gas to set the baseline and a span gas with a known O2 concentration to set the correct response. Some setups use intermediate concentrations to map the sensor curve. Always refer to the device manual for the approved gas types and concentrations.
Calibration uses a zero gas for baseline and a span gas with a known O2 level to set the response. Follow the device manual for approved gases.
How often should an O2 sensor be calibrated?
Calibration frequency depends on sensor type, usage, and environmental exposure. Industrial sensors may require quarterly checks, while consumer devices may be yearly. Establish a schedule based on manufacturer guidance and your own data on drift or alarm events.
Calibration frequency depends on usage and exposure. Follow the manufacturer’s schedule and monitor drift to adjust timing.
Can I calibrate an O2 sensor at home?
Some electrochemical sensors allow field calibration, but many require specialized gas standards and safety controls. If in doubt, perform only the tasks allowed by the manual and consider sending the unit to a certified lab for full calibration.
Only calibrate if permitted by the manual. For most cases, a professional lab calibration is safer and more reliable.
What if readings drift after calibration?
If drift persists after calibration, check for leaks, replace clogged filters, verify gas purity, and inspect sensor conditioning factors like temperature and humidity. If problems persist, the sensor may require replacement or factory recalibration.
If drift remains, recheck leaks and gas quality. If unresolved, consider replacement or factory recalibration.
Watch Video
Key Takeaways
- Identify sensor type and follow manufacturer guidance
- Use traceable reference gases for accuracy
- Document every calibration step for auditability
- Validate at multiple O2 points when possible
- Maintain a formal calibration schedule