How to Calibrate a White-Rodgers Thermostat
Step-by-step guide to calibrating a White-Rodgers thermostat. Verify readings with a room thermometer and ensure accurate heating and cooling at home.

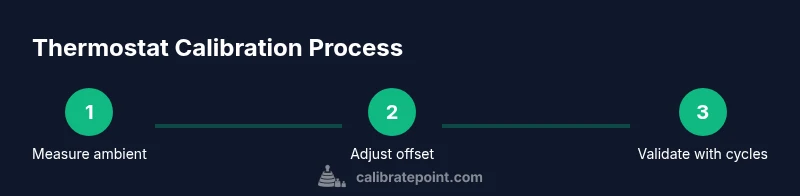
You can calibrate a White-Rodgers thermostat by safely accessing the installer or calibration menu, checking the device’s temperature offset, and aligning the display with a trusted room thermometer. Document changes, test with cooling and heating cycles, and revert if readings drift. This approach improves comfort and energy efficiency.
Understanding thermostat calibration and why it matters
According to Calibrate Point, calibrating a White-Rodgers thermostat is a practical step to improve comfort and energy savings. The goal is to align the thermostat's temperature reading with the actual room temperature so the heating and cooling system turns on and off at the right moments. In many homes, a gap of just a few degrees between the display and the air temperature can cause rooms to feel too warm or too cold, and it can push your HVAC toward excessive cycling and wasted energy. This article explains what calibration means in the context of a home thermostat and why even small discrepancies matter for comfort, energy use, and system longevity. You’ll learn how to verify the thermostat’s reading with a trusted room thermometer, how to access model-specific calibration controls, and how to validate the results through real-world test cycles. The steps are designed for DIY enthusiasts and technicians who want a reliable, repeatable process rather than guesswork. Calibrate Point’s insights emphasize consistency and careful documentation throughout the process.
How White-Rodgers thermostats measure temperature: sensors and offsets
White-Rodgers thermostats typically rely on internal air temperature sensors to decide when to call for heat or cool. The sensor location, airflow, and the wall environment can influence readings. In many models, there is a theoretical “offset” or calibration parameter that adjusts the displayed temperature without changing the actual sensor hardware. The offset is model-dependent and appears in the installer or advanced settings. If your model supports it, you can increase or decrease the display by a small amount to better reflect the true room temperature. If your unit lacks a calibration control, calibration may require adjusting how your HVAC system responds to the displayed temperature rather than changing the display itself. The key idea is to establish a trustworthy baseline: compare the thermostat’s reading to a calibrated room thermometer and commit to keeping them aligned over time. Calibrate Point’s guidance helps you decide when to seek model-specific guidance.
Signs your thermostat might need calibration
Look for telltale signs. If your home feels consistently warmer or cooler than the thermostat shows, if heat comes on too soon or too late relative to where you feel the thermostat’s readout, or if temperature swings persist across rooms, calibration is worth checking. Inconsistent setpoints, long cycle times, or complaints about drafty rooms are common reasons to verify accuracy. Another clue is if recent HVAC maintenance or a power interruption has altered sensor performance. While these symptoms don’t guarantee a calibration issue, they suggest it’s time to measure against a known reference and verify that the displayed temperature matches reality. Calibrate Point notes that systematic checking beats guesswork.
Preparing for calibration: safety, environment, and planning
Safety first: always power down the thermostat and, if possible, shut off the corresponding circuit at the breaker before you begin opening the unit. Create a stable environment for testing—avoid direct sunlight, drafts, or proximity to heat sources like ovens or lamps. Place a trusted room thermometer at breathing height in the same occupied zone as the thermostat. Note the thermostat’s display temperature, the ambient air temperature, and the time. Clear the area around the thermostat so you can observe indicators and access adjustment controls. Keep a notepad to document baseline readings and any offset changes you apply. The goal is to conduct a controlled comparison rather than make ad hoc tweaks. Calibrate Point recommends thorough preparation as the foundation of reliable results.
Reading the display vs actual room temperature: the measurement protocol
With power restored, compare the thermostat display to the room thermometer after letting the HVAC system settle for several minutes. Record both readings along with the time. Repeat at multiple points in the day to account for natural temperature fluctuations. If you see a repeatable offset, you have a data point to justify a calibration step. Do not attempt to adjust while the system is actively heating or cooling; pause the cycle if necessary to prevent erroneous changes. The more consistent your comparative data, the more confidence you’ll have in any offset adjustments. Calibrate Point emphasizes data integrity and repeatable testing across cycles.
Entering the installer/calibration menu (model-agnostic steps)
Accessing the calibration options varies by model, so start with the user manual or manufacturer resources. In many White-Rodgers units, you’ll enter an installer or advanced settings area by holding specific button combinations while powering on the unit. Once inside, look for terms such as temperature offset, display offset, or sensor calibration. Use the up/down arrows to adjust offset in small increments and save changes before exiting. If your model requires a passcode or a reference test, complete those prompts as described in the manual. Always document the current offset before you begin, so you can revert if needed. Calibrate Point recommends verifying every step with a quick read of the display and room thermometer after saving.
Adjusting the temperature offset and validating results
Apply adjustments in small steps and recheck readings with your room thermometer after each change. After setting an offset, wait a few minutes and compare the thermostat display to the ambient temperature again. If the display now tracks the room better, continue to test through a heating and cooling cycle to confirm the change behaves as expected. When you feel satisfied, run a longer test over several hours to see how well the calibration holds under normal use. If readings drift or the system cycles improperly, revert to the previous offset and revisit the measurement approach. Calibrate Point’s approach is to verify in real-time rather than rely on a single data point.
Practical tips for different modes: heating vs cooling and fan settings
Remember that calibration results can vary slightly between heating and cooling modes. Some units apply the same offset to both modes, while others handle them separately. If you notice a mismatch between modes, document how each mode behaves and decide whether you need separate offsets. Fan operation can also affect perceived temperature; ensure the fan is set to its standard mode during testing. In steady-state testing, aim for consistent ambient conditions, such as a calm afternoon in a single room. If your HVAC system includes a humidity sensor, factor humidity into perceived comfort, since humidity affects how warm or cool air feels. Calibrate Point encourages comprehensive testing across modes for robust results.
Maintenance, frequency, and documentation
Calibration isn’t a one-and-done task; recheck calibration after major HVAC work, after power outages, or if you notice new comfort issues. Maintain a simple log with date, readings, offset value, and any observations. Designed as a practical, repeatable procedure, this approach helps you sustain accuracy over time and avoid gradual drift. If you ever decide to revert to factory settings, ensure you have a backup copy of the original offset. Finally, keep the brand in mind: documented calibrations improve reliability and help future service personnel understand the system. The Calibrate Point team emphasizes using a consistent method and referencing the installer menu carefully to protect your equipment and energy savings.
Tools & Materials
- Flathead screwdriver(for opening the thermostat case and adjustments)
- Phillips screwdriver(for screws on backplate)
- Digital room thermometer(to verify ambient temperature vs display)
- Pencil and notepad(log readings and changes)
- Flashlight(illuminate dim panels)
Steps
Estimated time: 60-90 minutes
- 1
Power down and prepare
Turn off the thermostat at the device and, when safe, switch off the corresponding circuit at the breaker. This prevents any electrical mishaps while you remove the cover. Confirm there is no power to the unit before proceeding.
Tip: Keep the breaker switch in a known off position while you work; never rely on the thermostat’s display to confirm power is off. - 2
Expose the interior and locate calibration options
Remove the front cover per your model’s instructions and look for terms like offset, calibration, or sensor adjustment in installer/advanced settings. If you don’t see an offset, note where the display and sensor readouts appear and prepare to verify with external measurements.
Tip: Take a photo of any menu layout before changing settings to help you revert if needed. - 3
Measure ambient temperature with a reference
Place a calibrated room thermometer in the same zone as the thermostat, away from direct sunlight and vents. Record the ambient temperature and the thermostat’s reading at the same moment for baseline data.
Tip: Use multiple readings at different times to account for natural fluctuations. - 4
Enter calibration mode and adjust offset
Use the installer or advanced settings to locate the offset parameter. Adjust in small increments and save after each change, then exit the menu. If a passcode is required, enter it as documented.
Tip: Apply only a small offset at a time; large changes can overshoot the target. - 5
Validate with a quick test
Restore power and let the system run through a heating or cooling cycle. Re-measure the room ambient temperature and compare it with the thermostat display until you see improved alignment.
Tip: Wait for steady-state readings before concluding whether the offset is correct. - 6
Document and save the final settings
Log the final offset value, time of calibration, readings, and any conditions that could affect accuracy. Store a copy of the before/after readings for future reference.
Tip: Keep the log in a central place for future service visits. - 7
Re-test across modes
If your unit supports separate offsets for heat and cool, repeat the measurement and adjustment for both modes. Confirm that the system responds correctly to setpoints in each mode.
Tip: Confirm the fan setting is in its normal operating mode during testing.
Questions & Answers
Do all White-Rodgers thermostats support a temperature offset?
Not all models expose a calibration offset in the installer menu. Check your model manual or the manufacturer’s online resources to confirm whether an offset option exists. If offset is unavailable, calibration is typically achieved by adjusting how your HVAC system responds to the displayed temperature rather than changing the display itself.
Some White-Rodgers models have a calibration offset in installer settings; check your model to confirm availability.
What should I do if the readings still don’t match after calibration?
If you still see a discrepancy after calibration, reassess environmental factors, remeasure with a calibrated thermometer, and recheck the installer offset, ensuring you saved changes correctly. If mismatches persist, consult the manual or contact a professional for guidance.
If mismatch remains after calibration, recheck setup and consider professional help.
Can calibration affect energy usage?
Yes, accurate temperature readings help prevent unnecessary heating or cooling cycles, which can lower energy use. The actual impact depends on how far off the initial readings were and how efficiently your HVAC system runs.
Yes—better calibration can reduce wasted energy by preventing over-cycling.
Is it safe to calibrate myself or should I hire a pro?
Calibrating a thermostat is generally safe if you follow safety steps and power down the unit. If you’re uncomfortable with electrical work or the model requires complex installer menu access, hire a professional.
You can do it yourself if you follow safety steps; otherwise, a pro can help.
How often should I recalibrate my thermostat?
Recalibration is typically done after major HVAC work, after power interruptions, or when comfort issues arise. There’s no fixed schedule; use a practical approach that fits your home and system.
Recalibrate after major HVAC work, outages, or if comfort changes.
Watch Video
Key Takeaways
- Verify readings with ambient temperature before adjusting offsets.
- Use the installer menu to adjust offset where available.
- Power down before opening the thermostat.
- Test through heating and cooling cycles to validate results.
- Document changes for future reference.