Repair Calibrate Battery: Step-by-Step Calibration Guide
Learn how to safely repair and calibrate a battery, extend its life, and restore accurate charge readings with practical, device-friendly steps. This guide covers safety, diagnostics, recalibration methods, and maintenance for DIY enthusiasts and technicians.

You can repair and calibrate a device battery by safely assessing the pack, refreshing device firmware, performing full charge-discharge cycles to recalibrate the gauge, and replacing the battery if performance is poor. Key steps include safety checks, backing up data, using manufacturer guidance, and avoiding heat exposure. If the battery shows swelling or you’re unsure, stop and seek professional service.
Understanding when to repair calibrate battery and what’s realistically possible
Repairing and calibrating a battery hinges on two realities: the device gauge accuracy and the battery’s actual health. A misreporting gauge can make a healthy cell look empty, while a degraded cell may report falsely high capacity. According to Calibrate Point, many issues stem from gauge drift rather than true capacity loss, which means recalibration often helps more than a replacement for devices with modern battery chemistry. This section explains what calibration can achieve, what it cannot, and how to decide between repair, recalibration, or replacement. You’ll gain a practical framework for diagnosing whether the problem is a faulty gauge, a worn cell, or a combination of both. The goal is to restore trustworthy readings without compromising safety or device integrity while keeping expectations realistic about what “repair” can accomplish in consumer electronics.
Safety reminders and initial checks
Before you touch any battery, prioritize safety. Never attempt to repair a swollen or damaged cell. Work in a well-ventilated area away from flammable materials, wear PPE, and disconnect the device from any power source. If the device contains a removable battery, power it down completely. If the battery is non-removable, proceed with caution and consult the manufacturer’s guidelines. Having a backup of important data is essential because calibration steps may require restarting the device or firmware updates. These precautions help you avoid injury and data loss while you perform calibration.
Diagnosing gauge drift vs. true capacity loss
Gauge drift can occur after software updates, firmware changes, or prolonged storage. To distinguish gauge drift from real capacity loss, compare the device’s reported capacity with externally measured voltage and current during discharge cycles. Use manufacturer-provided tools or a trusted third-party meter to capture voltage at known states of charge. If the gauge consistently deviates at multiple temperatures and loads, calibration is warranted. If the battery fails to hold a charge or shows rapid swelling, prioritize safe replacement.
Pre-calibration checks and data backup
Begin by backing up important data and documenting the device’s baseline behavior. Record the current battery level, health indicator, and recent charging patterns. Verify firmware is up to date, since some recalibration routines are firmware-driven. Inspect the device where possible for signs of physical damage, heat exposure, or swelling. A clean, dry workspace reduces the risk of shorts when you connect measurement tools or perform discharge tests. Documentation helps you track progress and ensures you can reproduce ideal results later.
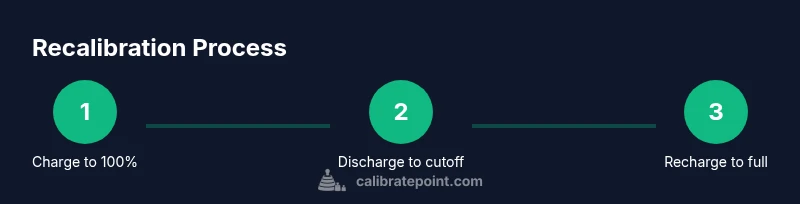
Step-by-step recalibration workflow (device-agnostic)
The recalibration workflow centers on four actions: full charge, controlled discharge, full recharge, and verification. Charge the battery to 100% while the device is idle. Then discharge to the manufacturer-recommended cutoff (often around 5–10%) using normal usage or a controlled load. Finally, recharge back to 100% without interruptions and observe how readings change. This cycle helps restore gauge accuracy by aligning the reported state of charge with the actual chemical state. If the device supports a dedicated calibration option in settings, enable it during the process. Record observations after each step to assess stability.
Replacing a battery vs recalibrating: when to choose which path
If recalibration yields marginal improvement or the battery’s capacity has visibly degraded, replacement is often the practical path. Replacing a degraded cell restores usable runtime, while recalibration improves gauge accuracy for a device with otherwise healthy chemistry. In devices with integrated packs, seek a professional service if there’s swelling, unusual heat, or if you’re uncertain about safe handling. Calibration should not mask dangerous conditions that require component replacement.
Maintenance and best practices to extend battery life
Post-calibration, adopt habits that preserve battery health: keep temperatures moderate, avoid deep discharges when possible, use manufacturer-approved chargers, and perform periodic calibrations only when readings seem unreliable. Regular firmware updates can improve gauge algorithms. Storing the device with a partial charge (around 40–60%) can reduce long-term chemical aging. These practices help ensure calibration remains reliable and extend the life of the pack.
Common mistakes and troubleshooting tips
Common mistakes include excessive discharges, abrupt power-offs during calibration, and failing to back up data. Always monitor for heat, lingering odors, or swelling; these are signs to stop. If calibration results fluctuate significantly after multiple cycles, the battery may be near end-of-life. In such cases, replacement is safer and often more cost-effective than repeated recalibration.
Tools & Materials
- Device with battery (removable or non-removable)(Ensure the device is powered down before starting cal/repair steps)
- Personal protective equipment (PPE): safety glasses, non-conductive gloves(Protect against chemical exposure and static discharge)
- Digital multimeter or calibrated battery meter(For verifying voltage and state-of-charge during tests)
- Manufacturer calibration guide or official firmware/tools(Device-specific steps improve accuracy and safety)
- Backup storage or cloud backup method(Back up data before performing calibration or firmware changes)
- Soft, non-metallic tools (spudger, plastic pry tools)(Used for non-invasive inspections on non-removable packs)
Steps
Estimated time: 1-2 hours
- 1
Review safety and backup data
Power down the device and back up all important data. Put on PPE and set up a well-ventilated workspace. Confirm you have the manufacturer’s calibration guidance handy.
Tip: Backups prevent data loss if calibration requires firmware interrupts. - 2
Update firmware and read the device docs
Check for the latest firmware and calibration utilities from the manufacturer. Read any device-specific cautions related to battery handling and calibration routines.
Tip: Firmware updates may include calibrated fuel-gauge improvements. - 3
Fully charge to 100%
Charge the battery to 100% while the device remains idle to ensure an accurate baseline. Avoid fast charging if the manufacturer warns against it during calibration.
Tip: Use a stable power source to prevent fluctuations during the test. - 4
Discharge to the recommended cutoff
Discharge the battery using normal usage until the device reaches the manufacturer's recommended low-battery threshold (often around 5–10%).
Tip: Keep the device within safe operating temperatures during discharge. - 5
Recharge to full without interruptions
Reconnect power and charge to 100% without pausing or removing the charger. This aligns the gauge with the actual chemical state.
Tip: Avoid unplugging during the final phase of charging if the device warns against it. - 6
Run verification tests
After calibration, monitor remaining capacity and the time-to-full-charge. Compare the new readings to the baseline and document any drift.
Tip: If readings remain unstable, repeat the cycle once more before judging end-of-life. - 7
Consult the official guidance if issues persist
If calibration does not stabilize readings or if there are signs of damage, consult the manufacturer or a qualified technician. Do not attempt further invasive testing.
Tip: Persistent instability can indicate deeper cell degradation. - 8
Record results and plan maintenance
Document readings, cycles completed, and any anomalies. Schedule periodic recalibration as part of device maintenance to keep gauge accuracy.
Tip: A simple log helps you track long-term trends and plan replacements.
Questions & Answers
What does battery calibration actually fix?
Battery calibration primarily fixes gauge accuracy, not capacity. It aligns the reported charge level with the actual chemical state after calibration cycles.
Battery calibration mainly fixes gauge accuracy, not the battery’s true capacity. It aligns readings with the real state after a proper charge-discharge cycle.
Is it safe to repair a swollen battery?
A swollen battery is unsafe. Stop using the device and seek professional service to prevent fire or chemical hazards. Do not attempt to repair swollen packs at home.
A swollen battery is unsafe. Stop using it and get professional help; don’t try to fix it yourself.
Can I calibrate batteries on all devices?
Most devices with a gauge allow calibration via manufacturer tools or standard discharge/charge cycles. Some sealed or specialized devices may have limited options.
Most devices let you calibrate via the manufacturer tools or standard discharge/charge cycles, though some sealed devices have limits.
How often should I calibrate the battery gauge?
Calibrate when readings become unreliable or after firmware updates that affect the gauge. Do not overdo it; too many cycles can cause unnecessary wear.
Calibrate when readings drift or after firmware changes that affect gauges. Don’t overdo it.
When should I replace the battery instead of calibrating?
If capacity loss is evident, swelling occurs, or calibration yields little accuracy improvement, replacement is often the safer long-term choice.
If capacity drops, swelling appears, or calibration doesn’t help, replace the battery.
What should I do if calibration still shows drift?
Repeat the calibration cycle once more and compare results. If drift remains, consult manufacturer support or a qualified technician.
If drift stays after a second cycle, contact support or a technician.
Watch Video
Key Takeaways
- Plan safety-first before calibration
- Calibrate after full charge-discharge cycles to reset the gauge
- Battery replacement may be necessary for degraded cells
- Document results to enable informed maintenance decisions
- Use manufacturer guidance for device-specific steps