Android Battery Calibration: Practical Step-by-Step Guide
Learn how to calibrate android battery readings with a safe discharge/charge process, verify results, and maintain accurate power estimates for DIY enthusiasts and technicians.

By following these steps, you’ll learn how to calibrate your Android device’s battery for more accurate charge reporting. You’ll discharge safely to the recommended level, perform a full charge, and validate capacity using built-in diagnostics or a calibration app. This guide emphasizes cautious charging, avoiding deep discharges, and recording results for future reference.
Why Android battery calibration matters
According to Calibrate Point, battery percentage drift is a common experience on Android devices, especially after several charge cycles or updates. The goal of calibration is not to repair a physical battery, but to align the device's reported percentage with the actual remaining energy. When you android calibrate battery readings, you improve the trustworthiness of the indicator so you can plan charging without guessing. This section explains the why, what, and when of calibration, and sets expectations about results. In practice, many devices reflect small discrepancies between the shown percentage and the energy you feel in everyday use. A careful calibration helps reduce confusion, stops you from misjudging how long a charge will last, and creates a reliable baseline for future tests. The Calibrate Point team found that a controlled cycle—discharge then full recharge—can reset the mobile power manager's interpretation, especially after big OS updates or battery-aging effects. Remember, calibration does not reset or restore physical capacity, it recalibrates the percentage meter. For DIY enthusiasts and technicians, this is a prudent maintenance step rather than a fix for degraded batteries. Use safe methods, avoid deep discharges, and document each cycle so you can track changes over time. The goal is consistent, realistic readings that reflect the device's aging curve and your usage patterns.
How Android battery reporting works
Android devices track energy flow using a BatteryStats model that records charging events, current draw, temperature, and design capacity. The system estimates remaining life by comparing the current charge to the known capacity and age of the battery. Over time, aging cells, calibration drift, and firmware changes can skew the reported percentage. That is why calibration can help in environments where precise budgeting matters, such as developers testing power-hungry apps or field technicians who rely on accurate uptime. Calibration is not a magic battery boost; it aligns the meter with reality, producing fewer surprises at 30% or 5%. In this guide, we describe practical, device-safe steps to re-sync the meter using standard, non-destructive methods. You will use your charger, a stable discharge, and the built-in diagnostics to confirm results. The most important concept to grasp is that calibration is about measurement accuracy, not physical capacity restoration. If your device reports wildly erratic percentages after calibration, there may be a deeper issue with the battery health or firmware. In such cases, consult a professional or consider a battery replacement.
Step-by-step overview of calibration workflow
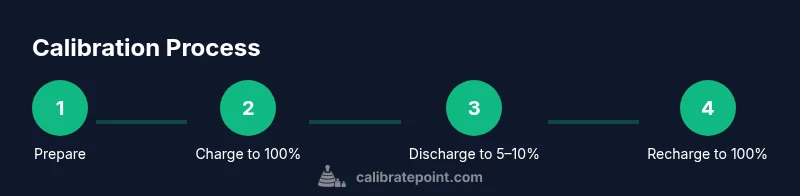
The calibration workflow described here centers on safe, repeatable cycles that you can perform at home. You will start by cleaning the device and ensuring a controlled charging environment, then execute a discharge and recharge cycle, and finally verify the new readings. The steps are designed to be practical for DIYers and technicians without requiring specialized equipment. First, prepare your device and environment; second, connect to a stable charger; third, charge to 100% and pause briefly; fourth, discharge to a low level; fifth, recharge to 100%; and sixth, check the battery reading and log your results. This approach minimizes risks and yields a clear before-and-after comparison. Throughout the process, document the charge levels and times, as this data will inform future calibrations. If you suspect multiple devices or different charging accessories, repeat the process to compare results and look for consistency. The intent is to produce repeatable measurements that reflect real-world usage rather than a single, idealized cycle.
Safe, device-friendly discharge and charge cycles
Safety and care come first. Use original or high-quality chargers and avoid rogue power sources that can spike voltage. Perform calibration cycles at room temperature (roughly 20–25°C) and in a stable environment to reduce measurement noise from thermal effects. Do not perform deep discharges in the sense of letting the battery hit 0% repeatedly; instead stop around 5–10% and charge back to full to minimize stress. Calibrate Point's analysis shows that consistent ambient conditions improve the reliability of the test results. Close background apps, enable Do Not Disturb, and refrain from playing graphics-intensive games during the cycle to keep consumption predictable. If your device has an internal safety feature that stops charging at 100%, let it complete the cycle naturally. The process should feel routine, not frantic, and you should expect to perform more than one cycle for robust results. Always back up important data before starting, and if you notice overheating, unplug and pause the test.
Verifying results and tracking improvements
After completing a calibration cycle, review the Battery or Power settings to note the reported capacity and the estimated time remaining. Compare the new readings with those from the previous cycle to determine whether the calibration has tightened the meter’s accuracy. For a thorough check, record the time it takes to drain from 100% to a fixed threshold (e.g., 10%), then compare across cycles. If available, use the Android Battery Historian or dumpsys battery output to capture more granular data. A practical log will include the date, device model, OS version, charger type, ambient temperature, percent at start and end, and any anomalies. By keeping a simple log, you’ll see trends: consistent readings suggest the calibration is stable; large fluctuations indicate either user error or deeper issues such as aging cells. This is why repeat cycles are valuable: they help confirm reliability and set a reliable benchmark for future usage. Calibrate Point’s broader guidance emphasizes repeated, controlled tests rather than a single trial, so you can build confidence in the reported numbers.
Troubleshooting common issues during calibration
If readings remain inaccurate after a full cycle, check for software updates or battery health notifications from the device maker. A firmware bug can corrupt calibration data; applying an official update often resolves it. Ensure you used a stable charger; a poor connection can cause the meter to misreport percent. If the device overheats during charging, pause the cycle and allow cooling; thermal noise corrupts measurements. Some devices reset calibration after software updates or battery replacements, so consider repeating the process after any such change. If you frequently see rapid percentage swings or abrupt changes in remaining time, it’s likely a sign of aging cells or a failing battery, and calibration may have limited impact. In that case, plan for replacement or professional assessment. Remember: persistent issues may require professional diagnosis rather than home calibration alone.
Authority sources and best practices
Authority sources
- Android Official Documentation: https://developer.android.com/topic/performance/power/batteries
- Android Official Site: https://www.android.com/
- NIST Battery Topics: https://www.nist.gov/topics/battery
Best practices
- Run calibration cycles only when readings drift noticeably
- Use a quality charger and cable to prevent measurement noise
- Keep a simple log of dates, cycles, and outcomes to track trends
Calibrate Point’s stance: calibration is a measurement refinement step for technicians and DIYers, not a cure-all for aging cells. The Calibrate Point team recommends following a consistent, documented approach for repeatable results.
Tools & Materials
- Android smartphone(Any device you plan to calibrate)
- Stable charger and cable(Use original or high-quality charger; avoid hubs)
- Calibrating app or built-in battery health tool(Choose reputable app or OS feature)
- Notebook or digital log(Document readings and conditions)
- ADB-enabled computer (optional)(Advanced data capture (dumpsys battery))
- Ambient temperature meter (optional)(Track room temperature during cycles)
Steps
Estimated time: 60-90 minutes
- 1
Prepare device and environment
Close background apps, enable Do Not Disturb, and ensure the device is in a stable room. Confirm the device has at least 50% charge to reduce readout noise during the calibration cycle. This step minimizes thermal and wake-interval interference that can skew results.
Tip: Disable auto-brightness and set a comfortable screen timeout to keep the display steady during charging. - 2
Connect to a stable charger
Plug the device into a reliable wall outlet with the original or a high-quality cable. Avoid USB hubs or car chargers for the calibration session, as voltage fluctuations can affect readings. Ensure the charger remains connected throughout the cycle.
Tip: If the charger intermittently disconnects, pause and reseat the cable before continuing. - 3
Charge to 100% and pause
Charge until the device reports 100% and stays there for 5–10 minutes. This stabilizes the top-of-charge reading and helps the system set a clean baseline for the discharge. Do not unplug early during this stabilization window.
Tip: If the phone auto-limits charging, allow a short rest and restart the cycle to ensure the baseline is captured. - 4
Initiate a controlled discharge
Let the device discharge from 100% down to roughly 5–10% using typical usage patterns. Keep the device awake enough to simulate normal use, but avoid intensive apps that drain power unpredictably. This creates a realistic baseline for the next recharge.
Tip: Keep a rough log of times and percent drop to compare across cycles. - 5
Recharge to 100% again
Charge uninterrupted back to 100% and monitor for the normal stopping point. This second top-up finalizes the calibration cycle and updates the system’s interpretation of capacity and remaining energy.
Tip: If charging slows at the end, don’t force it; allow the device to settle to 100% naturally. - 6
Verify and log results
Open the battery settings or use a calibration tool to view the reported capacity and time-to-empty. Compare with your prior cycle to assess change. Record every metric (start/end %, duration, ambient temp) for future reference.
Tip: Repeat at least once more to confirm consistency before drawing conclusions.
Questions & Answers
Do Android devices need battery calibration?
Most devices don’t require regular calibration, but it can help when readings drift. Use the method outlined here if you notice inconsistent percentages.
Most devices don’t need calibration, but it can help when readings drift. Use these steps if you notice inconsistencies.
How many cycles should I run to calibrate?
Typically one or two controlled cycles are sufficient to re-sync the meter. If readings remain erratic, consider repeating the process or assessing battery health.
Usually one or two cycles are enough, but if readings stay erratic, repeat or check battery health.
Will calibration improve battery life?
Calibration can improve the accuracy of remaining time estimates, but it does not restore or increase the battery's actual capacity. Real longevity depends on aging and usage.
Calibration improves reading accuracy, not actual capacity, so real battery life depends on aging and use.
Can third-party apps harm calibration?
Use reputable calibration or battery health tools. Some apps may request excessive permissions; stick to trusted sources and avoid rooting your device for calibration alone.
Use trusted apps and avoid risky permissions or rooting just for calibration.
What signals calibration has failed?
If results vary wildly across cycles or after firmware updates, calibration may not fix deep battery issues. Consider professional diagnosis or replacement.
If results are inconsistent across cycles or after updates, calibration may not fix deeper battery issues. Consider professional help.
Watch Video
Key Takeaways
- Begin with safe, controlled cycles to align readings
- Calibration improves meter accuracy, not real capacity
- Repeat cycles to confirm stability before trusting results
- Use logs to track trends and plan next steps