Calibrate External Monitor in Windows 11: A Practical Guide
Learn a practical, step-by-step method to calibrate an external monitor under Windows 11 for accurate color, gamma, and white point. Includes tools, steps, tips, and verification.

To calibrate an external monitor on Windows 11, follow a structured workflow that blends built-in tools with hardware measurements. You’ll establish target color, brightness, and gamma, then create and apply an ICC profile for repeatable results. This guide provides a step-by-step path and practical tips to get reliable color accuracy.
Why calibrate external monitor on Windows 11
Calibrating an external monitor is essential when color accuracy matters—whether photo editing, design, or video work. The process helps ensure your display renders colors consistently across software and devices. According to Calibrate Point, starting with a controlled environment and a clear target for color is essential for reliable calibration. In Windows 11, you can leverage built-in tools along with dedicated hardware to measure and adjust color precisely.
A properly calibrated monitor reduces color drift caused by aging panels and lighting conditions. It also improves collaboration, since teammates see the same colors. While consumer displays vary in quality, a repeatable workflow makes results more predictable across sessions and devices.
Before you start: prerequisites and setup
To calibrate effectively, you need a few fundamentals in place. A quiet, evenly lit room reduces ambient light influences; use dim, consistent lighting and a reliable power source. Connect the external monitor to your PC with the recommended cable (HDMI or DisplayPort) and ensure the monitor is set to its default factory calibration. Gather your measurement device (hardware colorimeter) and calibration software, plus a log to record target values and outcomes. Windows 11’s color management relies on ICC profiles that you will create and apply later in the workflow. Finally, close non-essential applications to avoid screen activity that can skew measurements.
If you’re new to calibration, practice on a non-critical display first to understand the process and how measurements translate into changes.
Understanding calibration concepts: gamma, ICC profiles, and color spaces
Color calibration revolves around several core concepts. Gamma describes the nonlinear relationship between input values and luminance; a correct gamma reduces misperceived brightness differences. An ICC profile encodes color space, gamma, white point, and other display characteristics so applications render colors consistently. Common color spaces include sRGB for web and Rec. 709 or DCI-P3 for video work. When calibrating, you will aim to match a target white point (often 6500K) and a neutral gamma tied to your workflow. The result is a device profile you can apply system-wide.
Understanding these terms helps you interpret measurements and avoid chasing unattainable perfection.
The Windows 11 calibration workflow: built-in tools and approaches
Windows 11 provides a straightforward calibration path through Settings > System > Display > Advanced display calibration. This built-in wizard guides you through brightness, contrast, gamma, and color adjustments, often using a reference image or test patterns. For precise results, pair this with a hardware colorimeter and appropriate software. You can also use the Color Management panel to apply an ICC profile system-wide, ensuring consistency across apps like photo editors and video players. The key is to follow a repeatable sequence rather than adjusting sliders haphazardly.
Note that some settings may differ slightly between GPU vendors; check both Windows and GPU control panels for color overrides.
Using hardware colorimeters and software for precise results
A hardware colorimeter measures the actual light output and compares it to your target color values. Combined with calibration software, it guides you through creating an ICC profile that reflects your target gamut and white point. Hardware devices vary in sensor quality and ease of use, but the general workflow remains the same: place the sensor on the screen, run measurements, adjust gamma/white point, and save the resulting profile. When you apply the profile, you’ll notice more accurate skin tones, better gray neutrality, and improved color consistency across images and videos.
If you’re comparing multiple monitors, calibrate them sequentially using the same target values to maintain uniformity.
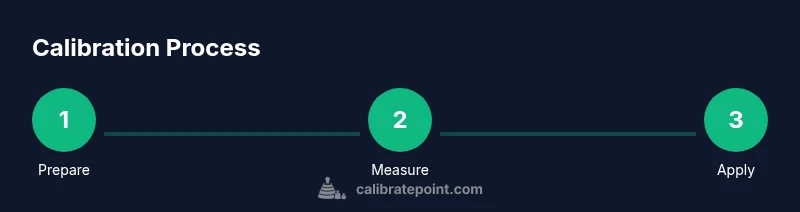
Step-by-step calibration workflow (overview)
This overview segment outlines the core steps you’ll perform with the full Step-by-Step guide below. Prepare your hardware, install calibration software, and connect your display. Start by establishing a baseline using Windows built-in tools, then apply precise color and gamma corrections with the help of the colorimeter. Create an ICC profile and set it as the default for your system. Finally, verify with test images and document the results for future re-calibration.
Skip ahead to the Step-by-Step section for the exact prompts you’ll see on screen.
Common issues and troubleshooting during calibration
Calibration can be challenged by ambient light shifts, wrong lighting temperature, and misinterpreted test targets. If measurements seem unstable, re-check the sensor placement, ensure the display is at the intended brightness level, and confirm no other software is adjusting color in real-time. If profiles don’t seem to apply, verify Windows color management settings and reset any GPU-specific color overrides. For multi-monitor setups, calibrate each screen to your shared target and then compare results.
Keep a log of the target values and observed results to spot drift over time.
Best practices for ongoing calibration and verification
Calibration is not a one-off task. Re-calibrate whenever you install new software, switch to a different monitor, or observe color shifts. Create a simple checklist to document target white point, gamma, and color space, then test with standard images to confirm accuracy. Schedule re-calibration every 4–8 weeks for critical work, and store profiles in a known location. Finally, use a neutral gray background when working to reduce eye adaptation effects during sessions.
Tools & Materials
- External monitor(Use HDMI or DisplayPort with factory reset default color)
- PC with Windows 11(Ensure up-to-date graphics drivers)
- Colorimeter (hardware device)(Place sensor at screen center during measurements)
- Calibration software(Supports ICC profile creation and export)
- Reference test patterns/images(Use standard targets for gamma and color balance)
- Ambient light meter or controlled room lighting(Optional but recommended for precise control)
- Notepad or digital log(Record target values and results)
Steps
Estimated time: 60-90 minutes
- 1
Prepare workspace
Set up in a dim, neutral-lit room. Connect the monitor, turn it on, and reset any custom color settings to factory defaults. Make sure the display is at its normal operating brightness.
Tip: Use a stabilized light source and keep the monitor at its usual viewing distance. - 2
Open calibration tool
Launch Windows 11 built-in calibration tool or your preferred calibration software. Ensure the colorimeter is recognized by the software.
Tip: Allow the software to run without background tasks that could affect measurements. - 3
Arrange measurement setup
Place the colorimeter on the screen center according to the device instructions. Ensure it is stable and not tilted. Confirm the device is warm if the software requests a warm-up period.
Tip: Keep hands away from the sensor during measurement cycles. - 4
Calibrate brightness and contrast
Follow the wizard to set brightness and contrast to target values that create a visually neutral image. Do not over-adjust; minor changes can yield better long-term results.
Tip: Use a neutral test image for reliable reference. - 5
Adjust gamma and white point
Measure and adjust gamma (2.2 is common for general work) and white point (6500K) to align with your target color space.
Tip: Apply gradual changes and re-measure after each adjustment. - 6
Create and apply ICC profile
Save the profile from the calibration software and apply it system-wide via Color Management in Windows. Ensure the profile is set as the default for the display.
Tip: Keep a copy of the profile in a known folder for easy re-application. - 7
Validate results
Open test images and compare with expectations. Check skin tones, grayscale ramp, and color gradients for smooth transitions.
Tip: If discrepancies appear, revisit steps 4–6 and adjust accordingly.
Questions & Answers
Do I need a hardware colorimeter to calibrate my monitor?
A hardware colorimeter provides objective measurements and typically yields more accurate results than software-only calibration. It is highly recommended for professionals, but you can start with built-in tools if a colorimeter isn’t available.
A colorimeter helps you measure accurately. It's recommended for professionals, but you can begin with Windows tools if you don't have one.
Can Windows 11 calibration work without hardware colorimeter?
Yes, Windows 11 offers a built-in calibration wizard that adjusts brightness, contrast, and color. However, results will be approximate; for precise color, add a hardware colorimeter and ICC profiling.
Windows has a built-in calibration wizard, but hardware colorimeters provide precision.
How long does a full calibration take?
A thorough calibration typically takes about 60 to 90 minutes, depending on hardware and prior calibration history. Breaks between steps can help accuracy.
Most calibrations take about an hour or more, depending on equipment.
What should I do when calibrating multiple monitors?
Calibrate each monitor to the same target white point, gamma, and color space. Use the same software workflow and apply ICC profiles per display to maintain consistency.
Calibrate each screen to the same targets and apply profiles.
How can I verify that calibration stuck?
Reopen test images, compare grayscale ramps, and look for consistent color across white gradients. If results drift, re-run the calibration steps and re-save the profile.
Re-run test patterns to confirm stability and re-save profiles if needed.
Is it necessary to re-calibrate after software updates?
Software and driver updates can affect color rendering. Plan periodic recalibration or after major updates to maintain accuracy.
Yes, consider recalibrating after major updates to ensure consistency.
Watch Video
Key Takeaways
- Follow a repeatable calibration workflow.
- Use a hardware colorimeter for consistent results.
- Apply the ICC profile system-wide for all apps.
- Verify with test patterns and document results.