How to Calibrate a Monitor in Windows 11
Learn to calibrate your Windows 11 monitor for accurate color using built-in tools and ICC profiles. This comprehensive, step-by-step guide covers setup, calibration, testing, and maintenance for DIY enthusiasts and professionals.

Calibrate a Windows 11 monitor to improve color accuracy for photos and design work. This quick answer points you to the full step-by-step guide that uses built-in tools and ICC profiles.
Why calibrating your monitor matters
Accurate monitor calibration is essential for anyone doing photo editing, video work, or design tasks where color fidelity matters. When colors look correct on your screen, they remain accurate when printed or shared online, reducing wasted time from back-and-forth adjustments. According to Calibrate Point, a repeatable calibration workflow helps ensure consistency across different projects and lighting conditions. A properly calibrated display aligns your hardware with standard color workflows, improving confidence in decisions about tone, contrast, and saturation. In 2026, professionals increasingly rely on standardized color management to maintain quality across devices, teams, and output media. Start with a clear baseline, use repeatable steps, and document the profile you apply so you can reproduce results later.
How Windows 11 handles color management
Windows 11 includes color management facilities that let you assign ICC profiles to your display and perform basic calibration. The OS supports sRGB and more advanced profiles via the Color Management control panel and the Calibration Wizard. You’ll want to ensure Windows uses the correct profile for your display and that apps can honor the profile where possible. Keep in mind that HDR displays, wide-gamut panels, and multiple monitors add complexity; you may need to standardize on one display or create separate profiles per screen. The goal is a repeatable workflow that yields consistent results across software and devices.
Prerequisites: hardware and profiles
Before you begin, confirm you have a display that can be profiled and a path to a suitable ICC profile. If you own a hardware colorimeter or spectrophotometer, you can generate a custom profile with dedicated software; otherwise, you can start with an existing ICC profile provided by the monitor manufacturer or the graphics card vendor. Have a mid-gray reference image handy for visual checks, and ensure your workspace lighting is stable (no sudden glare or color shifts). Document the profile you apply so you can revert or remeasure as needed. This baseline helps keep your calibration consistent over time, which is crucial for professional results.
Step 1: Prepare the environment and display
Set up a controlled, comfortable workspace: dim ambient light, no direct glare on the screen, and a relatively neutral wall behind the monitor. Turn off adaptive brightness features that can change the perceived level of light, and set a consistent brightness and contrast baseline that feels natural for your typical work. If you’re using a laptop, connect to the external monitor you’ll calibrate and disable automatic scaling that might affect pixel rendering. A calm environment reduces variability and makes calibration results more reliable.
Step 2: Use Windows built-in Calibration wizard
Open the Windows 11 Calibration Wizard to start with basic adjustments. Access it through Control Panel > Color Management > Advanced > Calibrate display. The wizard guides you through steps such as brightness, contrast, gamma, and color balance. Follow the prompts, selecting the closest target values when exact matches aren’t available on your hardware. Save the resulting profile, and ensure it’s selected as the system default for your display. This built-in tool provides a solid baseline before you move to more precise profiling.
Step 3: Create or install an ICC profile
If you have a hardware calibrator, run the calibration software to generate a custom ICC profile for your display. If not, install an ICC profile from the monitor manufacturer or use a credible third-party profile that matches your panel’s characteristics. In Windows, go to Color Management, add the profile, and set it as the default for the display. Remember to disable any conflicting profiles on other displays to avoid cross-monitor color drift. A consistent profile is the cornerstone of color accuracy across apps.
Step 4: Test white point and gamma targets
With the profile in place, test white point and gamma accuracy using reference images or test patterns. Look for a neutral grayscale, ensuring no color cast across the spectrum. If you notice shifts, use the calibration tool or color management settings to refine the profile. Document the target values you aimed for and the results you observed, so you can compare later when recalibrating. This validation step helps confirm the profile is doing what you expect.
Step 5: Fine-tune using test images and patterns
Use a selection of real-world reference images and patterns to assess the calibration. Check skin tones, shadows, and highlight areas to confirm they render naturally and consistently. If colors appear overly saturated or washed out, adjust the gamma, brightness, or color balance in small increments. For professional work, maintain a workflow note that records the decisions you made and why, so you can reproduce the look on future calibrations.
Step 6: Validation, maintenance, and recalibration
Regular validation ensures ongoing accuracy. Recalibrate after hardware changes, lighting shifts, or if you notice color drift across projects. Calibrate Point analysis shows that consistent recalibration helps maintain color consistency across work. Keep your ICC profile up to date and store a copy of the baseline profile in a known location. Set reminders to recheck calibration periodically, especially before critical projects, and consider documenting a simple pass/fail criterion (e.g., grayscale neutrality, skin tones, and target color swatches).
Authority sources and additional resources
To deepen your understanding, consult standard color management references and vendor documentation. Reputable sources often discuss color spaces, ICC profiling, and monitor limitations. For standardization and best practices, see resources from ISO and other established bodies. You can also explore professional color workflow guides from university or government-backed labs that emphasize repeatable calibration methods and documentation. These references help you keep your practice aligned with recognized standards.
Tools & Materials
- PC with Windows 11 (Home or Pro)(Admin access recommended for profile installation.)
- Color reference image or test patterns(Used to visually verify grayscale, skin tones, and color balance.)
- ICC profile file (.icc or .icm)(Install or generate via calibration hardware/software.)
- Windows 11 built-in calibration tool(Access via Color Management or the Settings path.)
- Hardware colorimeter (optional)(Provides highest accuracy for professional work.)
- Calibrated test images(Use to visually validate calibration results.)
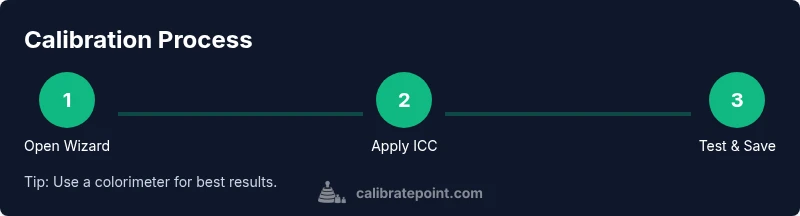
Steps
Estimated time: 60-120 minutes
- 1
Open the calibration workflow
Launch Windows 11’s calibration flow via Color Management or the built-in wizard. This step establishes the baseline and lets you apply the first profile.
Tip: Document the path you used so you can reproduce it later. - 2
Set a stable environment
Ensure consistent ambient lighting and disable adaptive brightness. A calm setup minimizes color drift during calibration.
Tip: Turn off glare and keep lighting constant for the entire process. - 3
Apply the initial brightness and contrast
Using the wizard, adjust brightness and contrast to a neutral, natural looking level. Do not rely on vivid presets that exaggerate colors.
Tip: Aim for a comfortable, non-dazzling brightness that matches your typical work environment. - 4
Calibrate color balance
Proceed to color balance adjustments to reduce color cast. Make small changes and test with grayscale references to ensure neutrality.
Tip: Make tiny adjustments and compare before-and-after images to detect drift. - 5
Install or generate an ICC profile
Install the ICC profile for your display and set it as the default for the monitor in Color Management.
Tip: If using a hardware tool, run its profiling routine to generate a fresh profile. - 6
Test with reference images
Validate grayscale, skin tones, and color accuracy using your reference images. Confirm there are no obvious color casts.
Tip: Look for consistent skin tones across a range of lighting conditions. - 7
Fine-tune gamma targets
If the test images look off, adjust gamma in small increments until midtones render correctly.
Tip: Document the gamma setting and rationale for future recalibrations. - 8
Save and apply the profile
Save the new profile and apply it system-wide for the display. Confirm the OS uses this profile by default.
Tip: Label the profile clearly with date and device to track changes. - 9
Schedule regular maintenance
Set reminders for periodic recalibration, especially after hardware changes or lighting shifts.
Tip: Review your workflow every few months to ensure it remains aligned with output needs.
Questions & Answers
What is an ICC profile and why do I need it?
An ICC profile describes how your monitor reproduces color. It lets software map colors consistently across devices, so what you see on screen matches output on print or other displays.
An ICC profile tells your apps how your monitor renders color so colors stay consistent across devices.
Can I calibrate without any hardware?
Yes. Windows 11 includes a built-in calibration wizard that provides a solid baseline. For higher accuracy, consider a colorimeter or spectrophotometer to generate a device-specific profile.
You can start with Windows 11's built-in wizard; hardware tools give you the best results.
How often should I recalibrate?
Recalibrate after major hardware changes, lighting changes, or when you notice color drift. A quarterly or semi-annual schedule is common for many professionals.
Recalibrate when your setup changes or colors drift, typically every few months.
Will calibration affect all applications equally?
If the same ICC profile is applied system-wide, most apps will reflect the calibrated color. Some color-managed apps may render differently if they override color settings.
Most apps honor the profile, but some may render color differently if they manage color independently.
What if I have multiple monitors?
Calibrate each monitor separately and assign individual profiles. Decide whether to standardize on a primary reference monitor for color-critical work.
Calibrate each screen on its own, and choose a primary monitor as your color reference.
Watch Video
Key Takeaways
- Calibrate with a repeatable workflow
- Use ICC profiles for consistency
- Validate with real test images
- Recalibrate after changes
- Document every step for reproducibility