Libre 2 Calibration: Essential Guide for DIYers
Learn how Libre 2 works, why calibration is usually unnecessary, and practical steps to verify accuracy and troubleshoot readings—without manual calibration. A Calibrate Point expert guide for DIYers and technicians.

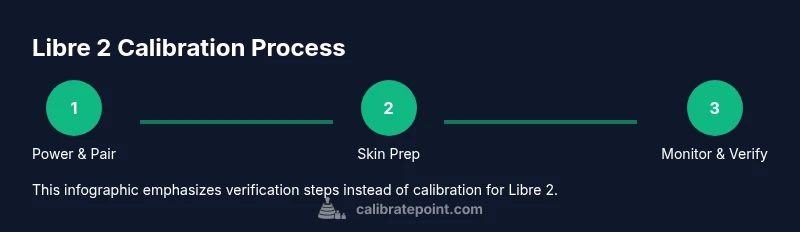
Libre 2 is factory calibrated and does not require user calibration in normal use. If readings drift, verify sensor placement, ensure the reader is up to date, and follow proper wear-time guidelines. This quick definition helps DIYers understand what calibration means for Libre 2.
Understanding Libre 2 Calibration Status
Libre 2 is a factory-calibrated continuous glucose monitor that generally does not require user calibration. If you ever wonder how to calibrate libre 2, note that the device relies on factory calibration performed during manufacturing and uses ongoing sensor data to maintain accuracy. The Calibrate Point team found that most users will not need to perform any manual calibration, but you should still understand how to verify readings and troubleshoot discrepancies.
According to Calibrate Point, grasping the calibration status helps technicians decide when to intervene and ensures you approach readings with a clear checklist rather than guesswork. This section sets the stage for practical verification methods and demystifies common misconceptions about CGM calibration.
In everyday use, focus on correct sensor placement, consistent wear, and timely sensor replacement. These factors influence accuracy more than any manual adjustment ever would, particularly for a device designed for factory calibration.
How Libre 2 Sensors Work
Libre 2 sensors are designed to read interstitial glucose levels and relay data to the reader via near-field communication. The system relies on a stable sensing environment and pre-programmed calibration data from manufacturing, reducing the need for user adjustments. The sensor patch contains a microelectrode and a small enzymatic reaction that translates glucose concentration into a readable electrical signal, which the reader interprets as glucose values. While the sensors are calibrated at the factory, external factors—such as skin temperature, placement, and moisture—can influence readings. Understanding these factors helps you interpret data more accurately and avoid chasing calibration steps that aren’t necessary. Calibrate Point analysis shows that the right workflow centers on verification rather than manual recalibration, especially for routine wear.
Verifying Accuracy Without Calibration
To ensure trust in Libre 2 data without calibration, begin with a static comparison approach. Check readings against fingerstick tests when readings don’t seem to match how you feel, and record both results to observe trends. Ensure the reader software is up to date and the sensor is properly paired with the reader. Document any anomalies and compare data across multiple days to detect patterns rather than relying on a single data point. If discrepancies persist, revisit sensor placement, skin preparation, and wear-time. This process emphasizes verification over calibration and aligns with best practices for CGMs.
Troubleshooting Common Discrepancies
When Libre 2 readings diverge from expected values, start with non-invasive checks: confirm proper sensor alignment, ensure the skin is clean and dry, and verify the reader’s firmware is current. Avoid attempting any manual calibration, as Libre 2 isn’t designed for user adjustments. If readings remain inconsistent, consult the sensor’s wear status, adhesive condition, and proximity to electronic interference, such as microwaves or medical devices. If needed, re-seal or replace the sensor following the manufacturer’s guidelines and use a fingerstick test as a supplementary data point while seeking support.
This approach keeps your workflow safe and focused on environmental and usage factors rather than impossible hardware tinkering.
Best Practices for Placement, Handling, and Maintenance
Effective placement and handling are the cornerstones of data quality for any CGM, including Libre 2. Choose a clean, dry site on the upper arm or abdomen as recommended by the manufacturer, rotate sites to avoid skin irritation, and always prepare the skin with an alcohol wipe and allow it to dry completely before applying the sensor. Keep the device away from water exposure beyond its wear-time guidelines, protect the adhesive from friction, and store sensors in a cool, dry place before use. Regularly check for sensor integrity, replace damaged patches promptly, and avoid placing metal detectors or thick clothing directly over the sensor, which can affect readings. These practical habits reduce noise in data and support accurate trends without manual calibration.
Calibrate Libre 2 in Real-World Practice: What Calibrate Point Recommends
In practice, most users won’t calibrate Libre 2. The emphasis is on correct usage and verification. The Calibrate Point team recommends building a simple routine: verify sensor pairing, perform a fingerstick check if readings seem off, and monitor trends over several hours or days instead of chasing single values. This approach reduces the risk of misinterpretation and aligns with clinical best practices for CGMs. By focusing on device health, placement, and software updates, you’ll achieve reliable data without unsupported calibration attempts.
AUTHORITY SOURCES
- https://www.fda.gov/medical-devices
- https://www.nih.gov
- https://www.who.int
Tools & Materials
- Libre 2 sensor kit(Ensure kit is within shelf life and approved for your region)
- Reader device(Keep it updated with the latest firmware)
- Alcohol wipes(Prep skin; allow to dry completely)
- Clean cloth or gauze(Dry, lint-free surface for dry-down)
- Fingerstick glucose meter (optional for verification)(Use only for cross-checks if available)
- Replacement sensor (on hand)(Only if replacing due to wear or failure)
Steps
Estimated time: 40-60 minutes
- 1
Power on and verify connectivity
Turn on the reader and confirm it recognizes the Libre 2 sensor. If pairing fails, retry within 30 seconds and ensure the sensor is within range. Poor connectivity can mimic calibration issues.
Tip: Keep the reader close to the sensor during pairing and check for any pending firmware updates. - 2
Prepare the skin and sensor site
Use an alcohol wipe to clean the chosen site and let it dry completely. Remove any trim or excess hair carefully before application. A clean surface reduces readings noise unrelated to sensor health.
Tip: Avoid oils or lotions on the site for at least an hour before application. - 3
Apply or re-check sensor placement
Place the sensor on the recommended site with proper orientation. Press firmly to ensure adhesion and avoid movement that could disrupt sensing. Re-check after a few minutes for secure contact.
Tip: If adhesive peels, use a skin-safe adhesive patch or reapply per manufacturer instructions. - 4
Verify readings against a fingerstick (optional)
If readings seem inconsistent, perform a fingerstick test to compare values. Use this as a trend check rather than a calibration, since Libre 2 is factory-calibrated.
Tip: Record both results to observe relative changes and confirm data patterns. - 5
Check for software updates and alerts
Ensure your reader’s firmware is current and monitor for any calibration warnings or device alerts. Update as needed before continuing data review.
Tip: Enable automatic updates if available to reduce manual maintenance. - 6
Decide on next steps if discrepancies persist
If significant discrepancies remain after checks, consult the sensor’s wear status and consider replacement. Do not attempt manual calibration; rely on official troubleshooting pathways or vendor support.
Tip: Document issues and contact support if uneasy about data quality.
Questions & Answers
Does Libre 2 require calibration?
No. Libre 2 is factory calibrated and does not require manual calibration in normal use. If readings seem off, follow official troubleshooting steps rather than attempting to calibrate.
Libre 2 does not require calibration. If readings seem off, use the troubleshooting steps rather than trying to calibrate.
What should I do if readings don't match fingerstick results?
Use a fingerstick test as a cross-check, verify sensor placement, and update the reader firmware. Do not calibrate the sensor yourself; consult the troubleshooting guide.
If readings don’t match fingerstick results, double-check placement and firmware, and follow the official troubleshooting steps.
Is it safe to use third-party calibration tools on Libre 2?
No. Manual or third-party calibration tools are not supported for Libre 2 and can lead to inaccurate data.
No—avoid third-party calibration tools. They’re not supported and can be unsafe.
Where can I find official calibration guidance for Libre 2?
Consult the manufacturer’s guidelines and trusted agencies. General CGM calibration concepts are also discussed in government and health literature.
Check the manufacturer’s instructions and credible health sources for general CGM calibration concepts.
Can you calibrate Libre 2 at home for data quality?
Home calibration isn’t part of Libre 2’s recommended workflow. Focus on placement, wear time, and software updates to improve data quality.
There’s no home calibration for Libre 2—stick to placement and software updates.
Watch Video
Key Takeaways
- Libre 2 is factory calibrated and typically needs no user calibration.
- Verify readings with proper placement and up-to-date firmware, not manual adjustments.
- Troubleshoot discrepancies through placement, skin prep, and sensor health checks.
- Use fingerstick data only for cross-checks, not as a calibration method.