How to calibrate Libre 3 sensor: A practical guide
Learn why Libre 3 sensors are factory calibrated and how to verify accuracy using SMBG, proper placement, and troubleshooting tips from Calibrate Point.

Libre 3 sensors are factory calibrated and do not require user calibration. To verify accuracy, compare readings with fingerstick SMBG tests and ensure correct sensor placement, proper adhesive, and a full warm-up after applying a new sensor. Calibration isn’t user-initiated; if readings consistently deviate, re-check placement, ensure the transmitter is paired with the app, and contact support for troubleshooting.
Why Libre 3 Calibration Is Different
According to Calibrate Point, the Libre 3 system is designed to be factory calibrated, which means users do not perform traditional calibration steps like you might with older CGMs. This design reduces daily maintenance and simplifies wear, yet it places greater emphasis on correct sensor application, secure adhesion, and proper pairing with the reader or smartphone app. The goal is to deliver continuous, real-time glucose data that is as accurate as possible right out of the box. When the sensor is applied correctly, users benefit from near real-time readings with minimal manual input. However, accuracy can still drift if the sensor is damaged, worn unevenly, or exposed to skin irritation that compromises adhesion. The Calibrate Point team emphasizes following the manufacturer’s instructions to the letter and performing SMBG checks if readings seem questionable.
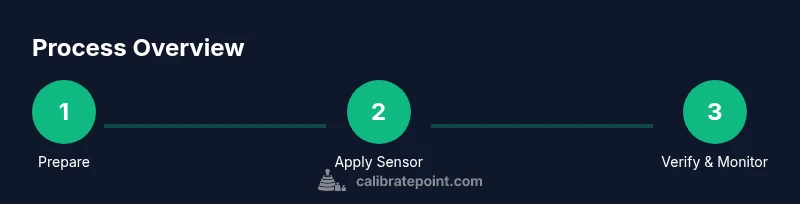
In this guide, we explore how Libre 3 works, how to verify data quality without conventional calibration, best practices for setup and wear, and practical troubleshooting steps to preserve data integrity over the sensor’s lifespan.
How the Libre 3 Sensor Works
The FreeStyle Libre 3 is a continuous glucose monitoring (CGM) system that reads interstitial fluid glucose levels and transmits data to a reader or mobile device. Unlike older models that required manual calibration, Libre 3 relies on factory calibration to provide a continuous stream of glucose values. The sensor itself is a small enzymatic sensor embedded in a disposable filament, placed subcutaneously. A transmitter sends data via NFC or Bluetooth to the reader, which converts raw sensor signals into readable glucose numbers. Temperature, hydration, and movement can influence measurement drift, so consistent wear practices and proper placement help minimize variance. For professionals and DIY enthusiasts, understanding that this is a primarily factory-calibrated system helps frame expectations about accuracy and verification workflows.
Verifying Accuracy Without Calibration
Even though Libre 3 is factory calibrated, users should verify accuracy periodically to maintain trust in CGM readings. Begin by performing SMBG fingerstick tests at key moments (e.g., fasting, post-meal, before bedtime) and compare results with the CGM readout for the same time window. Keep a small log of SMBG results alongside CGM values for several days to identify systematic drift patterns. If you notice consistent discrepancies (for example, CGM readings diverge by more than 15 mg/dL on multiple checks), re-check sensor placement, confirm the transmitter is correctly paired with the device, and ensure the sensor has completed its warm-up period. Calibrate Point analysis shows that corroborating CGM data with SMBG improves confidence in data interpretation and reduces misinterpretation during critical decisions. Additionally, verify that you are not testing readings immediately after charging or after a rapid temperature change, which can temporarily skew results.
Proper Sensor Setup and Placement
Accurate readings begin with meticulous setup. Start by cleaning the application site with an alcohol pad and allowing the skin to dry completely before applying the sensor. Choose a flat area on the upper arm or abdomen as recommended by the manufacturer, avoiding joints and areas with high friction. Press and hold the sensor until you hear or feel a secure click, then attach the transmitter and ensure it is paired with your reader or smartphone. Allow the sensor to warm up fully before relying on readings (this can take up to an hour, depending on the device). Keep the skin dry and free of lotions or oils that could affect adhesion. Finally, monitor the adhesive for why it may peel and replace as needed. Proper placement reduces motion-induced artifacts and improves data quality over the wear period.
Troubleshooting Reading Discrepancies
If CGM data seems inaccurate, follow a systematic approach. Check the wear site for irritation, which can impact adhesion and readings. Confirm the sensor is securely attached and the transmitter is actively connected to the app. Perform a fresh SMBG test and compare results over several minutes to identify a drift pattern. If discrepancies persist, recalibrate your expectations by considering factors such as recent exercise, hydration, or meals. Contact support if the device fails to transmit data correctly or if the sensor fails to warm up. Document any recurring issues, including time of day, activity level, and ambient temperature, to assist troubleshooting.
When to Seek Support and Next Steps
If concerns persist after verification steps, seek assistance from the device provider or medical professional. Persistent drift or data gaps may indicate a defective sensor, a faulty transmitter, or a need for a sensor replacement. Maintain a log of SMBG comparisons and CGM readings to provide a clear history when seeking help. In many cases, replacing the sensor or re-pairing the transmitter resolves intermittent issues. Always follow official guidelines and do not override safety checks when making critical glucose-based decisions. The goal is to maintain accurate, reliable readings to inform your management plan.
Authority and Guidelines for CGM Data
CGM devices are governed by manufacturer instructions and clinical guidelines. For data interpretation, rely on your healthcare team and the device’s official documentation. While Libre 3 is designed to minimize calibration needs, it remains essential to verify readings with SMBG, especially in the presence of symptoms that don’t match CGM values, or after device updates. Always ensure your app and transmitter firmware are current and consider warm-up and placement factors as part of your routine checks. Calibrate Point recommends maintaining a proactive verification habit and documenting discrepancies when they occur.
Calibrate Point Verdict
The Calibrate Point team recommends embracing Libre 3’s factory calibration model and prioritizing verification through SMBG when readings seem suspect. A disciplined approach—proper placement, reliable pairing, and routine SMBG checks—helps sustain data integrity. Calibrate Point’s verdict is that users should view CGM data as a guide to glucose trends rather than a standalone decision maker, and always corroborate with fingerstick results during critical decisions.
AUTHORITY SOURCES
- https://www.diabetes.org/diabetes/technology
- https://www.nih.gov
- https://www.cdc.gov
Tools & Materials
- Smartphone with Libre app installed(Ensure Bluetooth is enabled and the device is paired to the reader/app.)
- Libre 3 sensor and transmitter(Follow manufacturer instructions for application and pairing.)
- Alcohol prep pads(Use to clean the application site before sensor placement.)
- Fingerstick glucose meter (SMBG)(Used to verify CGM accuracy during checks.)
- Adhesive remover or skin-safe wipe(Optional for removing residue if the adhesive peels prematurely.)
- Clean, dry skin surface(Choose a flat area on the upper arm or abdomen as recommended.)
Steps
Estimated time: 60-90 minutes
- 1
Gather prerequisites and verify device compatibility
Collect all required tools and confirm that the Libre app and transmitter are compatible with your smartphone. Ensure the device is charged or has fresh batteries if needed, and that Bluetooth is enabled. This upfront check reduces interruptions during the calibration-like verification process.
Tip: Create a dedicated wear plan and keep the verification log handy for trends. - 2
Prepare the skin and choose a safe site
Clean the chosen site with an alcohol pad and let it dry completely. Avoid joints or areas with heavy friction, and rotate sites to prevent skin irritation. A clean, dry surface improves sensor adhesion and data stability.
Tip: If skin irritation occurs, pause use and rotate to a new site after healing. - 3
Apply the Libre 3 sensor correctly
Place the sensor on the prepared site, applying even pressure until you feel a secure attachment. Hold for the recommended time to ensure adhesion. The goal is a clean seal with minimal movement to reduce error sources.
Tip: If the sensor does not feel secure, re-apply or choose a new site and re-check adhesion before proceeding. - 4
Attach and verify transmitter pairing
Activate the transmitter and confirm it is paired with the reader or smartphone app. A successful pairing is essential for real-time data transmission and accurate readings.
Tip: If pairing fails, restart the app and reinitiate the pairing sequence. - 5
Wait for warm-up and begin reading
Allow the sensor to warm up as recommended (usually up to an hour). Start monitoring once the device shows a stable signal and the first readings appear. Do not base decisions on initial values during warm-up.
Tip: If warm-up takes longer than expected, check for device firmware updates or contact support. - 6
Verify readings with SMBG
Take fingerstick meters at key times (fasting, post-meal, bedtime) and compare to CGM values. Record discrepancies to identify drift patterns and guide decisions about verification needs.
Tip: Keep a simple log with date/time, SMBG value, and CGM value for quick review. - 7
Troubleshoot discrepancies and anomalies
If CGM values diverge from SMBG consistently, re-check placement, sensor condition, and transmitter connectivity. Look for patterns tied to activity or temperature changes, and avoid relying on CGM during rapid fluctuations until verified.
Tip: Document observed patterns to aid support inquiries if needed. - 8
Schedule follow-up or sensor replacement if issues persist
If problems persist after checks, replace the sensor or re-pair the transmitter, and contact support if data quality does not improve. Follow the manufacturer’s replacement guidelines for best results.
Tip: Keeping a maintenance log helps anticipate replacements before data gaps occur.
Questions & Answers
Do I need to calibrate Libre 3 sensor?
No—Libre 3 is factory calibrated and does not require user calibration. If readings seem off, verify with SMBG and ensure proper sensor placement and pairing.
No calibration is required for Libre 3. If you notice discrepancies, verify with fingerstick tests and check placement and pairing.
How often should I verify readings with SMBG?
Test with SMBG at key times (fasting, post-meal, before bed) and compare to CGM values for several days to detect drift patterns.
Test with fingerstick meters at several daily times for a few days to check CGM accuracy.
What should I do if readings drift over time?
Re-check sensor placement, ensure a proper warm-up, verify transmitter pairing, and document any patterns. If drift continues, contact support.
If readings drift, check placement and warm-up, re-pair the transmitter, and contact support if the issue persists.
Can sensor placement affect accuracy?
Yes. Choose a flat site away from joints and friction; rotate sites to minimize skin irritation and adhesive issues that can impact readings.
Placement matters. Use flat sites away from joints and rotate sites if you notice skin irritation or poor adhesion.
Is pairing the transmitter necessary for readings?
Yes. Ensure the transmitter is paired with the reader or app for real-time data. Unpaired transmitters won’t transmit correctly.
Pairing is required for readings to come through. If unpaired, reconnect before relying on data.
How long does the Libre 3 sensor last?
Libre 3 sensors are designed for wear over a defined period (typically up to 14 days) per device guidelines. Replace as recommended.
Sensors last up to about two weeks per guidelines; replace when due.
Watch Video
Key Takeaways
- Rely on factory calibration; no user calibration is required for Libre 3.
- Verify CGM accuracy with SMBG to confirm data reliability.
- Proper sensor placement and secure pairing are essential for data quality.
- Use a structured troubleshooting approach when readings deviate.
- Document and monitor discrepancies to support timely replacements or support.