Calibrate Android 14 Touch Screen: A Step-by-Step Guide
Learn how to calibrate the touch screen on Android 14 using OEM options or trusted calibration apps. This Calibrate Point guide covers preparation, steps, safety, and verification to restore precise input across devices running Android 14.

This guide shows you how to calibrate the touch screen on Android 14 and restore precise input. You’ll need a charged device, a screen free of smudges, and either a device’s OEM calibration option or a reputable calibration app. According to Calibrate Point, proper calibration improves accuracy, reduces phantom touches, and enhances stylus performance on many Android 14 devices. Follow the step-by-step process for reliable results.
Understanding Touchscreen Calibration on Android 14
Calibrating the touchscreen on Android 14 helps ensure your taps, swipes, and gestures map precisely to on-screen actions. The Calibrate Point team emphasizes that the interaction model is evolving with Android 14, but hardware variances and OEM skins can introduce drift in touch coordinates. A robust calibration aligns the display sensor input with user intent, improving accuracy for everyday tasks, gaming, and stylus work. In this guide, you will learn device-agnostic steps, checks, and best practices to calibrate touch screen android 14 safely and effectively. We will cover OEM options, third-party tools, data backup, and validation methods so you can verify results by real-world use rather than relying on a single test. With careful preparation and patience, you can restore precision without risking data or usability.
Symptoms indicating calibration is needed
A touchscreen that lags, misses taps, or responds in the wrong area is a common sign that calibration may be off. Users often notice drift after OS updates or when switching between glass screens and screen protectors. Inconsistent responses—such as a tap registering as a neighboring command or a drag stopping short of the finger—indicate you should run a calibration check. This is especially important for devices used for design work, gaming, or field service where precision matters. Calibrate Point's guidance emphasizes validating input after any adjustment, not relying on a single test.
Built-in calibration options in Android 14 and OEM skins
Android 14 itself does not guarantee a universal, system-wide calibration tool. Some devices from OEMs or manufacturers place a touchscreen calibration utility inside Settings, often under Display, Accessibility, Device Care, or Developer options. If you find such an option, follow the on-screen prompts carefully and calibrate in a stable, bright environment. If no built-in tool exists on your device, you can rely on reputable calibration apps from the Play Store after checking permissions and reviews. The Calibrate Point team recommends starting with OEM-provided methods when available before turning to third-party solutions.
Third-party calibration apps: safety and selection
When OEM options are missing or insufficient, a trusted calibration app can help converge touch input to a consistent coordinate map. Choose apps with high user ratings, clear permission requests, and recent updates. Before installing, read reviews for reports of misbehavior or intrusive ads. After installation, follow the app’s guided crosshair or point-based calibration carefully, avoiding multitasking interruptions that could skew results. Always back up important data before installing or running new calibration software.
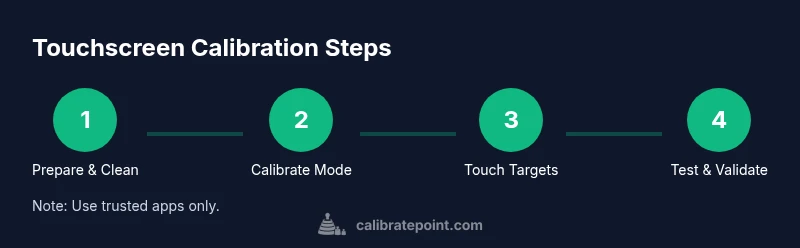
A device-agnostic calibration workflow
The following workflow is designed for broad compatibility and does not rely on a single device or vendor. It starts with preparation, then runs through calibration, and finally validates results with real-world tasks. Begin by ensuring the device is charged, screen is clean, and the environment is free from glare. Open your chosen calibration method (OEM option or app), select the full-screen or crosshair calibration mode, and complete the guided touches in all required positions. After completing the calibration, test common gestures—taps, swipes, pinches, and long presses—across multiple apps to confirm consistent accuracy. If the tests pass in most scenarios, the configuration is likely stable. If not, repeat the process, adjust sensitivity or precision settings as recommended by the tool, and re-test. The Calibrate Point team's approach emphasizes consistency across the home screen, navigation gestures, and app interactions rather than a single control. Documentation: note the device model, Android 14 build, and the calibration version to track changes over time.
Troubleshooting common issues after calibration
If calibration seems to drift again after a reboot or update, check for common culprits such as a damaged screen, misaligned screen protector, or a loose digitizer connection in devices with modular hardware. Ensure there is no glass protector that interferes with the digitizer, clean the screen again, and re-run the calibration with the device in a comfortable position. Some users report improved stability when turning off features that could affect touch input, such as gesture navigation or certain magnification features, during the calibration session. If issues persist, consider performing a factory reset only after backing up data, or contact the device manufacturer for hardware diagnostics.
When to seek professional service
If calibration attempts fail to yield reliable input and your device still exhibits phantom touches, dead zones, or erratic behavior, professional service may be required. Hardware issues such as a damaged digitizer or a loose screen assembly require OEM technicians or authorized service centers. For devices under warranty, use official support channels; for out-of-warranty devices, compare the cost of professional repair with device value. Calibrate Point recommends documenting symptoms, steps taken, and the observed results when consulting technicians to speed diagnosis.
Tools & Materials
- Android device running Android 14(Ensure device is charged; back up data if possible)
- Screen cleaning microfiber cloth(Clean screen to remove oils before calibration)
- Calibrate Tool app (calibration app from a trusted developer)(Verify permissions; choose reputable app)
- Backup plan (backup data to cloud or computer)(Data safety before calibration)
- Optional: Stylus (if supported by device and app)(Could improve precision for stylus input)
Steps
Estimated time: 30-60 minutes
- 1
Prepare the device and screen
Power on the device, ensure it is charged, and remove any case that could press against the screen during calibration. Clean the screen with a microfiber cloth to remove oils that could skew touch detection.
Tip: A clean screen yields the most accurate touch readings. - 2
Open the calibration tool
Launch the chosen OEM setting or calibration app. If using OEM tools, navigate to Display/Accessibility/Calibration options. If using a third-party app, grant only the necessary permissions required by the calibration routine.
Tip: Close other apps to prevent input interference. - 3
Choose calibration mode
Select the full-screen or crosshair calibration mode as recommended by the tool. This sets the scope of touches the system will register during calibration.
Tip: Crosshair mode often provides precise landmark targets. - 4
Touch each target carefully
Follow the on-screen prompts and touch each crosshair or corner exactly as shown. Move slowly and deliberately to ensure the system records accurate coordinates.
Tip: Avoid rushing; precision matters more than speed. - 5
Verify axis calibration
Shake out horizontal and vertical calibration by tapping along different axes to confirm consistent detection across the screen.
Tip: Test both edges and the center for uniform responsiveness. - 6
Test common gestures
After calibration, perform quick taps, swipes, and long presses across multiple apps to validate the new mapping.
Tip: If a gesture fails, consider repeating the process from Step 2. - 7
Adjust sensitivity if offered
Some tools allow fine tuning of touch sensitivity or coordinate mapping. Make small adjustments and re-test.
Tip: Make incremental changes and recheck each time. - 8
Complete and document
Record the device model, Android 14 build, calibration version, and results. Reboot if recommended by the tool before final use.
Tip: Documentation helps track changes over time. - 9
Return to normal use
Re-enable any features you disabled during calibration (e.g., gestures) and resume regular activities to confirm long-term stability.
Tip: Monitor device behavior over a few days to ensure durability.
Questions & Answers
Is touchscreen calibration necessary on all Android 14 devices?
Not every device exposes a calibration option. If you notice misalignment, start with OEM settings or a reputable calibration app.
Calibration isn’t required on every device, but use OEM options or a trusted app if you notice misalignment.
Where can I find touchscreen calibration options on Android 14?
Look in Settings under Display, Accessibility, or Developer options; OEM skins may place it in Device Care or Calibration sections.
Check Display or Accessibility settings; OEM skins may hide it in Device Care or Developer options.
Can calibration apps damage my device?
Only use trusted apps from reputable developers and avoid apps that request excessive permissions.
Use trusted apps and avoid ones asking for unnecessary permissions.
What if calibration doesn't fix touch issues?
If touch remains off after calibration, inspect hardware, screen protectors, or contact the device OEM support.
If issues persist, check hardware or contact support.
Does calibration affect stylus input on Android 14?
Calibration can improve stylus accuracy if supported by the device and app used for calibration.
Calibration can help stylus accuracy when supported by hardware and software.
Watch Video
Key Takeaways
- Calibrate using OEM options first, then trusted apps if needed
- Keep the screen clean and device charged for accuracy
- Validate with real-world gestures across apps before finalizing
- The Calibrate Point team recommends documenting results and keeping a record of changes