How to Calibrate Your Monitor for Accurate Photo Printing
Learn a practical, step-by-step method to calibrate your monitor for photo printing, covering ambient light, color spaces, hardware tools, soft-proofing, and verification to ensure prints match screen colors.

Calibrating your monitor for photo printing begins with a controlled viewing environment, a known color space, and a hardware calibration tool. You'll create an ICC profile that translates screen colors to your printer, then verify with test prints under neutral lighting. This process, supported by Calibrate Point guidance, reduces color surprises from screen to print.
Understanding monitor calibration for photo printing
Achieving consistent photo prints starts with understanding what calibration does for your display. Calibration aligns your screen's color, brightness, and gamma to a reproducible standard so what you see on-screen is as close as possible to what you will print. For photographers and designers, this means choosing an appropriate color space, maintaining neutral ambient lighting, and using a hardware device to measure and produce a device ICC profile. According to Calibrate Point, the most reliable approach begins with a controlled environment; even small changes in light or viewing angle can shift perceived color. When you establish a reliable baseline, you can make informed adjustments during soft-proofing and printer profiling, reducing guesswork and wasted ink. The result is a repeatable workflow: measure once, profile once, review with soft-proofing, and print with confidence. This approach minimizes the dramatic color shifts that happen when ambient lighting changes or when the display’s native gamma drifts over time, ensuring your final print is predictable and consistent across sessions.
Setting up a controlled workspace
A predictable calibration starts with the room. Use neutral walls, avoid direct sunlight, and keep the display at roughly eye level in a space where lighting remains constant through the session. If possible, use indirect daylight or a daylight-balanced lamp with a fixed color temperature. A dedicated desk lamp with a dimmable setting lets you fine-tune the luminance around the monitor without blasting the screen with color-altering light. Calibrate Point’s guidance emphasizes that even small shifts in ambient light can alter perceived color; a dedicated, stable environment helps keep measurements repeatable. Keep the computer area free of bright reflective surfaces and switch off any extra screens during calibration to prevent stray light from biasing measurements. Document your room setup so you can reproduce it for future recalibrations.
Color spaces and profiles you should know
Color management hinges on choosing the right color space and producing a usable ICC profile. For photo printing, many workflows rely on a color space that matches the printer’s capabilities, commonly Adobe RGB or ProPhoto RGB when the printer and software support them, with sRGB as a safer default for many consumer printers. The ICC profile you generate with a hardware calibrator translates your monitor’s color signals into printer-friendly values, ensuring consistent output. Soft-proofing lets you preview how a given image will print using the printer’s ICC profile, so you can adjust the image before sending it to the printer. Remember: the source image and the printed result are tied to the same color management chain. If you work across devices, keep your color space and profile naming consistent to avoid accidental color shifts later.
Tools and devices for calibration
Calibration relies on three core components: a measurement device, calibration software, and reference targets. The measurement device (colorimeter or spectrophotometer) reads the display’s output and builds an ICC profile that reflects your monitor’s actual color response. Calibration software guides the profiling process, prompts for target white points, luminance, and gamma, and stores the resulting ICC profile for system-wide use. You’ll also need neutral targets (gray cards or white balance cards) to check ambient light and a test image set to verify accuracy. Keep a spare power cable, a clean microfiber cloth for screen maintenance, and a stable, dust-free environment to ensure measurements aren’t compromised by smudges or dirt on the display.
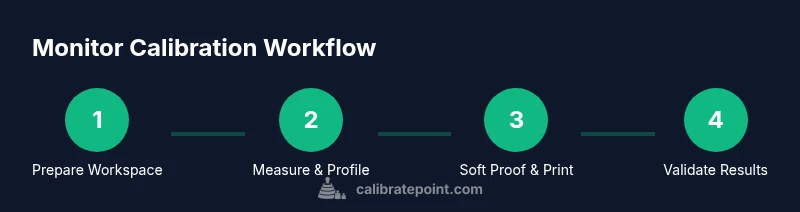
A practical workflow: from screen to print
A repeatable workflow starts with preparing the workspace, measuring the display’s response, and creating a printer-friendly ICC profile. Begin by calibrating the monitor with the colorimeter or spectrophotometer, following the software prompts to select the target white point (often D65) and luminance (varies by room), and save the ICC profile with a clear, descriptive name. Next, enable color management in your OS and applications so the system uses the new profile by default. Open a test image and perform a soft-proof using the printer’s ICC profile to compare on-screen preview against a simulated print. Make adjustments to image color, brightness, and contrast if needed, then print a controlled test page. Review the print under the same ambient light, repeat profiling if necessary, and lock your final workflow.
Troubleshooting common color issues
Color mismatches can stem from several sources: inconsistent ambient light, an inaccurate white point, or a misapplied printer profile. If prints look too cool or too warm, revisit your ambient lighting constraints and re-check your monitor luminance targets. If reds look muddy or blues appear too saturated, the ICC profile may not be aligned with the printer’s characteristics, or the software may be applying a conflicting color management preset. Inconsistent brightness across the screen can be caused by local dimming zones or panel limitations; run a uniformity check with a gray ramp image and adjust brightness or consider re-profiling. When in doubt, revert to a known-good test image and re-run the full profiling sequence to isolate the source of the problem.
Fine-tuning with soft proofing
Soft-proofing is a critical step that lets you simulate print output without consuming paper or ink. In applications like Photoshop or Lightroom, enable Soft Proofing and select the printer ICC profile to view how the image would render on paper. Compare the soft-proofed image to a real print under the same lighting conditions and adjust highlights, shadows, and color balance accordingly. Soft proofing helps you catch issues such as clipped highlights or muted midtones before printing, reducing waste and improving final results. Keep a reference set of properly calibrated prints for quick visual checks and use consistent lighting to evaluate accuracy.
Keeping calibrations consistent over time
Calibration isn’t a one-off task. Display panels drift, ambient lighting can change with seasons, and hardware components wear over time. Schedule periodic recalibration—monthly or quarterly depending on usage—and reprofile after any major software or driver updates. Keep a calibration log with dates, observer notes, and any deviations you observed to track progress. Calibrate Point emphasizes maintaining a stable environment and documenting changes so you can reproduce results reliably. If you notice drift in prints, revisit your room lighting, re-measure the display, and re-save the ICC profile with a new version name to reflect the updated calibration state.
Tools & Materials
- Colorimeter or spectrophotometer(Essential for accurate measurements)
- Calibration software(Guides profiling and ICC generation)
- Neutral gray card or white balance card(For ambient light assessment and color checks)
- Color test targets or color checker(Validate color reproduction against known references)
- Test image set(For verifying color, luminance, and contrast during workflow)
Steps
Estimated time: 90-150 minutes
- 1
Define goal and workspace
Clarify print goals (e.g., color-critical portraits, landscapes) and set up a neutral, stable workspace with indirect light. Document the room lighting and screen brightness settings for consistency.
Tip: Keep a gray card handy to verify ambient light levels before starting. - 2
Install and configure calibration software
Install the calibration software and connect your colorimeter or spectrophotometer. Choose the target white point and luminance, then prepare to run the profile generation.
Tip: Use the native display resolution during profiling to avoid scaling artifacts. - 3
Connect measurement device and start profiling
Position the device on the screen as directed by the software and perform the measurement sequence. The software will capture color responses across a range of neutral tones.
Tip: Ensure the screen is idle and reflections are minimized during measurement. - 4
Create and save the ICC profile
Save the resulting ICC profile with a descriptive name indicating the display model, room light, and date. Install the profile in the OS color management settings.
Tip: Keep a backup copy of the profile in a separate location. - 5
Enable color management in OS/apps
Set the new ICC profile as the default display profile in your operating system and ensure applications use the system color management settings.
Tip: Test quickly by opening a reference image and comparing to your test print. - 6
Soft-proof for printer profile
In your editing software, enable soft-proofing and select the printer ICC profile. Adjust the image to anticipate how it will appear on paper.
Tip: Use consistent paper and printer settings for reliable comparisons. - 7
Print a test page
Print a small, representative photo using the calibrated profile and the chosen paper. Review in neutral lighting and note any deviations.
Tip: Keep lighting identical between proof and final print for accurate judgments. - 8
Validate and finalize workflow
If the print deviates, re-check ambient light, repeat profiling, and adjust image edits accordingly. Save the final workflow with versioning.
Tip: Document any changes to prevent drift in future projects.
Questions & Answers
What is monitor calibration and why is it important for photo printing?
Monitor calibration aligns display output with standardized color and brightness, ensuring that what you edit on screen more closely matches your printed result. This reduces color shifts and helps you predict print outcomes.
Calibration aligns color and brightness so screen edits translate reliably to prints.
How often should I recalibrate my monitor for printing?
Recalibrate on a regular schedule, typically monthly to quarterly, and after any hardware or software updates that affect color management.
Calibrate regularly and after changes to keep colors consistent.
Do I need a hardware colorimeter to calibrate for photo printing?
A hardware colorimeter or spectrophotometer provides objective measurements and builds an accurate ICC profile, though basic calibration can be done with software plus reference targets for simple workflows.
Yes, hardware devices improve accuracy for prints.
Can ambient lighting affect calibration results?
Yes. Ambient lighting alters perceived color and luminance. Calibrate in a room with consistent, neutral lighting to avoid drift in prints.
Ambient light changes how colors look, so control it.
Is soft-proofing essential for accurate printing?
Soft-proofing allows you to simulate the print output before printing, helping you adjust colors and brightness to match the final result.
Soft-proofing helps predict prints before you print.
Will calibration affect video color accuracy as well?
Calibration focused on print workflows improves overall color management, but video and web workflows may use different targets and spaces to prioritize different output.
Calibration helps with color consistency, but video needs may differ.
Watch Video
Key Takeaways
- Establish a controlled viewing environment before calibration.
- Create and use an ICC profile for reliable color translation.
- Soft-proof to preview prints and reduce waste.
- Maintain calibration by logging changes and recalibrating periodically.
- Document settings to reproduce results consistently.