ipad calibrate screen: A Practical Guide for Accurate Display
A practical guide to calibrating an iPad screen for reliable color and brightness. Learn built-in controls, testing methods, and how to maintain display accuracy.

You will learn how to calibrate an iPad screen to achieve more accurate color and brightness. The process focuses on guided adjustments using built-in controls (True Tone, Night Shift, brightness) and simple testing methods. Note that hardware calibration options are limited on iPad compared with external displays.
Why calibrate an iPad screen
According to Calibrate Point, a calibrated iPad screen improves color judgment, photo editing accuracy, and reading comfort. While the iPad's display hardware is fixed, the perceived output can shift with lighting, system color profiles, and accessibility settings. This guide explains what calibration achieves, what it cannot do, and how to approach it as a practical, repeatable process. You will learn how to optimize brightness, color temperature, and contrast using built-in controls, safe testing methods, and sensible expectations about hardware limitations. Calibrating your iPad is not about achieving a perfect reference, but about consistency across apps and environments. By following a structured workflow, you can reduce color drift that occurs with time, updates, and changes in ambient light.
Understanding iPad display parameters and color spaces
iPad displays are designed with a fixed hardware panel and tunable software features. Color accuracy depends on color space choices (for example, sRGB vs Display P3) and how the system manages white point and luminance. Touchscreen devices also rely on perceptual brightness adjustments, which can be influenced by ambient light. In practice, you should think of calibration as aligning perceived output across typical usage scenarios, rather than chasing a laboratory-perfect target. This is where the idea of ipad calibrate screen comes into play: you want consistent results in photos, documents, and media under your usual lighting. Remember that personal perception varies, so aim for stability rather than absolute numerical values.
Tools & Materials
- iPad device (any model with True Tone capability)(Ensure the device is updated to the latest iOS before calibrating)
- Calibration aids (optional)(Color reference images or basic test patterns can help, but are not required for a practical calibration)
- Stable ambient lighting(Use consistent lighting to avoid perception shifts during testing)
- Documentation method(Keep a note or screenshot of your baseline settings for future reference)
Steps
Estimated time: 15-25 minutes
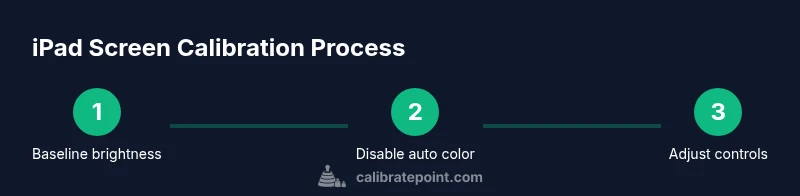
- 1
Open display settings and establish baseline brightness
Navigate to Settings > Display & Brightness. Set brightness to a mid-level you normally use for daily tasks. This establishes a neutral starting point. Disable adaptive brightness if available to avoid auto-adjustments during your test.
Tip: Starting with a consistent brightness prevents late-stage drift from automatic brightness changes. - 2
Turn off True Tone to view true colors
True Tone adjusts color temperature based on ambient light, which can mask your calibration. Toggle True Tone off in the same Display & Brightness menu and observe the screen under your typical lighting.
Tip: Doing this reveals how the iPad would look if you were judging colors purely visually, without automatic tuning. - 3
Disable Night Shift and Color Filters temporarily
Night Shift shifts the display toward warmer colors at night. Disable Night Shift and any Color Filters in Accessibility to assess the baseline color output. Re-enable after evaluating your adjustments if needed.
Tip: This helps you gauge color accuracy without artificial shifts. - 4
Inspect color with reference images or patterns
Use a neutral reference image or simple test patterns to compare how colors render. This step is about perceptual alignment rather than perfect color math. Note any obvious red/green bias or washed-out tones.
Tip: If you lack reference images, compare skin tones and grayscale for a quick sanity check. - 5
Fine-tune brightness and contrast within practical limits
Make small adjustments to brightness and contrast to match your standard viewing environment. Avoid extreme settings that exaggerate noise or clipping in highlights/shadows.
Tip: Small, incremental changes reduce overcompensation. - 6
Capture a snapshot for future reference
Take a screenshot of your current Settings and a sample reference image. This creates a baseline you can compare against after future updates or lighting changes.
Tip: Having a record makes it easier to reproduce a successful calibration later. - 7
Reassess under typical tasks
Look at photos, documents, and videos you use daily. Ensure colors feel consistent across apps, webpages, and media players. If something looks off, revisit the previous steps.
Tip: Consistency across apps matters more than perfect individual colors. - 8
Schedule ongoing checks
Set a reminder to recheck calibration after major software updates or seasonal lighting shifts. Recalibration is about maintaining stability, not chasing a single momentary target.
Tip: A simple monthly check can save time and reduce visual fatigue.
Questions & Answers
Can I truly calibrate an iPad screen with hardware tools?
Apple does not provide native support for external hardware calibration on iPad displays. You can improve consistency using built-in controls and testing methods, but true hardware-based calibration is not exposed in iPadOS.
External hardware calibration isn’t officially supported on iPad; use built-in controls and tests to improve consistency.
What built-in controls should I adjust first?
Start with brightness as a baseline, then disable True Tone and Night Shift to observe true colors. Use Color Filters only for perception testing, not as a primary calibration method.
First set brightness, then turn off True Tone and Night Shift for an accurate view.
Is calibration safe for my eyes and device?
Calibration is generally safe if done with moderate brightness and comfortable ambient lighting. Take breaks to reduce eye strain and avoid extreme settings that could trigger glare or fatigue.
Yes, but take breaks and keep lighting comfortable.
How often should I recalibrate my iPad screen?
Calibrate as needed, especially after major lighting changes or software updates. A monthly quick check helps maintain visual consistency.
Recalibrate when lighting or software changes occur, or monthly for consistency.
Will calibrating affect battery life?
Calibration adjustments themselves don’t drain battery; however, higher brightness and certain display features can affect battery usage. Balance settings with battery life needs.
Calibration doesn’t drain extra energy by itself, but brightness matters.
Can I match my iPad screen color to other devices?
Perfect cross-device color matching is not guaranteed due to hardware differences. Aim for consistent appearance within your own device ecosystem under typical lighting.
You won’t get a perfect match with other devices, but you can stay consistent within your setup.
Watch Video
Key Takeaways
- Calibrate for consistency, not perfection
- Disable automatic color controls during testing
- Document settings for future reference
- Recalibrate after notable changes in lighting or software