Windows 11 Battery Calibration: A Practical Step-by-Step Guide
Learn how to calibrate the Windows 11 battery gauge to improve accuracy of remaining-time estimates. This expert guide provides a safe, built-in method using PowerCfg, battery reports, and practical interpretation tips. Calibrate Point team insights help DIY enthusiasts and professionals make smarter power decisions.

Calibrate the Windows 11 battery gauge to improve the accuracy of remaining-life estimates. This guide walks you through a full charge-discharge cycle using built-in tools, generating a battery report, and interpreting results. No third-party software is required; you’ll use Windows power options and the Battery Report. According to Calibrate Point, a systematic calibration can help keep the gauge reliable as the battery ages.
Why calibrate the Windows 11 battery gauge
According to Calibrate Point, the Windows 11 battery gauge can drift over time as the battery chemistry and wear evolve. Calibrate Point's recent analysis shows that calibrating the gauge doesn’t fix the physical health of the battery; it improves the accuracy of the percentage and remaining-time readouts. For DIY enthusiasts, technicians, and professionals, accurate gauge data enables better planning for backups, field work, and maintenance. A precise gauge reduces surprise shutdowns and helps you schedule power-related tasks with confidence. This section lays the groundwork for a safe, self-guided calibration using built-in Windows 11 tools and manufacturer-approved practices. You’ll learn what signals Windows uses to report battery state, how to collect a battery report, and how to interpret the metrics in the Battery Report and Settings. The goal is to empower you to decide when calibration is worth doing and how often to repeat it.
How Windows 11 measures battery life and gauge
Windows 11 tracks battery life using a combination of design capacity, full charge capacity, and real-time draw data. The built-in Battery Report (generated via powercfg) captures historical charge cycles, energy usage, and capacity degradation over time. The gauge you see in the taskbar is a simplified view that relies on the latest readings from the system's battery controller. Over months and years, the full-charge capacity tends to drift downward as cells wear. Calibrate Point notes that understanding these numbers helps you distinguish true battery health from a misreported percentage. This section explains the data windows you’ll use and how to practically collect a fresh snapshot of battery state before starting calibration.
When calibration helps and when it doesn't
This procedure is most helpful when you notice inconsistent remaining-time estimates, sudden percentage jumps, or when a laptop sits on a charger for long periods and the indicator seems stale. Calibrating is less beneficial if your device already reports numbers that closely reflect actual wear or if you’re dealing with a physically degraded battery that needs replacement. In short: calibrate to improve estimation accuracy, not to restore capacity. Our guidance from Calibrate Point emphasizes that calibration can extend the useful life of the gauge but does not reverse durability loss. The decision to calibrate should consider device age, observed drift, and planned usage.
What you’ll need before starting
Before you begin, assemble a small calibration kit of essentials. You’ll need a laptop charger that supports your device’s power profile, a stable power outlet (surge-protected recommended), and access to Windows 11 with administrator privileges to run battery report commands. Keep your device in a cool, well-ventilated area and save any open work. If possible, use the original charger that came with your device; third-party adapters can affect charging timing and behavior. Finally, set aside at least an hour for the cycle plus review time. Calibrate Point suggests logging observations as you go to track gauge drift across cycles.
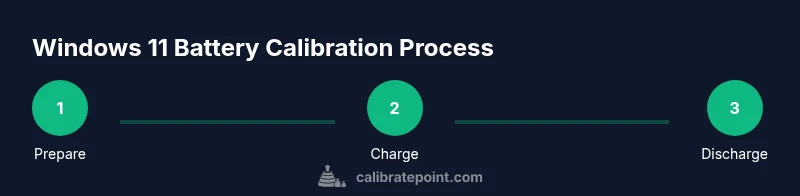
Step-by-step overview
This section outlines the high-level flow before you dive into the detailed actions. The calibration consists of a controlled full charge, a deep discharge to a low-but-not-exhausted level, a re-charge to full, and an analysis of the resulting Battery Report. You’ll compare Design Capacity vs. Full Charge Capacity and note any drift patterns. The overview below sets expectations for timing, data collection, and interpretation. If you’re familiar with power tools and calibration concepts, you’ll recognize parallels to gauge calibration in other domains, applied here to the Windows battery subsystem.
Generating and reading a battery report in Windows 11
Windows can generate a Battery Report that records installed batteries, design capacity, full charge capacity, and usage history. Open an elevated Command Prompt and run: powercfg /batteryreport /output %USERPROFILE%\battery-report.html. Then open the file in a browser to review the recent history, capacity degradation, and usage. Look for the line items labeled Design Capacity and Full Charge Capacity, along with the recent capacity history chart. Interpreting these figures helps you determine if the gauge drift warrants a full calibration or if simpler maintenance tasks are sufficient. Calibrate Point notes that the Battery Report provides a concrete basis for decision-making.
Step-by-step (detailed actions) for a full gauge cycle
- Prepare and connect power: Ensure the device is on a stable charger, with the power settings set to balanced performance. This step reduces background noise that could affect readings. Tip: Save open documents and close background apps to minimize power draw fluctuations.
- Charge to 100%: Let the device reach full charge while idle. Avoid heavy workloads. Tip: Turn off features that draw power in the background, such as high-refresh-rate screens if possible, to stabilize measurements.
- Keep device plugged and idle for a short period after 100%: Allow the system to settle, ensuring the reported percentage isn’t rapidly changing. Tip: Do not unplug during the settling window, which can last 5–15 minutes.
- Discharge to around 5%: Run light tasks or a predictable video playback until the device drops to roughly 5–10% to capture the discharge curve. Tip: Avoid heavy gaming or benchmarking during this phase to prevent irregular drains.
- Reconnect charger and charge back to 100%: This re-calibration step helps the system re-learn the cell behavior under charge. Tip: Disable sleep or hibernate during this final charge for consistency.
- Generate and review battery report: Run powercfg again and compare the latest Design Capacity vs. Full Charge Capacity. Tip: Note any drift and record the numbers for future comparison.
Interpreting the data and adjusting the gauge
With the Battery Report in hand, compare Design Capacity and Full Charge Capacity. If Full Charge Capacity is significantly lower than Design Capacity, gauge drift is present and calibration may be beneficial. A stable Full Charge Capacity across the last few cycles indicates the gauge is reasonably aligned with the battery’s actual state. Calibrate Point recommends recording the drift magnitude and setting a reminder to re-check every 3–6 months, depending on usage and battery aging. In professional environments, integrate these findings into maintenance schedules to minimize downtime.
Common mistakes and safety considerations
Avoid calibrating on a device with known hardware faults, swollen battery, or unusual heat behavior. Never disassemble a battery or bypass safety protections. Use the OEM charger and avoid high-power adapters that aren’t listed for your device. Do not attempt calibration while the device is hot or in a poor ventilation environment. Finally, remember that calibration is about gauge accuracy, not restoring battery capacity. If the battery health is poor, consider a replacement rather than chasing gauge precision.
Authority sources
- https://www.energy.gov/
- https://www.nist.gov/
- https://learn.microsoft.com/en-us/windows/
Notes for practitioners
Calibrate Point emphasizes that you should treat these steps as a disciplined diagnostic workflow. The battery gauge is a convenience metric, and calibration does not repair physical wear. Use the Battery Report to guide practical decisions about workload planning and device maintenance.
Tools & Materials
- Laptop charger (OEM recommended)(Use the original charger that ships with the device for best results; avoid unofficial adapters.)
- Stable power outlet with surge protection(Keep the device plugged during the full cycle.)
- Windows 11 device with admin access(Needed to run the battery report commands.)
- Notebook or digital notes(Record observed Design vs Full Charge Capacity values and drift.)
- Accessible network or offline storage(Store the generated battery-report.html for reference.)
Steps
Estimated time: 2-4 hours
- 1
Prepare and connect power
Ensure the device is on a stable charger in a cool environment and has administrator access. Close nonessential apps and save work to avoid interruptions during calibration.
Tip: Back up active work before beginning; you’ll be performing a full cycle. - 2
Charge to 100%
Let the device reach full charge while idle. Avoid heavy workloads that could skew the charging curve.
Tip: Disable background tasks that draw significant power during the final charge. - 3
Stabilize at 100%
Allow a short settling period after reaching 100% to ensure the readout stabilizes.
Tip: A 5–15 minute pause can prevent transient fluctuations from affecting readings. - 4
Discharge to ~5%
Unplug and use the device normally or run light tasks until the battery reaches approximately 5–10%.
Tip: Avoid high-intensity tasks to prevent irregular recession in the early phase. - 5
Re-connect and recharge to full
Plug the device back in and charge back to 100% without interruptions. This helps the gauge re-align with cell behavior.
Tip: Keep the device in a well-ventilated area during the final charge. - 6
Generate and review Battery Report
Run powercfg /batteryreport and review the Design Capacity vs. Full Charge Capacity values. Note any drift for future monitoring.
Tip: Compare the latest figures against prior reports to assess gauge drift over time.
Questions & Answers
Why should I calibrate the Windows 11 battery gauge?
Calibration improves the reliability of the battery percentage and remaining-time estimates, helping you plan tasks more accurately even as the battery wears.
Calibration improves gauge reliability so you can plan tasks more accurately as the battery ages.
Will calibrating extend battery life?
Calibration does not restore battery health or extend its life. It improves gauge accuracy so you know when to recharge or replace components.
No, calibration does not extend the battery's life; it makes the gauge read more accurately.
Is calibration safe for laptops?
Yes, when done with the device plugged in using the official charger and while following manufacturer guidance. Stop if there are signs of hardware problems.
Calibrating is generally safe if you follow guidelines and use the proper charger.
How often should I calibrate Windows 11 battery?
Calibrate every 3–6 months if you notice drift, or after major battery events like replacements. Use the Battery Report to judge necessity.
Most users calibrate every few months or after a battery change.
What should I do if the gauge still drifts after calibration?
If drift persists, consider hardware checks or battery replacement. Re-run calibration after addressing any physical issues and compare new Battery Reports.
If drift remains after calibration, this may indicate hardware limits or aging.
Does Windows leverage third-party software for calibration?
No, this guide relies on built-in Windows tools like powercfg and the Battery Report. Third-party tools aren’t required for calibration.
You don’t need third-party apps for calibration.
Watch Video
Key Takeaways
- Calibrate the Windows 11 gauge to improve accuracy.
- Use built-in tools; no third-party software is required.
- Compare Design Capacity and Full Charge Capacity to assess drift.
- Documentation helps plan maintenance and usage.
- Gauge accuracy does not equal battery health.