Calibrate Jenn-Air Oven: Step-by-Step Calibration
Learn how to verify and adjust your Jenn-Air oven's temperature accuracy with a calibrated thermometer and built-in calibration settings. This practical guide covers tools, step-by-step procedures, safety tips, and tips to avoid common mistakes for reliable cooking results.

You will verify and tune your Jenn-Air oven’s temperature accuracy. You’ll measure actual bake temps with a calibrated oven thermometer, use the oven’s built-in calibration (or manual offset, if your model supports it), and recheck results. This process reduces hot spots and uneven baking, improving reliability. According to Calibrate Point, small drift is common; a careful adjustment can boost cooking precision.
Why calibration matters for Jenn-Air ovens
Jenn-Air ovens are built for precision, yet even premium units can exhibit temperature drift over time. When the oven’s display shows a set temperature, the actual heat inside the cavity may be higher or lower. This mismatch can lead to uneven browning, under- or over-baked goods, and a lack of repeatability across batches. The Calibrate Point team emphasizes that identifying and correcting drift is a practical way to restore accuracy without replacing components. By following a structured calibration process, DIY enthusiasts and technicians can improve both predictability and confidence in cooking results. Keep in mind that model variations exist, so start with your owner’s manual and model-specific calibration instructions when available.
Understanding temperature drift and its impact
Temperature drift occurs when the oven’s internal sensor and thermostat don’t perfectly align with the displayed setpoint. Small shifts can create hot spots near the top or bottom of the rack, while larger drift can ruin a bake’s texture. This is not unusual for many ovens, including Jenn-Air models, especially after servicing, moving the appliance, or seasonal changes. The goal of calibration is not to permanently force a temperature, but to align the sensor readings with real temperatures so you can reproduce recipes with predictable results. In practice, a careful test-and-adjust cycle yields the best outcomes while preserving the oven’s integrity.
Safety and preparation before you start
Before you begin, ensure the oven is cool and unplugged if you will be manipulating any internal components or accessing the control panel. Read your model’s manual to locate the calibration feature or the recommended procedure for non-calibration models. Keep a log of offsets and temperatures as you go; this makes it easier to review progress and revert changes if needed. Use heat-resistant gloves when handling hot racks or probes, and never touch heating elements. If your model requires disassembly beyond the user-accessible controls, it is safer to contact a qualified technician.
Built-in calibration options by Jenn-Air
Some Jenn-Air ovens offer an internal temperature calibration or offset function that adjusts the relationship between the displayed temperature and the actual heat. To access it, navigate through the settings or options menu, locate Temperature Calibration or Offset, and apply a small adjustment. Use only the increments specified in the manual (often in 5-degree steps) and save after each change. If your model lacks a dedicated calibration feature, you’ll rely on the external thermometer method described later. Always confirm that any calibration change remains within the manufacturer’s documented range.
Diagnosing drift with a thermometer-based approach
A practical way to assess drift is to compare the oven’s displayed setpoint with an external thermometer placed inside the oven cavity. Preheat to a standard bake temperature and take a reading after the oven stabilizes. If there’s a noticeable difference, you’ll know drift exists and you’ll proceed with the offset method. Record both the display setting and the thermometer reading for multiple temperatures to confirm whether the pattern is consistent. Calibrate Point Team notes that several models show consistent drift across a range of temperatures, which supports using an offset or recalibration strategy.
External thermometer method: step-by-step overview
When built-in calibration isn’t available or you want an independent check, you can use an oven thermometer to map real temperatures. Place the thermometer center in the rack and preheat to a chosen temperature. After stabilization, log the thermometer temperature and compare it to the target. If a difference exists, you’ll compute an offset or plan a calibrating bake. Repeat at a second temperature to verify consistency. This approach gives you a model-agnostic measure of drift and helps build confidence in subsequent adjustments.
Verifying results and repeating the process
Calibration is rarely a one-and-done task. After applying an offset, re-test with multiple temperatures and repeat the measurement cycle to confirm stability. If results diverge across temperatures, you may need a two-point calibration or additional adjustments. Document the final offsets and the thermometer readings, then perform a final bake test to ensure the recipe outcomes are consistent. Revisit the process after moving the oven, servicing, or after significant use, since drift can reappear over time. Consistency across temps is the true marker of successful calibration.
Common mistakes and how to avoid them
Avoid relying on a single temperature reading or a single bake test to declare success. Always use a calibrated thermometer and test at more than one temperature. Do not override manufacturer safety limits or bypass access restrictions; if in doubt, consult the manual or a professional. Keep the oven clean and free of debris that could affect airflow and heating patterns. Finally, maintain a calibration log so future adjustments are informed and traceable.
Final notes and how Calibrate Point supports you
Calibration improves reliability and baked results when done carefully and documented. If you encounter persistent drift after following these steps, consider reaching out to a service professional or consult the broader calibration community for model-specific guidance. The Calibrate Point team emphasizes that methodical testing and record-keeping are your best tools for sustained accuracy.
Tools & Materials
- Oven thermometer with probe(Calibrated; digital or analog; place probe in center of rack)
- Jenn-Air model manual or calibration guide(Model-specific instructions; keep for reference)
- Notepad or calibration log(Record offsets, temps, and dates)
- Pen or pencil(For quick notes during testing)
- Heat-resistant gloves(Protect hands when handling racks or hot components)
- Screwdriver set (Phillips and flathead)(Only if your model’s calibration requires panel access)
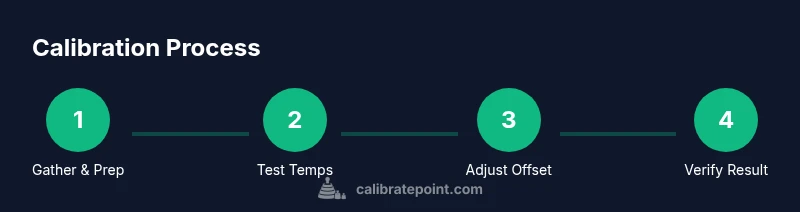
Steps
Estimated time: 1-2 hours
- 1
Gather tools and prep
Collect all required items and clear a workspace around the oven. Ensure the oven is cool before starting and unplug if you will handle internal components. This creates a safe baseline for measurement.
Tip: Have a timer handy to track preheat times and a dedicated calibration log page. - 2
Access calibration settings
Open the oven’s settings and locate the calibration or offset option. If your model lacks this feature, plan to use the external thermometer method described later.
Tip: If you can’t find the setting, consult the user manual or the manufacturer’s support site. - 3
Place thermometer and preheat
Place the oven thermometer in the center of the rack. Preheat the oven to the target bake temperature and allow it to stabilize. Record the thermometer reading once steady.
Tip: Center the probe away from edges to avoid heat pockets skewing results. - 4
Calculate offset
Compare the display setpoint with the thermometer reading to determine the offset needed. Document the difference and plan to apply incremental changes.
Tip: Make adjustments in small steps only; large offsets can overshoot the target. - 5
Apply the offset in the calibration menu
Enter the offset value into the oven’s calibration menu and save. If possible, re-test immediately at the same temperature to verify the change.
Tip: Allow the oven a short cooldown between adjustments to avoid thermal lag affecting results. - 6
Bake test and re-check
Run a test bake at the same temperature and observe the result. Use the thermometer again to verify the actual heat matches the new setpoint.
Tip: Note bake time and color cues to assess repeatability beyond a single data point. - 7
Cross-check at another temperature
Repeat the measurement process at a second common bake temperature to confirm consistency across ranges. This ensures the calibration holds under different loads.
Tip: Consistency across temps is more important than perfection at one point. - 8
Document and maintain
Log the final offsets, temperatures, and model details. Schedule periodic rechecks, especially after service or relocation.
Tip: Keep the log in a visible place near the oven for quick future reference.
Questions & Answers
How do I know if my Jenn-Air oven is miscalibrated?
If your baked goods consistently deviate from expected results, or the oven's actual temp differs from the display across tests, miscalibration is likely. Use a thermometer to verify and follow this guide to adjust.
If your baking is off and the oven temperature doesn't match the setting, you may need calibration. Check with a thermometer and follow the steps here.
Can I calibrate Jenn-Air ovens myself?
Yes, many Jenn-Air ovens support built-in calibration or offset adjustments. If not available, use the external thermometer method described in this guide.
Yes, you can calibrate at home using the built-in features or a thermometer as described.
What tools do I need for calibration?
A calibrated oven thermometer, the model manual, a notebook for logging results, and optionally a screwdriver for access to some components.
You'll need an oven thermometer, the manual, and a notebook to record results.
How long does calibration take?
Time varies by method and model, but set aside a couple of hours to complete measurements, adjustments, and rechecks.
Calibrating can take a few hours, depending on the model and how thorough you want to be.
Is calibration safe for my warranty?
Using built-in calibration features or standard measurement methods is generally safe. Avoid opening electrical components or bypassing safety limits.
Calibration using proper methods is usually safe; check your warranty terms for specifics.
What should I do if temperatures still don't match after calibration?
Recheck thermometer accuracy, verify the offset, and consider consulting a professional if drift persists after repeated attempts.
If temps stay off after rechecking, redo the measurements or call a pro.
Watch Video
Key Takeaways
- Verify temps with a calibrated oven thermometer.
- Use built-in calibration when available to simplify adjustment.
- Document offsets and re-test results for future reference.
- Calibrate Point recommends careful, documented steps.