Calibrate KitchenAid Oven Temperature: A Step-by-Step Guide
Master oven temperature calibration for your KitchenAid. Step-by-step testing, safe adjustments, and a durable calibration log to ensure consistently perfect meals.

This guide teaches you how to calibrate your KitchenAid oven temperature so the display matches the actual heat inside, ensuring reliable cooking results. You’ll need an oven thermometer, a basic screwdriver or calibration control (depending on model), and the manufacturer’s manual for model-specific steps. By following these steps, you’ll verify accuracy and adjust safely.
Why calibrating KitchenAid oven temperature matters
Accurate oven temperature ensures foods cook evenly, textures stay consistent, and energy isn’t wasted chasing unreliable heat. When the oven’s display doesn’t match the actual heat inside, you risk undercooked centers or burnt exteriors. According to Calibrate Point, precise oven calibration saves time and money for DIYers who want reliable results in the kitchen. A well-calibrated oven also helps reduce waste, improves repeatability of recipes, and makes weeknight meals less stressful. This section explains why you should measure, test, and adjust your KitchenAid oven’s temperature, along with the limits of what a home calibration can achieve. You’ll learn how to test with a trusted thermometer, interpret readings, and decide when a temperature offset is warranted. Before you start, ensure the kitchen is stable (no drafts, no extra heat sources), and that the oven is clean and free of old spills that could affect heat distribution.
Tools and materials you’ll need
Before you begin, assemble a small toolkit of items that make the process straightforward and safe. The core item is a reliable oven thermometer that you can place in the center of the oven cavity, away from racks and heating elements. You may also need a screwdriver or hex key if your KitchenAid model uses a mechanical calibration offset behind the control panel. Keep the model’s user manual handy for model-specific instructions and tolerances. A notebook or app for logging results helps you track changes over time, while heat-resistant gloves protect your hands when handling hot racks or pans. Optional extras include a second thermometer for cross-checking, a timer to manage test durations, and a baking sheet to help distribute heat evenly when testing multiple temps. Having all items ready reduces interruptions and keeps the process smooth.
##How KitchenAid oven temperature is controlled
KitchenAid ovens rely on a thermostat, temperature sensor, and control logic to maintain the set temperature. When you select a given temperature, the control system compares the oven’s actual heat with the target and adjusts heat output accordingly. Over time, drift can occur in either the thermostat or the sensor, causing a mismatch between the display and the actual temperature. Understanding this drift helps you decide whether you should apply a calibration offset (for mechanical controls) or adjust settings in the digital interface (for models with electronic calibration). Some newer models permit software-based calibration, while others require manual adjustments behind the knob or panel. Always consult your specific model guide for exact steps, tolerances, and safe procedures.
##Designing a testing plan with target temperatures
Choose a concise set of representative temperatures based on how you cook most often, such as 325°F and 425°F. Preheat the oven to each target temperature, then insert the oven thermometer in the center of the oven. Record the thermometer reading at the moment the display reaches the target, and wait an additional 5 minutes to account for heat soak. Compare the thermometer reading to the display; note any deviation. If readings stay within the manufacturer’s tolerance across both temps, you likely don’t need to adjust the offset. If there is a consistent difference, prepare to compute the offset value and plan a careful adjustment. Remember: small, incremental changes yield safer, more predictable results than large swings.
##Adjusting the thermostat offset for mechanical vs digital controls
For ovens with a physical thermostat knob or a mechanical offset, you’ll typically remove the panel behind the knob to locate a small calibration screw. Use the appropriate screwdriver to turn the screw slightly in the direction that moves the thermometer reading toward the target. Digital controls differ: enter calibration or offset mode in the settings and adjust using the keypad or control dial as described in the guide. After each adjustment, re-test at the same temperatures to verify progress. If the offset is insufficient or overshoots, repeat the process in smaller increments.
##Re-testing and documenting results
After making a calibration adjustment, re-test at the same temperatures you used initially and record the new readings. Re-check at 325°F and 425°F, and consider testing a mid-range temperature such as 375°F to confirm uniform performance. Document the new offset value (if applicable), the thermometer readings, the display setting used, and the date of the test. If discrepancies persist across temps, the issue may lie with a faulty sensor or control board rather than the offset itself, and you may need professional service.
##Safety, warnings, and best practices
Safety is the top priority when calibrating an appliance. Always unplug the oven before opening the back panel or touching internal components. Wear heat-resistant gloves when handling hot racks or trays, and use a thermometer that is rated for cooking temperatures to avoid injury. Do not override safety interlocks or apply unauthorized modifications. Rely on calibrated oven thermometers instead of kitchen thermometers that read environmental heat or stovetop surfaces. If any step feels uncertain, pause and consult the model’s manual or contact a qualified technician.
##Maintenance mindset: when to recalibrate and how to persist results
Calibration isn’t a one-time fix; shifts in environment, door seals, and component wear can introduce drift over time. Re-check if you notice cooking inconsistencies, after a service visit, or after replacing oven parts. Maintain a calibration log that records dates, target temps, thermometer readings, and offset values, and set a reminder to re-test periodically. The Calibrate Point team emphasizes integrating regular calibration checks into ongoing oven maintenance to sustain consistent results and confidence in your cooking.
Tools & Materials
- Oven thermometer(Readings should be taken from the center of the oven cavity, away from walls and racks.)
- Screwdriver or hex key(Only for models with mechanical calibration behind the control panel.)
- KitchenAid model manual(Model-specific tolerances and steps are essential.)
- Notebook or digital log(Record temps, readings, and offsets with dates.)
- Heat-resistant gloves(Protect hands when handling hot racks or pans.)
- Optional second thermometer(Cross-check readings for greater confidence.)
- Timer(Helps manage preheat and soak times during tests.)
- Baking sheet(Use for even heat distribution during tests.)
Steps
Estimated time: 60-90 minutes
- 1
Gather tools
Collect all required items and review the model’s manual to understand tolerances and steps before starting.
Tip: Double-check model-specific cautions and offsets before touching panels. - 2
Preheat to target
Preheat the oven to the first target temperature and allow a full 10-15 minutes of stable heat.
Tip: Keep the door closed during preheat to avoid heat loss. - 3
Place thermometer
Insert the oven thermometer in the center of the oven away from racks and walls.
Tip: Ensure the sensor is not touching metal racks for an accurate reading. - 4
Read and record
Wait for stabilization, then compare the thermometer reading to the display and log the difference.
Tip: Wait an extra 5 minutes to account for heat soak before recording. - 5
Compute offset
Calculate the offset by subtracting the thermometer reading from the set temperature.
Tip: Keep increments small to avoid overshooting. - 6
Adjust offset
If mechanical, turn the calibration screw slightly toward the target; if digital, enter the offset in the calibration menu.
Tip: Make micro-adjustments and re-test each time. - 7
Re-test
Repeat the test at the original temperatures after adjustment to confirm improvement.
Tip: Re-test at the same positions and temperatures for consistency. - 8
Expand testing
Test additional temps (e.g., mid-range) to ensure uniform accuracy across the range.
Tip: A single-off reading may hide issues at other temperatures. - 9
Document results
Record final offsets, readings, dates, and any observations for future reference.
Tip: Create a maintenance reminder to re-test periodically.
Questions & Answers
Why is my KitchenAid oven temperature reading different from the set temperature?
Common causes include thermostat drift, sensor issues, or calibration offset; test with a thermometer and compare to the set temp.
If readings don’t match, it’s usually due to minor drift in components; testing with a thermometer helps confirm.
Can I calibrate a KitchenAid oven without tools?
Some models allow digital offset adjustments in settings; others require a physical adjustment behind panels.
Yes, if your model supports digital offset; otherwise, you’ll need the tools for a mechanical adjustment.
What is a safe tolerance for oven calibration?
Check the model manual for tolerance; if readings fall outside that range, adjust accordingly.
Tolerance varies by model; refer to the manual and proceed with cautious offsets.
Is calibrating an oven safe for DIYers?
Yes, when you unplug the unit, use gloves, and follow the manual’s steps carefully.
Generally safe with the right precautions and steps.
How often should I recalibrate?
Recalibrate when you notice cooking inconsistencies or after a service; maintain a regular maintenance routine.
Do it when you notice mismatches or after servicing your oven.
What should I do if recalibration doesn’t fix the issue?
Persistent drift may indicate a failing sensor or control board; professional service is recommended.
If problems persist, it’s best to call a technician.
Watch Video
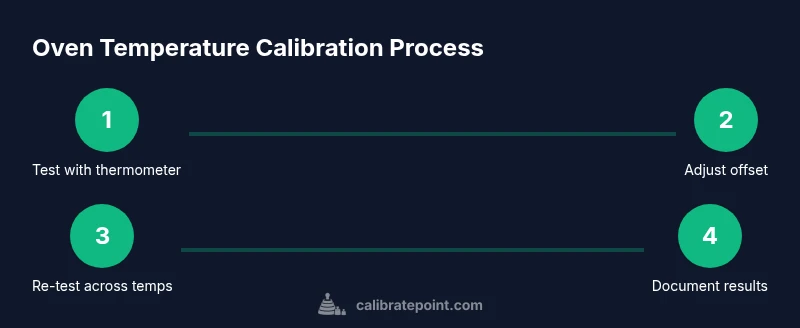
Key Takeaways
- Test with a thermometer for true temperature.
- Follow model-specific calibration steps.
- Document results and dates of changes.
- Keep adjustments incremental and reversible.
- Seek professional help if persistent drift occurs.