How to Calibrate a Samsung Oven
Learn to calibrate your Samsung oven with a safe, thermometer-driven procedure. This guide covers tools, tests, adjustments, and best practices to improve temperature accuracy and baking results.

Calibrating a Samsung oven involves verifying the displayed temperature with a reference thermometer, adjusting an internal offset if your model supports it, and re-checking for consistency. The process is home-friendly and helps ensure reliable baking results. You will need a thermometer, a timer, and basic tools to begin; follow the step-by-step instructions to complete the test.
Why calibrate Samsung oven matters
Calibrating your Samsung oven matters because it ensures the oven's displayed temperatures align with the actual heat inside the cavity, leading to reproducible baking results. According to Calibrate Point, calibrating an oven improves bake accuracy and can reduce energy waste when used regularly. Home cooks and technicians alike rely on a stable oven to achieve consistent browning, proper dough rise, and accurate timing across different recipes. An uncalibrated oven can cause edges to burn while centers remain undercooked, or vice versa, especially with convection cycles. By validating the oven’s temperature against a reference thermometer, you create a reliable baseline that informs any adjustments and helps you repeat successful results across multiple pans. Remember that Samsung models vary in how calibration is performed—some offer an offset setting, others require documented temperature tests to verify accuracy.
Safety considerations and prerequisites
Safety is paramount when working with hot appliances. Before you start, unplug the oven or switch off at the circuit and allow the interior to cool completely if you need to inspect components. Wear heat-resistant gloves when handling racks or probes and keep flammable materials away from the cooking cavity. Work in a well-ventilated space and have a timer, a calibrated thermometer, and a fire extinguisher nearby. Avoid touching wiring or disassembly; consult the device manual for model-specific calibration options. If your model lacks an offset feature, avoid attempting hardware changes and instead focus on test-based adjustments to become confident in your results.
How Samsung ovens handle calibration: hardware and software
Samsung ovens embed electronic thermostats and, in some models, an adjustable offset that corrects the displayed temperature to better reflect reality. The offset, if present, is typically accessed through a service menu or a consumer-friendly calibration option in newer models. Other models require confirmation via thermometer testing without altering the internal control, which preserves safety and warranty while still letting you quantify performance. Knowing which path your unit supports will save time and prevent improper changes. Always consult the official manual or Samsung’s website for model-specific steps and warnings, because calibration procedures can vary by series, whether it’s a single-oven or dual-wall setup.
Tools and materials you'll use (overview)
Having the right tools makes calibration straightforward. You’ll need a calibrated digital oven thermometer (capable of reading high temperatures accurately), an oven-safe probe or metal stem thermometer, a timer, and a notebook for logging readings. A screwdriver may be necessary if you access a panel in the control area. Place the thermometer so its sensing bulb sits in the center of the oven cavity, away from coils or fans for a representative reading. Ensure all tools are clean and dry, and verify that the thermometer has recently been calibrated for reliability.
Establishing a baseline: testing methodology
This baseline testing procedure creates a reference for future calibrations. Preheat the oven to a standard temperature, such as 350°F, and allow at least 15–20 minutes for the oven to stabilize. Insert the reference thermometer into the center of the oven, ensuring the probe does not touch racks or walls. Record the displayed temperature, the actual thermometer reading, and any deviations. Repeat at least once to determine consistency. If you can test multiple temperatures (e.g., 325°F, 350°F, 400°F), you’ll gain a better map of how the oven's display tracks true heat across the range. Document any offset that appears and note whether it changes with temperature or remains constant.
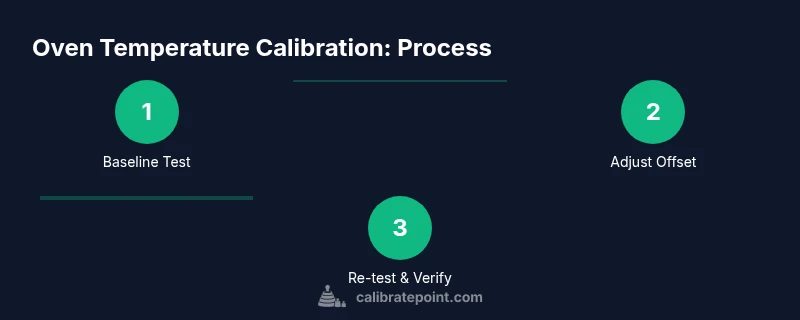
Step-by-step calibration procedure (overview)
This section outlines the core actions you’ll perform in order. Step 1: Prepare workspace and safety gear. Step 2: Baseline test at your chosen temperature. Step 3: Preheat and test at a second temperature to check for drift. Step 4: If your model supports an offset, apply the adjustment following the manual. Step 5: Re-test the oven at multiple temperatures to verify accuracy. Step 6: Record results and reset to normal operating mode. The goal is a repeatable reading within the target range across common baking temperatures.
Troubleshooting common issues
If readings remain inconsistent after a baseline test, check thermometer placement, ensuring the probe isn't too close to the door seal or heating elements. Heat sources can create hot spots near racks; move the thermometer to the center for an average reading. Debris or melted sugar on the probe can skew results; clean the probe tip between tests. If you notice a constant offset that your model's settings cannot adjust, confirm you’re using the correct model-specific calibration steps, and consider professional service for recalibration or sensor replacement. Remember that some fluctuations are expected due to door open duration or oven fan cycles during testing.
Post-calibration checks and maintenance
Once you achieve stable readings within the target range, re-check after several bake cycles to confirm persistence. Keep a calibration log with dates, temperatures tested, readings, and any offset applied. If you notice drift over time, schedule a re-check and revisit the calibration steps. For long-term maintenance, avoid placing metal lids or foil too close to the heat source during calibration tests, since reflective surfaces or obstruction can alter heat distribution. Periodic checks help sustain accuracy and preserve cooking consistency.
Authority sources and standards
For calibration guidance and standards, refer to reputable sources: the National Institute of Standards and Technology (NIST) provides measurement references and testing methodologies; the Occupational Safety and Health Administration (OSHA) outlines safe handling of heated equipment; and the Department of Energy’s energy-saving guidance offers best practices for household appliances. While these sources don’t provide model-specific Samsung instructions, they establish the safety and measurement frameworks you should follow during calibration and testing.
Calibration best practices for Samsung ovens
To summarize best practices: always verify with a trusted thermometer, stick to model-supported procedures, document all results, and perform checks across multiple temperatures. Avoid unauthorized hardware changes; calibration is about measurement and adjustment within the built-in options, not invasive service. Schedule periodic re-checks and keep your manual handy for model-specific steps. By following a consistent protocol, you’ll achieve reliable baking results and extend the reliability of your kitchen appliances over time.
Tools & Materials
- Digital oven thermometer(Target reference thermometer with range at least 100–500°F)
- Oven-safe probe(Probe that can withstand high oven temperatures)
- Timer(Accurate timing device for stable readings)
- Notepad and pen(Log readings and offsets)
- Screwdriver set(If panel access is required for offset (model-specific))
- Calibrated baking sheet or tray(For test cooking consistency checks)
- Heat-resistant gloves(Handle hot racks safely)
- Samsung model manual(Model-specific calibration instructions)
Steps
Estimated time: 30-60 minutes
- 1
Prepare workspace and safety gear
Clear the area, unplug or switch off the oven, and wait for it to cool if you’ve been using it. Gather a calibrated thermometer, an oven-safe probe, a timer, a notepad, and a pen. Put on heat-resistant gloves and ensure all tools are clean and ready.
Tip: Have a helper hold the oven door open briefly if you need to swap probes, but avoid prolonged door opening to minimize heat loss. - 2
Verify baseline with the thermometer
Preheat to 350°F and let the oven stabilize for 15-20 minutes. Place the thermometer probe in the center of the oven, avoiding contact with racks or walls. Compare the thermometer reading to the oven display and record both values.
Tip: Ensure the thermometer bulb is fully inserted and not touching metal parts that could skew readings. - 3
Test at a second temperature to check drift
Repeat baseline test at 400°F (and optionally at 325°F) to detect drift across a range. Allow 15 minutes to stabilize after each preheat and record readings.
Tip: Drift that varies with temperature suggests a non-linear offset or sensor issue. - 4
Apply offset adjustment (if available)
If your Samsung model exposes an offset calibration in the settings, enter the required adjustment so the display aligns with the thermometer reading. Save changes and return to a neutral cooking mode before retesting.
Tip: Double-check any closed-loop settings to confirm you saved correctly. - 5
Re-test to confirm accuracy
Repeat the 350°F baseline and 400°F test after applying the offset. Ensure readings are within a close range of the target; note any remaining discrepancy and decide if further action is needed.
Tip: If you can’t adjust the offset, rely on test results to guide baking times rather than trusting the display alone. - 6
Document results and reset to normal
Log the temperatures tested, thermometer readings, and offset values (if used). Return the oven to its normal mode and continue baking as usual, watching for consistent results over time.
Tip: Keep a calibration log for future reference and periodic re-checks.
Questions & Answers
Can I calibrate a Samsung oven at home?
Yes, many Samsung ovens allow basic calibration using built-in options or thermometer-based testing. Check your model’s manual to confirm available methods and avoid any actions that could void the warranty.
Yes, you can calibrate at home if your model supports an offset or thermometer-based testing. Refer to your manual for model-specific steps.
What tools do I need to calibrate my Samsung oven?
You’ll typically need a calibrated digital oven thermometer, an oven-safe probe, a timer, a notepad, and the model’s official manual for instructions. Optional items include a screwdriver for panel access on some models.
A calibrated thermometer, a probe, a timer, and the manual are usually enough to start.
What if my oven doesn’t have an offset adjustment?
If offset adjustment isn’t available, calibration relies on thermometer testing and adjusting baking times or using recipes adjusted for the observed error. Do not attempt hardware changes without professional guidance.
If there’s no offset option, you’ll calibrate by testing and adjusting cooking times instead of altering hardware.
How long does calibration take?
A typical home calibration takes about 30 to 60 minutes, depending on how many temperatures you test and whether you apply an offset. Allow extra time for careful documentation and re-testing.
Most people complete it in about half an hour to an hour.
Is calibrating dangerous?
Calibration involves heat and handling hot components. Follow safety precautions, use gloves, and never bypass safety interlocks or disassemble electrical parts. If uncertain, seek professional service.
It’s relatively safe if you follow safety steps and don’t tamper with electrical components.
How often should I re-check calibration?
Re-check calibration if you notice inconsistent baking results or after moving the oven, replacing racks, or after servicing. Regular checks help catch drift before it affects cooking outcomes.
Check whenever you notice drift or after a maintenance event.
Watch Video
Key Takeaways
- Test temperature accuracy with a reference thermometer
- Document baselines before adjustments
- Use model-supported calibration paths only
- Re-test after any adjustment to confirm accuracy
- Maintain a calibration log for ongoing accuracy