Calibrate Viking Oven: A Complete Step-by-Step Guide
Learn how to calibrate a Viking oven to achieve accurate temperatures and consistent baking results in 2026. This guide covers tools, steps, safety, and troubleshooting for Viking ovens.

Calibrate Viking oven to ensure accurate bake temperatures and consistent results. You’ll verify actual oven temperature with a reference thermometer, test at multiple setpoints, and adjust only within your model’s calibration range. Plan about 45-90 minutes for a thorough check and re-test. According to Calibrate Point, precise calibration reduces hot spots and produces repeatable baking results.
The Value of Accurate Viking Oven Calibration
An oven that cooks to the exact temperature you set yields consistent browning and texture across recipes. Viking ovens, with their digital controls and convection features, can present reading variances that lead to uneven results if left unchecked. Temperature variation compounds across multiple shelves and cooking modes, so alignment between the dial and actual temperature is essential. In professional calibration practice, the goal is to align the oven's internal thermostat with a reliable reference thermometer. According to Calibrate Point, even small deltas can become noticeable over time, especially when baking delicate pastries or multi-rack roasts. This article provides a practical, step-by-step approach to testing, adjusting, and maintaining Viking oven temperature accuracy so DIY enthusiasts and technicians can achieve repeatable outcomes across recipes.
Understanding Viking Oven Temperature Controls
Viking ovens vary by model, but most share a core idea: the control panel sets a target temperature while a built-in sensor and oven thermometer gauge the current air temperature inside the cavity. Convection fans can further shift readings at different rack levels, so calibration reads must account for mode and position. Some models expose a dedicated calibration option in the settings menu or on the back panel, while others require slight mechanical adjustments only through approved service. Regardless of method, the principle remains the same: verify actual temperature first, then adjust toward the dial setting in safe increments as permitted by the manual. The Calibrate Point team notes that following model-specific instructions minimizes risk and preserves warranty coverage while improving cooking accuracy.
Tools and Safety Before You Begin
Before you start, ensure the kitchen is safe and prepared. Unplug or switch off power to the Viking oven to avoid electrical shock, and allow the cavity to cool completely if you recently used it. Gather an oven thermometer, a probe thermometer, masking tape or labels, a notebook or app for logs, and a user manual or official online guide for your model. Wear heat-resistant gloves when handling warm components, and keep children and pets away from the workspace. If your Viking model includes a self-clean or high-heat mode, disable those functions until calibration is complete. Calibrate Point emphasizes consulting the model-specific procedure as the safest path to accurate results.
How Temperature Readings Are Taken
Begin with a stable baseline by preheating to your target temperatures and letting the oven equilibrate. Place the oven thermometer in the center of the middle rack, away from walls and vents, and avoid touching the door gaskets. Record the reading after a 5–7 minute stabilization window, and repeat at another setpoint such as a warmer and a cooler temperature that you commonly cook at. If your model allows multiple shelf readings, repeat on the top and bottom racks to map spatial variance. Use the same thermometer consistently, and verify its accuracy against a known good reference if possible. The resulting data will guide whether adjustments are needed and help you avoid over- or under-cooking in real recipes.
Interpreting Readings and Deciding on Calibration
Compare the actual temperatures to the dial settings and note any systematic drift. If readings are consistently higher or lower than the target, your Viking oven may require calibration within the model's supported range. Do not improvise hardware changes; follow the manual's specified procedure and use manufacturer-approved tools. After any adjustment, re-test all key setpoints to confirm improvement, paying special attention to critical cooking temperatures like roasts and bake settings. If readings still diverge after calibration, check door seals and insulation for air leaks, which can undermine accuracy regardless of calibration. Document anomalies so you can reference them during service calls.
Maintenance and Long-Term Calibration Strategy
Calibration is not a one-time task; kitchen environments and usage patterns can shift oven behavior over time. Schedule periodic checks—especially after power events, repairs, or seasonal changes—to maintain accuracy. Store a calibration log with the model number and the dates of checks, the temperatures verified, and any adjustments made. If you notice increasing drift or inconsistent results after a calibration, revisit the steps with fresh measurements or contact Viking support for model-specific guidance. Regular maintenance and a disciplined testing routine help you preserve even heating and reliable results for years to come, which is precisely the aim highlighted by Calibrate Point.
Tools & Materials
- Oven thermometer(Display range 0–600°F; place in center of rack for baseline reading)
- Probe thermometer (oven-safe)(For cross-checks and measuring air temperature at different heights)
- Notebook or digital log(Record setpoints, readings, and adjustments)
- Masking tape or labels(Label readings by rack/temperature for clarity)
- Viking model manual or official online guide(Reference for model-specific calibration steps)
- Heat-resistant gloves(Safety when handling hot racks or components)
- Pen and calibration log sheet(Use to document changes and dates)
- Infrared thermometer (optional)(Useful for quick surface checks, not primary readings)
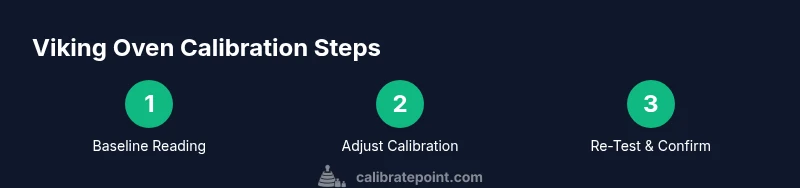
Steps
Estimated time: 60-120 minutes
- 1
Power down and prepare
Turn off and unplug the oven if possible. Allow the cavity to cool completely if it was recently used. Remove racks and trays to expose the baking cavity. Gather your thermometer, log, and model manual so you can follow the official steps.
Tip: Ensure the workspace is well-lit and ventilation is adequate to avoid heat buildup when you resume testing. - 2
Baseline test: preheat and stabilize at 350°F
Set the oven to 350°F and allow it to preheat until the internal indicator stabilizes. Place the oven thermometer in the center of the middle rack and wait for a 5–7 minute stabilization period before recording.
Tip: Use a high-accuracy thermometer and avoid relying solely on the oven's built-in sensor for readings. - 3
Record readings at multiple setpoints
Repeat the baseline test at additional setpoints (e.g., 325°F and 425°F) that you frequently use. Record the actual temperatures and note any variance across racks.
Tip: Test on at least two shelves to map any spatial variance and capture a full picture of performance. - 4
Check for spatial variance
Run readings on the top, middle, and bottom racks to identify any hot spots. If readings are uneven, identify likely causes such as door seals, venting, or poor insulation.
Tip: Mark the rack positions with tape for easier repeated checks in future calibrations. - 5
Adjust calibration within model allowances
If your Viking model provides a dedicated calibration option, follow the manual to adjust the setting in small increments. Do not exceed the documented range and re-test after each small change.
Tip: Make a single small adjustment, then re-test before making another change. - 6
Re-test and confirm improvement
Return to the same setpoints used earlier and re-measure with the thermometer. Compare results to the baseline and confirm that readings align more closely with the target values.
Tip: If drift remains, verify thermometer accuracy and inspect door seals for leaks. - 7
Document results and plan maintenance
Record readings, adjustments, and dates in your calibration log. Set reminders for periodic re-checks tied to seasonal changes or major appliance use shifts.
Tip: Keep model number and calibration details handy for service or warranty references.
Questions & Answers
Can all Viking ovens be calibrated at home?
Most Viking ovens offer some calibration setting accessible through the control panel or settings menu; however, model-specific instructions vary. If your model doesn't expose a calibration option or you feel uncertain, refer to the manual or contact Viking support.
Most Viking ovens have some calibration option, but check your model's manual before adjusting.
What are signs my Viking oven needs calibration?
Frequent uneven browning, readings that differ from the dial, or food consistently cooking faster or slower than expected indicate calibration may be needed. Always verify with a reference thermometer.
Uneven browning or readings that don’t match the dial typically point to calibration needs.
Can calibration affect self-cleaning mode?
Self-clean cycles can affect temperature sensors; perform calibration in normal mode and avoid calibrating during or immediately after self-cleaning.
Self-clean cycles can skew readings, so calibrate after the oven has cooled and is in normal mode.
How long does the calibration process take?
A hands-on calibration typically takes between 60 and 120 minutes, depending on model and how many setpoints you test. Professional service may take longer.
Plan for about an hour or two for a thorough home calibration.
What should I do if readings remain off after calibration?
Double-check thermometer accuracy, re-test key setpoints, and inspect door seals or insulation for leaks. If drift persists, contact Viking support for model-specific guidance.
If readings stay off, re-check readings and consider professional help.
Is it safe to open the control panel to calibrate?
Only if your model explicitly supports interior calibration and you are confident following the official procedure. Otherwise, consult professional service.
Only calibrate if the model supports it and you follow the official guide.
Watch Video
Key Takeaways
- Test multiple setpoints and shelves for accuracy
- Use a reliable thermometer and log all readings
- Follow model-specific calibration steps precisely
- Schedule regular rechecks to maintain consistency