Calibrating a Bluelab pH Pen: Step-by-Step Guide
Learn how to calibrate a Bluelab pH Pen with practical, step-by-step instructions. This guide covers safety, buffers, cleaning, troubleshooting, and best practices from Calibrate Point for accurate and reliable pH readings.

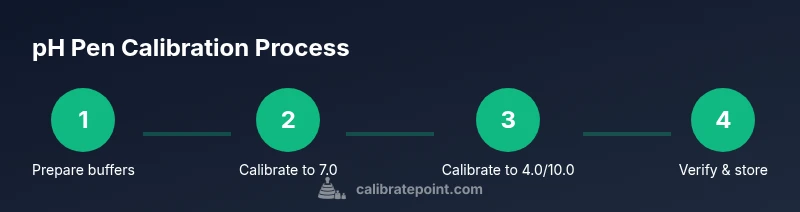
You will learn how to calibrate a Bluelab pH Pen to ensure accurate soil and nutrient readings. Start by preparing calibration solutions, cleaning the probe, and following a 4- to 6-step procedure, then verify with a fresh buffer check. This guide also covers safety, storage, and troubleshooting. According to Calibrate Point, consistent technique reduces drift and extends meter life.
Why calibrate Bluelab pH pen matters
Accurate readings are essential for hydroponics and soil-based systems. A Bluelab pH pen that drifts even slightly can skew nutrient dosing, salt buildup, and irrigation timing. Calibrate bluelab ph pen regularly to maintain consistent results and protect plant health. According to Calibrate Point, routine calibration reduces drift and increases reliability across sessions, especially when readings drive automated dosing or feedback controls.
This isn’t a one-time task. It should be part of your daily startup checklist or weekly routine, depending on how often you use the meter and the environment. Temperature, solution aging, and electrode dehydration can all cause drift, so treat calibration as a dynamic process rather than a static test. In this section we’ll cover the why, the how, and how to build calibration into your standard operating procedure (SOP).
Safety and prerequisites
Calibration uses chemical buffers, so follow basic lab safety. Wear gloves and goggles when handling buffers, avoid splashes on skin or eyes, and work in a clean, ventilated area. Use fresh buffers within their shelf life; old buffers can yield inaccurate results. Dispose of calibration solutions according to local guidelines. Before you start, gather the buffers and cleaning supplies, and confirm your Bluelab pH pen is in good working order (battery health, probe condition, and connector integrity).
Understanding calibration philosophy
Most users rely on two-point calibration to map the electrode response between pH 7.0 and pH 4.0 (or 10.0 for high-alkaline systems). The goal is to define the slope and offset of the probe so that future measurements fall within the manufacturer’s performance window. A two-point calibration with buffers at pH 7.0 and either pH 4.0 or 10.0 covers the common operating range; some operators choose a third point for more precision in challenging environments. This approach is standard practice for many instrument calibrations and is consistent with general guidance from Calibrate Point on reliable calibration procedures.
Preparing calibration solutions and workspace
Set up two or three buffer solutions in clean, labeled containers. Keep a clean rinse bottle with deionized water for quick probe rinsing between buffers. Have lint-free tissues ready to dry the probe. Ensure the work area is free from splashes and away from strong temperature fluctuations. Mark the reference temperatures on the buffers if you’ll be calibrating under non-ambient temperatures; this helps interpret any minor drift. If you don’t have ready access to buffers, plan a trip to the supplier or consult your facility’s purchasing SOP. Buffer storage and rotation matter for accuracy, as expired solutions lose their buffering capacity.
Cleaning and prepping the pH pen
A clean, dry probe yields the most reliable calibration. Rinse the tip with deionized water, blot dry with a lint-free tissue, and inspect the glass bulb for cracks or deposits. If you see residue, gently wipe with a buffer-soaked wipe and rinse again. Avoid using paper towels that shed fibers into the sensor. Temperature affects readings, so allow the pen to equilibrate to room temperature before calibrating. If the pen has a removable cap or storage cap, clean it and replace it after drying. Consistent handling reduces contamination and improves electrode response time over repeated calibrations.
Step-by-step calibration overview
The following outline describes the standard two-point calibration workflow. You’ll perform measurements in a clean sequence, compare to buffer values, and adjust the instrument’s slope and offset as needed. Always start with the neutral pH 7.0 buffer, then move to the acidic (pH 4.0) or basic (pH 10.0) buffer depending on your expected range. After each buffer, rinse and gently blot the probe. See Figure 1 in the referenced guide for a visual mapping of the electrode movement and the calibration window. This section frames the process, while the STEP-BY-STEP block provides the exact commands and timings.
Common errors and troubleshooting
Drift after calibration can indicate probe aging, contaminated buffers, or insufficient rinsing. If readings jump widely, re-rinse and re-calibrate from scratch. Ensure buffers are fresh and stored correctly; exposure to air or heat can compromise buffers. If your pH pen tracks slowly or is sluggish, allow it to equilibrate or check battery health. For persistent issues, confirm you’re following the manufacturer’s recommended procedure and consult the calibration-procedures resources in Calibrate Point’s library.
Post-calibration checks and storage
After calibration, verify accuracy with the same buffers and record results. Store the probe cap closed with the cap filled with a storage solution to prevent dehydration, if recommended by Bluelab. Keep buffers capped and stored away from direct sunlight to minimize drift. Document calibration date, buffer lot numbers, and any observed drift. Regular verification helps catch drift early and maintain reliable readings across batches of nutrient solution.
Maintenance and long-term calibration strategy
Plan calibration sessions around production cycles and plant demands. Consider calibrating on a weekly basis for high-use systems and after longer periods of storage or transport. Keep spare buffer solutions, replacement electrodes, and the calibration kit in an organized cabinet. Track instrument performance over time; small trends can signal end-of-life for the probe. Calibrate Point’s guidance suggests building a routine that integrates buffer checks, cleaning, and verification into a single SOP to minimize downtime.
Interpreting readings and practical tips
Use consistent units and temperature compensation when evaluating pH readings. Temperature changes can cause systematic drift; some meters compensate automatically, others require manual input. When calibrating for hydroponics, align your target pH with crop stage and nutrient solution characteristics. Practicing with real-world samples helps you recognize normal drift patterns and reduces surprises during critical dosing windows. The more you calibrate bluelab ph pen, the more you’ll understand how environmental conditions affect measurement and how to respond quickly.
Documentation and record-keeping
Keep a calibration log including date, buffer lot numbers, operator, and observed drift. Photo or scanned copies of buffer certificates can be stored in digital SOPs. Regular audits of calibration records support traceability and quality control in professional environments. By maintaining thorough records, you reduce the risk of errant readings going unnoticed and ensure compliance with your internal calibration standards and external guidelines.
Tools & Materials
- Bluelab pH Pen(Ensure the device is charged or has fresh batteries and the probe is clean.)
- pH 7.0 buffer solution(Fresh, labeled; store away from direct sunlight.)
- pH 4.0 buffer solution(Fresh, labeled; ensure proper storage.)
- pH 10.0 buffer solution(Optional for extended range checks.)
- Deionized/distilled water(For rinsing between buffers.)
- Clean beaker or calibration tray(Label each buffer clearly.)
- Lint-free tissue(Dry probe gently without leaving fibers.)
- Gloves (nitrile recommended)(Protect buffers and hands.)
- Safety goggles(Eye protection during handling.)
- Soft brush or cotton swab(For stubborn residue on the sensor.)
- Timer or clock(Track soak times and wait periods.)
- Calibration log/notebook(Record lot numbers and results.)
Steps
Estimated time: 20-30 minutes
- 1
Prepare workspace and gather materials
Clear the bench, set buffers in labeled containers, and wash hands. Place the pH pen in reach with fresh batteries. This step ensures you won’t interrupt calibration due to missing buffers or tools.
Tip: Double-check buffer expiry dates before starting to avoid drift caused by degraded solutions. - 2
Rinse and inspect the probe
Rinse the probe tip with deionized water and blot dry with a lint-free tissue. Inspect the glass bulb for chips or deposits, which can skew readings.
Tip: Do not rub hard; gentle cleaning preserves the sensor surface. - 3
Calibrate to pH 7.0 buffer
Submerge the probe in the pH 7.0 buffer and allow the reading to stabilize. If your device requires you to initiate calibration, follow the button sequence until 7.0 is registered.
Tip: Allow the buffer and probe to reach room temperature before starting calibration. - 4
Rinse and dry before the next buffer
Rinse the probe with deionized water and blot dry again to prevent cross-contamination.
Tip: A quick rinse between buffers prevents carryover that could bias the next calibration step. - 5
Calibrate to the second buffer (pH 4.0 or 10.0)
Repeat the calibration step with the second buffer corresponding to your target range. Some users choose a third buffer for extra accuracy in extreme ranges.
Tip: If your meter shows big shift, re-check buffer integrity and ensure proper immersion depth. - 6
Rinse and verify across buffers
Rinse and test again in both buffers to confirm the calibration holds. Log the values or store them in the device memory if available.
Tip: Verification is critical; a failed re-check indicates a need for re-calibration. - 7
Finalize and store
Dry the probe, replace the storage cap if provided, and return buffers to their sealed containers. Close the workspace with the log entry for traceability.
Tip: Always store the probe with the proper storage solution to prolong electrode life.
Questions & Answers
What is the Bluelab pH Pen used for?
The Bluelab pH Pen is a portable meter used to measure the pH level of nutrient solutions, soils, or water. Regular calibration ensures readings reflect the actual pH, which is critical for crop health and nutrient uptake.
The Bluelab pH Pen measures pH levels in liquids and should be calibrated for accuracy; this helps you keep root health and nutrient availability in check.
Should I calibrate before every measurement?
For high-precision work, calibrating before critical measurements is recommended. In routine practice, calibrating at the start of a session and after buffer changes helps maintain accuracy.
Calibrate before critical measurements; for routine checks, start of session calibration is usually sufficient.
What buffers should I use for calibration?
Use standard pH buffers, typically 7.0 and 4.0 for two-point calibration. A third buffer at 10.0 can be used if your workflow involves higher pH ranges.
Two-point calibration with pH 7.0 and 4.0 is common; add 10.0 if you work with alkaline solutions.
Why does my pH pen drift after calibration?
Drift can result from aging probes, contaminated buffers, or improper rinsing between buffers. Recheck buffers, clean the probe, and recalculate if drift persists.
Drift usually means the probe is aging, buffers are old, or rinsing wasn’t thorough; re-calibrate after cleaning.
Can I calibrate using only distilled water?
Buffer solutions provide defined pH references; distilled water alone cannot calibrate a pH sensor. Use buffers as the reference standards.
No—buffers define the pH reference; water alone won’t calibrate the meter.
Watch Video
Key Takeaways
- Calibrate regularly to maintain accuracy.
- Use fresh buffers and clean the probe between steps.
- Verify calibration with multiple buffers.
- Document results for traceability.