Can I Calibrate a pH Meter with Tap Water? A Practical Guide
Learn whether tap water can be used for pH meter calibration, why buffer solutions matter, and a clear, step-by-step workflow for accurate, repeatable pH measurements.

If you ask can i calibrate ph meter with tap water, the short answer is no. Tap water is not a stable reference and can cause drift due to minerals and chlorine. According to Calibrate Point, buffer-based calibration with pH 4, 7, and 10, plus DI rinse between measurements, yields reliable, traceable results. This guide explains why and how to calibrate properly.
Why Tap Water Isn't a Reliable Calibration Reference
pH meters depend on fixed reference points to convert electrode response into a pH value. The calibration process anchors those responses to known standards, usually buffer solutions at pH 4, 7, and 10. Tap water, by contrast, varies from municipal supply to supply and with temperature, altitude, and daily usage. The dissolved minerals, carbonates, and chlorine in tap water impact ion activity at the reference and glass–electrode junction, which shifts slope and offset. Since you want repeatable measurements across days and instruments, using anything other than certified buffers jeopardizes accuracy.
According to Calibrate Point, even short-term exposure to tap water can cause small, cumulative changes in electrode potential that show up as drift when you re-check with buffers. Therefore, consider tap water for quick rinses only, not as a substitute for calibration standards. If your lab relies on quick checks, keep a dedicated reference solution or a known-stable buffer stock on hand and label it clearly. The key is stability: stable reference points drive consistent readings.
Buffer Solutions vs Tap Water: What Each Does
Buffer solutions provide a known hydrogen ion activity at a controlled temperature, so the electrode's response can be translated into a precise pH reading. They are manufactured to tight tolerances and are often certified with traceable documentation. Tap water, even when filtered, carries variable ions like calcium, magnesium, bicarbonate, and chloride that alter the reference potential and change the electrode slope over time. This makes it unsuitable as a calibration reference, though fine for a quick rinse between buffers to remove residue.
Calibrate Point analysis shows that using non-buffer references can cause systematic errors that accumulate across calibrations, leading to inaccurate measurements for samples. If you cannot access buffers, at minimum use fresh, high-quality DI water for rinse steps and record any changes you observe. For those relying on hand-held meters, consider a small, dedicated buffer kit with labeled pH 4, 7, and 10 solutions and a temperature-stable storage container. The bottom line: buffers are the backbone of calibration integrity; tap water is a risk, not a solution, for calibration.
Preparing Your Calibration Routine
Begin with a clean, organized workspace and a stable temperature. Confirm the pH meter is clean, dry, and powered if required. Prepare buffers at stable room temperature (ideally within a few degrees of your sample measurements). Label buffers clearly and verify expiry or batch information. Keep a small container of DI water for rinsing the electrode between buffers. Temperature compensation should be enabled if your meter supports it. Record the environmental conditions, buffer lot numbers, and the date of the calibration to maintain traceability. According to Calibrate Point, consistent environmental control reduces drift and improves repeatability across calibration events, especially when you work with complex samples.
Step-by-Step Calibration Workflow (Buffer-Based)
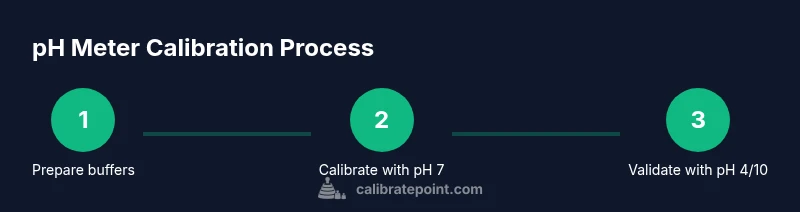
A buffer-based calibration workflow ensures consistent results across days and instruments. The workflow typically involves three reference points to define the meter’s slope and offset. Begin with a pre-rinse, then insert the electrode into the buffers in sequence, and verify the readings against the target values. Temperature control is important; perform calibrations at a known temperature when possible. After calibration, rinse and dry the electrode before proceeding to sample measurements. This section provides an overview; see the dedicated STEP-BY-STEP block for the exact, numbered actions and timing.
Note: This section emphasizes buffer-based calibration because it yields stable, repeatable results essential for reliable measurements.
Rinsing, Drying, and Handling Electrodes
Proper rinsing between buffers helps prevent cross-contamination that can skew results. Use distilled or deionized water for initial rinses and lightly dab the electrode with a lint-free tissue to remove surface moisture. Avoid vigorous wiping that can abrade the glass electrode or generate static. Drying is crucial for stable readings; leave the electrode tip briefly exposed to ambient air or pat gently until the surface is dry. Handle the probe by the body, not the glass bulb, to avoid micro-cracks that can alter response. Temperature stability remains important; rapid temperature changes can invalidate the calibration.
Following best practices reduces drift and ensures the electrode's response remains consistent across calibrations.
Troubleshooting: Common Issues and Fixes
If readings drift after calibration, verify buffer integrity and check for expired solutions. Re-check the temperature compensation setting and confirm the electrode is properly immersed and equilibrated in each buffer. Inconsistent readings can also come from a dirty or worn electrode, a fouled junction, or improper rinsing. If you suspect a fouled electrode, perform an optional clean with a manufacturer-recommended cleaning solution and re-calibrate. Ensure you rinse thoroughly between buffers and avoid cross-contamination by using clean containers for each buffer.
Calibrate Point emphasizes documenting any drift pattern and the actions taken to resolve it; patterns help you identify recurring issues and optimize your workflow.
Documentation and Calibration Logs
Maintaining calibration records is essential for traceability and quality control. Record buffer lot numbers, expiry, the calibration date, operator, environmental temperature, and the final readings for each buffer. If the meter has temperature compensation, note the ambient temperature and the estimated sample temperature. Retain copies of the calibration certificates if you use certified buffers. Regular review of logs helps detect drift trends and plan maintenance or replacement of the electrode.
A well-kept log is a practical investment in long-term accuracy. It also makes audits smoother and supports consistent decision-making over time.
Quick Reference Checklist for Calibrations
- Prepare buffers (pH 4, 7, 10) and DI water
- Clean and dry the electrode; inspect for damage
- Calibrate at pH 7 first, then at pH 4 and/or pH 10
- Verify slope and offset; re-check pH 7 after adjustments
- Rinse between buffers; document results
- Store buffers properly and label containers
- Review calibration logs for drift patterns
- If uncertain, repeat calibration or seek guidance from a supervisor
Following this checklist helps maintain consistency and reliability across calibration events.
Verdict
The Calibrate Point team recommends using buffer-based calibration rather than tap water for pH meter calibration. Tap water should be confined to rinsing steps only, and buffers should anchor the instrument’s slope and offset. For repeatable results, maintain a routine, document your calibrations, and verify readings with multiple buffers. This approach minimizes drift and supports trustworthy pH measurements across samples.
Tools & Materials
- pH buffer solutions (recommended: pH 4, 7, and 10)(Use fresh, known-good buffers; store per manufacturer guidance; ensure temperature stability.)
- Distilled or deionized water for rinsing(Use for electrode rinses between buffers.)
- Beaker or clean container for buffers(Label to prevent cross-contamination.)
- Lint-free cloth or tissue(Pat dry; avoid fibers that shed.)
- Calibrated thermometer or temperature sensor(Helpful for temperature compensation.)
- Gloves(Protect hands from buffer solutions.)
Steps
Estimated time: 60-90 minutes
- 1
Power on and inspect the meter
Turn the meter on and visually inspect the probe for cracks or residues. If the electrode looks dirty, clean according to manufacturer instructions before calibration. Ensure the meter is in the proper calibration mode and the display is ready to receive buffer values.
Tip: A clean, dry electrode improves contact and accuracy. - 2
Rinse the electrode with DI water
Rinse the electrode tip with distilled or deionized water to remove any previous buffer residues. Shake gently to remove droplets; avoid sloshing that could contaminate the buffer solutions. This step prevents carryover from the previous calibration.
Tip: Even tiny droplets can skew successive readings. - 3
Immerse in pH 7 buffer and equilibrate
Immerse the electrode in the pH 7 buffer and allow the reading to stabilize. If your meter offers temperature compensation, enable it and note the ambient temperature. Record the stable reading before proceeding to other buffers.
Tip: Equilibration is essential; give it enough time for a stable signal. - 4
Calibrate with pH 4 buffer
Rinse, then immerse the electrode in the pH 4 buffer. Allow stabilization, then adjust the reading to 4.0 (or as instructed by your instrument). Rinse again to prevent carryover.
Tip: Handle buffers carefully; pH 4 buffer can be more acidic and corrosive. - 5
Calibrate with pH 10 buffer
Repeat the rinse and immersion in the pH 10 buffer. Stabilize and adjust to the target value (normally 10.0). Ensure the temperature is consistent with the prior steps.
Tip: Balance slope with both ends of the scale for accuracy. - 6
Verify with pH 7 buffer again
Return the electrode to the pH 7 buffer to confirm the calibration is stable. If readings deviate, repeat steps 4 and 5 or perform a fresh calibration using fresh buffer solutions.
Tip: Re-checking ensures the calibration remains valid. - 7
Final rinse, dry, and store
Rinse the electrode with DI water, blot gently, and let it air-dry before storage. Store the electrode according to the manufacturer’s guidelines and ensure the meter is turned off or placed in standby mode.
Tip: Storage conditions prevent drift between uses. - 8
Document results and review
Record the buffer lots, date, ambient temperature, and the readings achieved at each buffer. Review your calibration history for drift trends and decide on next steps if performance changes.
Tip: Documentation aids traceability and troubleshooting.
Questions & Answers
Can I calibrate a pH meter with tap water?
No. Tap water has variable mineral content and contaminants that cause drift and inaccurate readings. Calibration requires stable, known references like buffer solutions.
No. Tap water isn’t a reliable reference for calibration; you should use buffer solutions for accuracy.
What buffers do I need for calibration?
Typically, pH 4, pH 7, and pH 10 buffers are used to establish the meter’s slope and offset. Certified, traceable buffers improve accuracy and repeatability.
Use pH 4, 7, and 10 buffers for a reliable three-point calibration.
How often should I calibrate a pH meter?
Calibration frequency depends on usage, sample type, and stability. Many labs calibrate daily or before critical measurements, with a mid-shift check.
Calibrate according to your usage and sample requirements; daily checks are common in professional settings.
What if my readings drift after calibration?
If drift occurs, re-check buffer integrity, clean the electrode, verify temperature compensation, and ensure proper rinsing between buffers. Consider recalibrating with fresh buffers.
If drift happens, redo with fresh buffers and check the electrode and temperature settings.
Can I calibrate with only two buffers?
Two-point calibration is possible but provides less information about slope precision. Three-point calibration is generally recommended for accuracy across the pH range.
Two buffers work, but three are better for reliable slope and offset assessment.
Watch Video
Key Takeaways
- Use buffer solutions, not tap water, for calibration.
- Rinse with DI water between buffers to minimize carryover.
- Record calibration data for traceability and trend analysis.
- Verify calibration with multiple buffers to ensure accuracy.
- Maintain temperature control and electrode maintenance to avoid drift.