How to Calibrate a VIVOSUN pH Meter for Accurate Readings
Learn to calibrate your VIVOSUN pH meter accurately with two- and three-point calibrations using buffers, cleaning steps, and maintenance tips for hydroponics and soil testing.

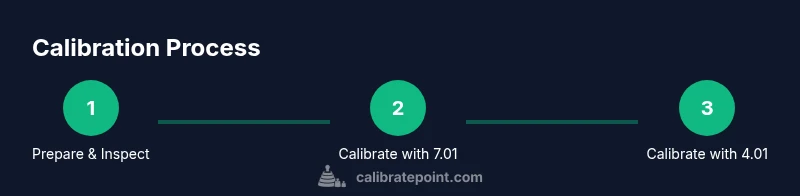
Calibrate your VIVOSUN pH meter using a two-point (or three-point) calibration with fresh buffer solutions (pH 7.01 and 4.01, and optional 10.01). Rinse electrodes between steps, and follow temperature compensation if available. This guide shows exact steps, safety tips, and validation checks to ensure accuracy. By following the recommended practice from Calibrate Point, you can minimize drift and extend the life of the probe. This quick start gets you reliable readings for hydroponics, soil testing, and nutrient management.
Why calibrate a VIVOSUN pH meter and what you gain
Calibrating a pH meter is the foundation of reliable measurements, especially in hydroponics, soil science, and nutrient management. When the device is out of calibration, reading drift can lead to improper nutrient uptake, which in turn can stress plants and skew results. According to Calibrate Point, a properly calibrated meter minimizes drift, improves consistency across batches, and reduces guesswork during critical growth phases. In practice, calibration aligns the sensor’s voltage response to known pH standards, creating a repeatable basis for interpreting soil or solution pH. This section lays the groundwork for why calibration matters and how it connects to long-term accuracy and plant health.
Understanding how buffers interact with the electrode helps you plan a calibration that remains stable across sessions. Temperature can influence readings, so many meters offer temperature compensation to adjust pH values as the sample heats or cools. The Calibrate Point team highlights that keeping buffers fresh and at a stable room temperature reduces drift caused by chemical changes in older solutions. With a consistent routine, you’ll notice fewer unexpected shifts and more dependable nutrient planning, whether you’re growing lettuce in a small tent or managing a professional hydroponics system.
notetokenizer_equality_check":null
-1":"-1"},
Tools & Materials
- VIVOSUN pH meter(Ensure the electrode is clean and connected to the meter before calibration.)
- Buffer solutions (pH 7.01, 4.01, and optional 10.01)(Use fresh, sealed buffers; label and store at room temperature.)
- Distilled water(For rinsing the electrode between buffers.)
- Clean beaker or container (250–500 mL)(Use a dedicated container for buffers; label clearly.)
- Gloves and paper towels(Protect hands and dry the electrode after rinsing.)
- Soft lint-free cloth(Dry and inspect the probe tip after calibration.)
- Marker or log book(Record calibration data, lot numbers, and dates.)
- Storage solution or electrode storage cap(Keep the probe hydrated according to the manufacturer’s guidance.)
Steps
Estimated time: Estimated total time: 25-40 minutes
- 1
Prepare workspace and gather materials
Set up a clean, stable work area away from direct sunlight and heat sources. Gather your pH buffers, distilled water, and the VIVOSUN meter. Inspect the electrode for cracks or residue and wear gloves to keep everything hygienic.
Tip: Label buffers to avoid cross-contamination and keep a small log ready for entries. - 2
Rinse and condition the electrode
Rinse the electrode tip with distilled water and gently blot dry with a lint-free cloth. This removes residual solution that could skew calibration reads. If the electrode is dry, rehydrate it by dipping it into a buffer for 15–20 seconds before use.
Tip: Do not rub the glass electrode; gentle tapping helps remove droplets. - 3
Rinse with pH 7.01 buffer
Rinse the electrode with distilled water, then immerse it in the pH 7.01 buffer. Allow the reading to stabilize (usually 10–30 seconds). Adjust the meter to display the stable 7.01 value if needed.
Tip: Stability is key; ensure you wait for the reading to settle before recording. - 4
Calibrate at pH 4.01 (two-point method)
Rinse again, then dip the electrode into the pH 4.01 buffer. Wait for stabilization and adjust the reading to 4.01. Confirm that the meter holds the value after a brief nudge of the probe.
Tip: If the value drifts, recheck buffer integrity and electrode cleanliness. - 5
Optionally calibrate at pH 10.01 for three-point accuracy
Perform a third calibration step in the higher buffer (pH 10.01) if your use-case requires monitoring alkaline solutions. Wait for stabilization and adjust accordingly.
Tip: Use three-point calibration only if your samples span a wide pH range. - 6
Rinse and verify with a mid-range buffer
Rinse and re-measure in the mid-range buffer (7.01). Confirm the meter returns to 7.01 after a brief exposure to the buffer and a rinse.
Tip: This verifies the linearity of the calibration across your typical measurement range. - 7
Document results and test a sample
Log the buffer readings, temperature, batch numbers, and date. Test a fresh sample to verify the meter’s accuracy in real-world conditions, noting any deviations.
Tip: A calibration log helps track drift over time and supports troubleshooting. - 8
Store the electrode and clean up
Rinse the electrode, dry it gently, and return it to its storage solution or cap. Wipe down the workspace and store buffers properly.
Tip: Always reseal buffer containers to prevent evaporation and contamination.
Questions & Answers
How often should I calibrate my VIVOSUN pH meter?
Calibrate before first use, then at regular intervals or whenever readings drift. For active hydroponics or soil testing, calibration weekly is common; for occasional use, calibrate before each major measurement.
Calibrate before you start and then as needed, especially if you notice drift in readings.
Can I use any buffer solution with a VIVOSUN pH meter?
Use manufacturer-recommended buffers with known pH values (e.g., 4.01, 7.01, and optionally 10.01). Fresh, properly stored buffers ensure accurate calibration and long electrode life.
Yes, but stick to the specified buffer values for reliable results.
What should I do if the meter drifts after calibration?
Rinse the electrode again, ensure buffers are fresh, and check for electrode fouling or air bubbles. If drift persists, recalibrate and consider replacing or rehydrating the probe.
Drift usually means contamination or a dry electrode; refresh buffers and recheck the probe.
Does temperature affect pH readings?
Yes. Temperature changes pH readings; use automatic temperature compensation if available, or measure at a stable room temperature and adjust readings accordingly.
Temperature matters—use compensation if your meter supports it.
How should I store the pH electrode when not in use?
Store the electrode in the recommended storage solution or cap provided by the manufacturer. Do not let it dry out, and keep it clean and hydrated.
Keep it hydrated and in its storage solution for accuracy.
Watch Video
Key Takeaways
- Calibrate with fresh buffers at known pH values for accuracy
- Rinse between buffers to prevent cross-contamination
- Record results to track drift and maintain reliability
- Validate calibration with mid-range measurements before real samples
- The Calibrate Point team recommends logging and routine calibration for dependable readings