How to Calibrate Distance on a Garmin Treadmill
Learn to calibrate the distance on a Garmin treadmill with a practical, safe step-by-step method. Validate results, log tests, and ensure accurate workouts and data syncing.

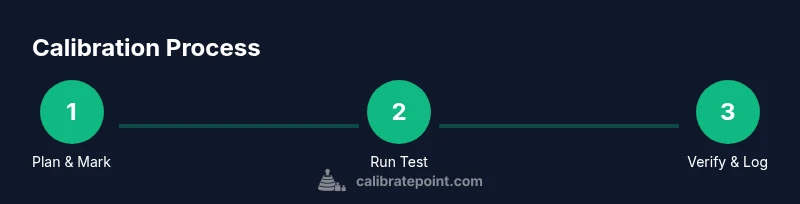
By the end of this guide, you will know how to calibrate the distance reported by your Garmin treadmill. You’ll gather the right tools, access the treadmill’s settings, and run a validated distance test to adjust calibration factors in both the device and Garmin Connect. This ensures workouts, distance goals, and data sync accurately reflect real-world distance.
Why distance accuracy matters for Garmin treadmill
Distance accuracy is fundamental for training fidelity, pacing, and progress tracking. If the treadmill misreports distance, your workout data, speed targets, and interval timing can drift, making it harder to hit goals or compare sessions over time. According to Calibrate Point, reliable distance data underpins repeatable results and safer workouts, especially for technicians and DIY enthusiasts who depend on precise feedback in calibration tasks. In this section we explore why accuracy matters, how Garmin treadmills compute distance, and the mindset you’ll bring to a successful calibration that you can repeat when needed.
How distance is measured on a Garmin treadmill
Most Garmin treadmills estimate distance by measuring belt rotations and translating those rotations into miles or kilometers shown on the display. The actual distance you cover can diverge from the readout due to belt length drift, wear, tension, and speed calibration. Understanding the relationship between belt movement and reported distance helps you decide which calibration method to use and how often to verify accuracy. This section also clarifies how the treadmill’s internal factors interact with Garmin Connect to present a unified data picture for workouts and progress monitoring.
Trigger points for recalibration and signs of drift
Drift can occur gradually with belt wear, pulley changes, or after maintenance. Common signs include consistently undershooting or overshooting distance on measured runs, mismatched paces, or interval targets that feel off when compared with perceived effort. If you notice such discrepancies across multiple runs, it’s time to consider recalibration. Calibrate Point’s guidance emphasizes a structured approach: verify setup, run a controlled test, adjust calibration factors, and re-test. Being proactive helps preserve data integrity and training quality.
Garmin Connect and the calibration workflow
Calibration can involve the treadmill’s internal factors and, in some models, data synchronization with Garmin Connect. Connecting the device to the app lets you log the calibration run, view the adjusted factors, and compare post-calibration results with previous sessions. However, you can often perform essential calibration on the treadmill itself without relying solely on the app. The key is to document your factors, test distances, and outcomes so you can reproduce results later if needed.
What you need before starting calibration
Prepare a clean workspace around the treadmill, with ample space and a flat, stable floor. Gather the essential tools and a plan for testing. At minimum, you’ll need a measured test distance, a stopwatch, marking tape to delineate start and finish, and a notebook or app to record outcomes. Optional but helpful items include masking tape for clean markers, a ruler for precise marks, and the Garmin Connect app for data logging. Planning ahead reduces test variance and speeds up the process.
Choosing a calibration method: belt-rotation test vs rolling-distance test
There are two commonly used methods to calibrate distance on a Garmin treadmill. The belt-rotation method relies on counting belt revolutions over a known distance, then adjusting the device to align indicated distance with actual distance. The rolling-distance method uses a marked distance on the belt and a fixed pace, measuring how far the belt travels in a fixed time. Each method has trade-offs: belt-rotation can be affected by belt slip, while rolling-distance requires careful marking and consistent speed. Your choice depends on equipment, model, and comfort level with measurements.
Method A: Belt-rotation calibration overview
In belt-rotation calibration, you mark a known distance along the treadmill belt, then run at a controlled speed while recording how many belt revolutions occur during that distance. Compare the revolutions to the distance and compute a calibration factor that translates revolutions into the actual distance. This method works well when you have precise belt-length knowledge and a reliable counting method for revolutions. It’s important to maintain a consistent warm-up and belt tension during the test to minimize variance.
Method B: Rolling-distance test with a marked path
The rolling-distance approach requires marking a precise distance on the belt using tape or chalk and running at a steady speed over that path. You then compare the elapsed time and the distance displayed by the treadmill, calculating a correction factor if the readout deviates from the actual distance. This method emphasizes repeatable speed control, proper marking accuracy, and a calm testing environment to avoid acceleration or deceleration that could skew results.
Verifying calibration results and logging the data
After applying a calibration factor, perform a second verification run to confirm the corrected distance aligns with a known reference. Record the initial and final readings, notes about belt tension, temperature, and any anomalies. Store this data with timestamps in a log (digital or paper) so you can reproduce or audit the calibration later. A thorough log supports ongoing accuracy and is valuable for technicians performing maintenance or audits.
Common pitfalls and safety reminders
Avoid calibrating while the treadmill is occupied by others or while the belt is moving at unsafe speeds. Ensure power is off when adjusting components, and re-check all markers before testing. A small mis-mark can introduce large errors in your results, so take your time. Regular maintenance, including belt alignment and tension checks, helps maintain accuracy between calibrations. The aim is consistent, reproducible data you can trust for your training plans.
Tools & Materials
- Calibrated measuring tape (2 m or longer)(For marking a precise test path on the belt)
- Stopwatch or timer(Accurate timing for distance tests)
- Masking tape or painter's tape(Label start/finish points on the belt)
- Ruler or straightedge(Fine measurements and alignment checks)
- Notepad or smartphone notes app(Record test results and calibration factors)
- Flat, clear space around treadmill(Safety and accurate testing conditions)
- Optional: Garmin Connect app(For data logging and visualization)
- Optional: Safety mat or non-slip mat(Stability during testing)
Steps
Estimated time: 45-60 minutes
- 1
Prepare the treadmill and test area
Clear the area, ensure the treadmill is on a stable, level surface, and remove any obstacles. Warm up the belt to operating temperature for 5–10 minutes to ensure consistent belt behavior during measurements.
Tip: Do a quick belt check for smooth rotation before starting to avoid skewed results. - 2
Mark a precise test distance on the belt
Apply a clean, straight marking along the belt to designate the test path. Use tape to outline a known distance (e.g., 100 meters equivalent in belt length) and ensure the mark is visible at the start and finish.
Tip: Verify the route is perpendicular to any belt curvature to minimize measurement error. - 3
Set a controlled belt speed and start the test
Choose a steady speed within the treadmill’s comfortable interval range and maintain it for the duration of the test. Keep the runner stationary and focus on consistent pace rather than sprinting.
Tip: Use the same speed setting for each repetition to reduce variability. - 4
Record the actual distance and reading
As you approach the marked finish, stop the belt if safe, and note the treadmill distance reading. Compare this against the known test distance marked on the belt and record any discrepancy.
Tip: Repeat the test at least twice to confirm consistency. - 5
Enter calibration factors into the treadmill and Garmin Connect
Compute a calibration factor from the ratio of actual distance to reported distance. Apply this factor in the treadmill’s settings and, if desired, log it in Garmin Connect for trend analysis.
Tip: Document the exact factor and the date of adjustment for future audits. - 6
Verify results with a follow-up test
Run a second test using the same setup to confirm the correction. If results differ beyond an acceptable tolerance, refine the factor and re-test until readings align.
Tip: Aim for a difference within a small margin to ensure reliability.
Questions & Answers
What is calibration distance on a Garmin treadmill?
Calibration distance is the adjustment factor that aligns the treadmill’s distance readout with the actual distance you ran. By applying a calibration factor, you correct for belt wear, tension, or sensor drift that skews the readout.
Calibration distance is the adjustment that aligns the treadmill's distance readout with actual distance. You adjust a factor to correct drift in the readout.
How often should I calibrate distance on a Garmin treadmill?
Calibrate when you notice consistent discrepancies between your effort and the treadmill readout, after major maintenance, or when you change the belt. Regular checks help keep data accurate for training plans.
Calibrate when you notice consistent distance discrepancies or after maintenance to keep data accurate.
Can I calibrate distance without Garmin Connect?
Yes. You can adjust the treadmill’s internal calibration factor directly on the device and keep a manual log of results. Garmin Connect can be used later to visualize trends.
Yes. You can calibrate directly on the treadmill and log results manually, with Connect used later for trends.
Is there a safety risk when calibrating?
Yes. Always unplug or power down before making hardware adjustments. Keep feet clear of moving parts and ensure the area is free of obstructions to prevent injuries.
Yes. Power down before adjustments and keep clear of moving parts to stay safe.
What tests prove calibration is correct?
Use a known distance test (for example, a marked belt path) and compare the treadmill’s readout with the measured distance. After adjustment, repeat to confirm consistency.
Test with a known distance and confirm the readout matches the measure after adjustment.
Watch Video
Key Takeaways
- Identify why distance accuracy matters
- Choose a clear test method and mark the belt precisely
- Document calibration factors and verify with a follow-up test
- Log results for future audits and maintenance
- Maintain belt tension and consistent warm-up for repeatable outcomes