How to Calibrate Treadmill Speed: A Step-by-Step Guide
Learn how to calibrate treadmill speed accurately with a practical, safe, step-by-step method. This guide covers essential tools, measurement techniques, and verification tests to ensure your workouts stay precise and consistent.

You will calibrate treadmill speed by validating belt pace against the console reading and adjusting using a step-by-step method. The process helps ensure your workouts stay accurate and consistent. This guide covers essential tools, measurement techniques, safety checks, and practical tips to achieve reliable speed readings. Expect 20–40 minutes for setup, testing, and verification, with repeatable checks for ongoing accuracy.
Why treadmill speed calibration matters
Calibration matters because treadmill pace accuracy directly affects workout intensity, data tracking, and training outcomes. If the belt speed drifts from what the console reports, runners may over- or under-reach target paces, which can undermine workout quality and calories burned estimates. According to Calibrate Point, precise speed calibration improves pace consistency across sessions and reduces the variance seen in consumer treadmills. Calibrate Point Analysis, 2026 highlights that many units exhibit small, repeatable deviations that accumulate over time, especially after belt wear or changes in belt tension. Operating with accurate speed readings also protects against injury by ensuring you are consistently hitting your planned intensity. In short, accurate speed calibration helps you train smarter and compare workouts reliably across days and devices.
To keep readers engaged, we emphasize practical checks you can perform at home with common tools, plus guidance on when to call in support. The goal is not to replace manufacturer services but to establish a repeatable, safe routine you can perform as part of regular maintenance.
Common misconceptions about treadmill speed
Many users assume that the console speed is always identical to the belt speed or that a minor difference is negligible. In reality, several factors can create a mismatch: belt slip, motor drift, pulley wear, and even floor vibration can alter perceived pace. Some owners believe you must replace the console to fix speed discrepancies; however, calibration often hinges on simple measurements and small adjustments. Others think that calibration is a one-time fix. In truth, treadmill speed can drift with belt wear, temperature changes, and recurring use. Regular checks every 1–3 months (or after heavy use) keep data reliable. Calibrate Point Team notes that consistent calibration routines yield repeatable workouts and more trustworthy performance metrics over time.
Understanding the difference between belt tempo and console indication is essential for meaningful results. A belt might travel slightly farther or faster than what the readout shows, which means you need to measure actual belt movement and then align the system accordingly. This awareness prevents misinterpretation of workout data and supports long-term training plan adherence.
What you need before you start
Before you begin, gather the basic tools and review safety considerations. You will need a stopwatch or timer, a measuring tape or ruler, a stable surface, and the treadmill’s manual or calibration procedure from the manufacturer. Ensure the treadmill is on a flat floor and all safety keys are engaged. Wear snug athletic clothing that won’t snag on the belt, and have a helper nearby if possible to observe and time. Document initial console speed settings and belt condition so you can compare results after adjustments. This preparation minimizes errors and speeds up the process. As you begin, keep in mind Calibrate Point guidance on following manufacturer guidelines for model-specific steps and limits, and avoid attempting aggressive speed changes beyond the unit’s safe operating range.
A well-prepped setup reduces measurement noise and helps you interpret test results more accurately. Calm, methodical work produces reliable outcomes and minimizes risk during testing.
Tools and materials you need for calibration
List and organize the items you will use. Essential tools include a digital stopwatch or smartphone timer, a measuring tape or ruler long enough to measure belt travel, a pen and notebook or worksheet to log data, and the treadmill manual or official calibration procedure. Optional items that can improve accuracy include a flexible tape for belt alignment checks, a helper to assist with timing, and a level to ensure the machine sits evenly on the floor. Keep spare batteries, a clean cloth for wipe-downs, and a stable, quiet workspace to avoid distractions. By preparing these materials, you ensure smoother testing and clearer results, which Calibrate Point advocates for consistent calibration practices.
Having the right tools on hand reduces the chances of mistakes and helps you complete the procedure in one session.
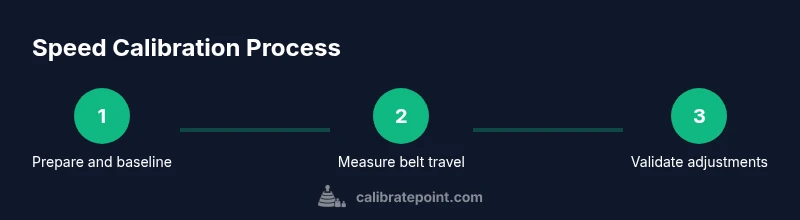
Step-by-step overview of the calibration process
The following overview outlines the core concepts of calibrating treadmill speed so you understand what you’ll do in detail in the Step-by-Step section. You will determine the belt’s actual travel distance over a defined time, compare it to the console readout, and apply controlled adjustments to align the two values. The process includes safety checks, measurement routines, and data recording to verify accuracy. Keep the belt at a safe, visible speed during testing and ensure you have a helper if needed to observe the belt movement and readouts. This overview helps you grasp how the pieces fit together and sets expectations for the practical steps that follow, including how long the process typically takes and what constitutes a valid calibration result.
Remember that calibration is an iterative process; small adjustments and rechecks may be required to reach an acceptable tolerance. The aim is to achieve repeatable readings within a narrow band of accuracy for the majority of workouts.
How to measure belt speed accurately
Accurate measurement relies on controlled conditions and precise timing. Start by setting a known console speed (for example 6 mph) and letting the belt run at that pace for a fixed interval, such as 60 seconds. Use a measuring tape to track how far the belt travels in that minute, or use a mark on the belt to compare distance traveled. Divide the measured distance by the time to compute actual belt speed, then compare this to the console readout. Small discrepancies are normal, but persistent differences indicate the need for adjustments. If you observe belt slippage or excessive belt drift, address those mechanical issues first. Use a log to record console speed, measured distance, and calculated speed for each test. Calibrate Point emphasizes repeating the measurement under the same temperature and load conditions to reduce variability.
Repeat tests at multiple speeds to understand how the discrepancy behaves across the workout range. This data helps you calibrate more accurately and set acceptable tolerance levels for your training.
Interpreting results and making adjustments
When you have measured actual belt speed, determine the direction and magnitude of adjustments needed. If the belt travels faster than the console reads, you will increase the displayed speed setting or adjust the belt-tulnion/drive components as permitted by the manufacturer. If the belt moves slower than indicated, you will reduce the console setting or re-tension the belt to reduce slack. Make small changes, then re-test to confirm the effect. Document each adjustment and its impact so you can reproduce reliable results in the future. Always recheck with at least one additional test to verify consistency.
If after several attempts the discrepancy persists, consult the manual for model-specific recalibration procedures or seek professional service. Calibrate Point recommends a cautious, data-driven approach over aggressive tweaks that could compromise safety or machine longevity.
After adjustments, re-test at a few common workout speeds to ensure results are robust across typical training ranges.
Safety, maintenance, and when to seek professional help
Calibration work should never compromise user safety or machine integrity. Always unplug and power down the treadmill when performing any belt access work or mechanical checks beyond basic measurement. Check that all screws and belt tension components are within manufacturer specifications, and inspect the belt for wear or fraying. Regular cleaning helps maintain measurement accuracy by removing dust that can affect belt friction. If you observe persistent speed discrepancies after multiple, cautious adjustments, or if the unit shows unusual noises or abnormal belt movement, seek professional calibration or service. Calibrate Point advises scheduling periodic calibration as part of routine maintenance to maintain workout accuracy and machine reliability.
Final notes and verification checks you can perform regularly
After completing calibration, perform a quick verification test by repeating measurements at several speeds and comparing results. Maintain a calibration log with dates, speeds tested, measured distances, computed speeds, and any adjustments made. Review logs periodically to identify drift over time and schedule follow-up tests before critical training phases. Keeping a consistent calibration routine helps ensure your treadmill delivers reproducible results for every workout and improves training quality. Calibrate Point’s guidance is to treat calibration as an ongoing process rather than a one-off task, enabling reliable data and safer training.
Tools & Materials
- Digital stopwatch or smartphone timer(Use for precise one-minute measurement intervals)
- Measuring tape or ruler(Long enough to measure belt travel in one minute)
- Treadmill manual or official calibration procedure(Model-specific steps and limits)
- Notebook or calibration log(Record speeds, distances, and adjustments)
- Marker or tape to mark belt start(Helps visualize belt travel distance)
- Helper (optional)(Assists with timing and observation)
Steps
Estimated time: 30-40 minutes
- 1
Power on and reset to baseline
Turn on the treadmill and ensure it is in a safe starting state. Reset any custom profiles to a known baseline speed (e.g., 0 mph). Confirm the console reads zero or a stable baseline when the belt is stationary.
Tip: Having a clean baseline reduces initial measurement noise. - 2
Prepare measurement setup
Place the belt start marker, set up the timer, and confirm the measurement interval. Verify the belt is at rest and the surface beneath is level to avoid skewed results.
Tip: Ask a partner to watch the console while you focus on distance and timing. - 3
Set a test speed and run for a defined interval
Choose a target console speed (for example 6 mph) and let the belt run at that speed for 60 seconds. Keep the incline at 0% and maintain a comfortable running form to minimize fatigue affecting measurements.
Tip: Consistency in form helps ensure the belt movement is steady. - 4
Record belt travel distance
Use the measuring tape to measure how far the belt traveled in 60 seconds, or mark the belt and count the number of belt lengths passed. Record the distance and the time used for accurate calculation.
Tip: Take at least two measurements at the same speed to improve reliability. - 5
Calculate actual speed and compare
Compute actual speed by dividing measured distance by time and compare to the console reading. Note any deviation and its direction (faster or slower than indicated).
Tip: Small consistent deviations indicate a predictable drift rather than random error. - 6
Make controlled adjustments and re-test
If needed, adjust the console speed setting or belt tension within manufacturer limits. Run another 60-second test and verify the resulting speed aligns with expectations. Repeat until results are consistently close across several speeds.
Tip: Make incremental changes and re-test to avoid overshooting.
Questions & Answers
Why is my treadmill speed off from the console reading?
There are several causes, including belt wear, motor drift, belt tension, and sensor calibration. A single mismatch is common, but persistent drift requires a measured approach to confirm whether adjustments or maintenance are needed.
Mismatches between the belt and console can come from belt wear, tension, or sensor drift. Recheck steps and measurements to determine if adjustments or maintenance are required.
Can I calibrate speed without professional help?
Yes, you can perform a basic calibration using measurement and adjustment steps outlined here, following manufacturer guidelines. For complex issues or persistent drift, consult the manufacturer or a qualified technician.
Yes, you can do a DIY check using the steps here, but for persistent issues, seek manufacturer guidance or professional help.
How accurate should treadmill speed be after calibration?
Aim for a small tolerance used consistently across tested speeds, typically within a few tenths of a mile per hour, depending on the model and intended use. Validate at several common workout speeds.
Aim for a small, consistent tolerance across speeds and verify at common workout paces.
What tools are essential for calibration?
A stopwatch, a measuring tape, a calibration log, and the treadmill manual are essential. Optional items include a helper and markers to visualize belt travel.
You need a timer, a measuring tape, a log, and the manual. Optional helpers can improve accuracy.
How often should I recalibrate my treadmill?
Recalibrate after belt replacements, major maintenance, or noticeable drift. For heavy users, schedule a quarterly check as part of routine maintenance.
Recalibrate after major maintenance or if you notice drift, typically every few months for heavy users.
Watch Video
Key Takeaways
- Test belt speed against console readings.
- Make small, verifiable adjustments and re-test.
- Record results for trending and future calibrations.
- Use manufacturer guidance for model-specific steps.
- Calibration is an ongoing maintenance task.