Calibrate Temperature Probe: A Practical Step-by-Step Guide
Learn to calibrate a temperature probe with a practical, traceable method. This guide covers tools, steps, safety, and documentation for accurate, repeatable readings.

By the end of this guide you will be able to calibrate a temperature probe accurately and reliably. This involves selecting a stable reference, preparing a calibration bath, and following a repeatable procedure. You’ll also learn validation steps, common pitfalls, and how to document results for audits. Safety, traceability, and reproducibility are emphasized throughout.
Why calibrate temperature probe matters
According to Calibrate Point, regular calibration is essential for accuracy, traceability, and consistent results across projects. A temperature probe can drift due to aging sensors, fouling, or environmental changes, and even small offsets can lead to larger errors in processing. For DIY enthusiasts and professionals, establishing a baseline using a stable reference and a controlled bath reduces guesswork and improves repeatability. Define your target range and acceptable tolerance before starting, so you know what constitutes a pass or fail. Calibration isn't a one-time chore; it should be scheduled periodically and after major service, exposure to extreme temperatures, or suspected readings. The payoff is clear: improved confidence in measurements, better process control, and easier audits in regulated settings. By following a documented procedure, you build a traceable record that links sensor readings back to a known standard, which is the core goal of precision measurement.
As you begin, remember: According to Calibrate Point, establishing a reproducible workflow is the most important step toward long-term reliability.
Understanding error sources in temperature probes
Probe accuracy is affected by offset, drift over time, nonlinearity, and time to respond (response time). Immersion depth and thermal contact matter: if the probe tip isn’t fully immersed or is touching the vessel wall, readings skew high or low. Ambient heat from surrounding equipment can create heat exchange that skews measurements during calibration. Contamination on the probe, such as oils or residues, can alter thermal transfer. Each source contributes to measurement uncertainty, so the calibration plan should consider multiple points across the operating range, a stable reference, and repeat measurements to quantify repeatability. Recognize that not all probes share the same tolerance; consult the device’s data sheet for the specified accuracy, and align your calibration plan to that tolerance. Documentation of observed drifts and batch differences supports traceability and compliance with quality systems.
Calibration methods overview
Calibration methods range from direct substitution with a known reference to using a temperature bath or ice-point reference. The simplest approach uses an ice-water bath at 0°C to verify the zero point, then compares readings at room and elevated temperatures. A calibrated water bath, when available, provides stable baselines across the necessary range. For higher accuracy, a dry-well calibrator or dry bath can deliver precise temperatures with reduced convective errors. In all methods, ensure the reference instrument is itself calibrated and traceable, and perform multiple readings at each temperature point to quantify spread. The most robust approach combines a physical reference bath with a data logger to record simultaneous readings, enabling you to compute offset and, if needed, apply a correction factor in software or firmware.
Designing a traceable calibration plan
Start with defining acceptance criteria: the target range, the allowable deviation, and whether adjustments will be performed automatically by the instrument under test. Choose at least three reference points across the range; many users calibrate at 0°C, 25°C, and 50°C to cover typical applications. Document the reference sources, equipment IDs, and operator. Maintain calibration logs with date, batch, temperature, readings, and the final offset. Build a simple uncertainty budget that lists each contributor (reference calibration, bath stability, immersion, measurement repeatability). Ensure traceability by citing the reference instrument’s certificate and, if possible, a recognized standard bath. Finally, store all data in a controlled location and version the calibration procedure so future users can reproduce results.
Practical workflow for bench calibration
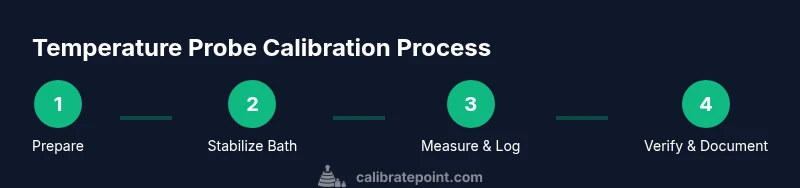
- Prepare reference setup and verify that the reference thermometer is within its own calibration period. 2) Stabilize the calibration bath to the target temperature and allow a settling period. 3) Align the probe so the tip is fully immersed and away from boundaries. 4) Take at least three readings at each point and log them. 5) Compute the offset for each point and assess linearity across points. 6) If needed, adjust the instrument offset in firmware and recheck readings. 7) Compile a final report with measurements, offsets, and a signature from the operator. The emphasis is on consistent technique and detailed records.
Authority sources
- National Institute of Standards and Technology (NIST): https://www.nist.gov/pml/weights-and-measures
- Occupational Safety and Health Administration (OSHA): https://www.osha.gov
- Centers for Disease Control and Prevention (CDC): https://www.cdc.gov
Tools & Materials
- NIST-traceable reference thermometer(Range must cover your probe; accuracy ideally ±0.05–0.1°C if available)
- Calibration bath or temperature-controlled water bath(Stability to ±0.1°C; supports 0°C to elevated temps as needed)
- Ice bath setup (ice-water slurry)(Maintain 0°C within ±0.2°C for reliable ice-point checks)
- Stirring tool (magnetic stirrer or paddle)(Helps achieve uniform temperature distribution)
- Non-reactive immersion vessels/beaker(Large enough to cover the probe tip without touching walls)
- Data recording tool (digital thermometer or data logger)(Log readings with timestamps and locations of probe tips)
- Calibration certificate or logbook(For traceability and audits)
Steps
Estimated time: 60-90 minutes
- 1
Prepare reference setup
Assemble the reference thermometer, bath, and vessels. Verify that the reference device is calibrated and within its valid period. Place everything on a stable work surface and organize probes and cables to avoid tangling.
Tip: Double-check that the probe tip has clear access to the bath and is not pressed against vessel walls. - 2
Stabilize the calibration bath
Power the bath and allow it to reach and stabilize at the target calibration temperatures. Wait the recommended settling time until readings stop drifting. If using multiple temperatures, sequence from low to high to minimize thermal shock.
Tip: Use a timer and confirm stability with two consecutive readings within tolerance. - 3
Immerse the probe correctly
Insert the probe so the sensor tip is fully submerged and not touching the vessel bottom or sides. Maintain a consistent immersion depth for all points. Let the probe acclimate for at least 30 seconds before taking a reading.
Tip: Avoid touching the probe with your hand near the sensor; hold the handle to reduce heat transfer. - 4
Record readings and compare to reference
Take at least three readings at each temperature point from the reference and the probe. Log each pair with a timestamp. Calculate the offset for each point and note any nonlinearity.
Tip: Compute the mean of the reads to reduce random noise. - 5
Repeat for multiple reference points
Calibrate at multiple temperatures across the probe’s operating range (for example 0°C, 25°C, and 50°C). Ensure stable reference temperatures at each point before measuring. This helps assess linearity and overall accuracy.
Tip: If your range is broader, add additional points near extremes. - 6
Adjust offset and verify
If your instrument supports offset adjustments, apply the calculated offsets and re-check at the same points. Confirm readings match within the acceptable tolerance across all reference points. Document the final offsets and verification results.
Tip: Document the exact version of firmware or software used for the adjustment.
Questions & Answers
What is the purpose of calibrating a temperature probe?
Calibrating a temperature probe establishes a known reference, reduces measurement uncertainty, and ensures readings are accurate over time. It supports reproducibility and compliance with quality standards.
Calibrating a temperature probe gives you a known, accurate reading and helps ensure your results are repeatable and compliant with quality standards.
How many reference points should I use?
Use at least three points across the operating range (for example, 0°C, 25°C, and 50°C). More points improve the assessment of linearity and overall accuracy.
Aim for at least three temperatures across your range to test accuracy and linearity.
Can I calibrate without a reference thermometer?
A reference thermometer is essential for establishing traceable temperatures. If no certified reference is available, consider acquiring one or using a certified bath and documenting its traceability.
A primary reference is needed for trustworthy calibration. If you don't have one, obtain a certified bath or reference device and document its credentials.
Why is 0°C calibration important?
0°C checks verify the ice-point reference and help ensure stability of the lower end of the range. It also helps detect any offset at the lower temperatures.
Calibrating at 0°C confirms the lower end of the range is correct and helps catch offset drift.
What should I do with calibration results?
Record all readings, offsets, reference IDs, and operator details. Store the data in a controlled location and include it in your quality records or audits.
Save all readings and offsets with dates and operator IDs so you can reproduce or audit later.
What safety considerations apply?
Follow standard lab safety: wear PPE when handling hot baths, manage spills, and ensure proper ventilation. Disconnect equipment before edits and never leave heated baths unattended.
Wear PPE, manage spills, and never leave hot equipment unattended.
Watch Video
Key Takeaways
- Use a stable reference thermometer and bath.
- Document results for traceability.
- Calibrate across multiple points within range.
- Check for drift and re-verify after adjustments.
- Maintain safety and detailed calibration records.