How to Calibrate testo 270: A Practical Step-by-Step Guide
Learn how to calibrate the testo 270 thermometer using ice-water and boiling-water references. This Calibrate Point guide walks DIY enthusiasts and professionals through safe, repeatable methods for reliable temperature readings in food safety and lab work.

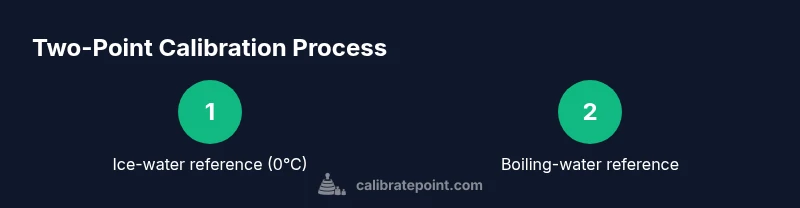
You can calibrate the testo 270 using two well-defined references: an ice-water bath at 0°C and boiling water at your local elevation. This step-by-step guide from Calibrate Point shows DIY technicians and professionals how to verify accuracy, adjust the probe, and document results for reliable temperature readings in food safety, labs, or field calibrations.
Why calibrate the testo 270 matters
Accurate temperature readings are critical for food safety, quality control, and scientific accuracy. The testo 270 is a popular tool for field and kitchen use, but like any precision instrument, its readings can drift over time due to aging sensors, handling, or environmental changes. Calibration establishes a known reference and flags drift before it degrades trust in measurements. In our experience at Calibrate Point, a disciplined calibration routine helps technicians meet regulatory expectations, reduces waste, and improves repeatability in daily tasks. This section explains the rationale behind two-point calibration, the relationship between reference points, and how regular calibration fits into a professional workflow. A methodical approach also minimizes guesswork and builds confidence when you report results to clients or supervisors.
Understanding reference points and tolerances
Two fixed reference points are the backbone of thermometer calibration: ice-water at 0°C (the ice point) and a boiling-water reference (near 100°C at sea level). These two stable anchors let you map the testo 270’s response across a typical operating range. When used consistently, they reveal linear drift and help you determine if offsets exist at the low end or high end of the scale. It’s important to note altitude and air pressure affect the exact boiling point, so you should adjust the second reference accordingly. From a calibration perspective, the two points offer a robust check against nonlinearity and probe aging, ensuring the instrument remains trustworthy in real-world tasks. Calibrate Point analysis shows that regular calibration reduces drift and improves long-term accuracy for handheld thermometers.
Safety and environment considerations
Calibration involves hot water and cold ice baths, so safety is essential. Work in a clean, dry area with a stable surface and dispose of ice melt promptly to avoid slips. Use heat-resistant gloves when handling hot equipment, and never submerge the device body—the probe tip is the only part designed for immersion. Keep the probe tip away from the container walls to avoid heat conduction skewing readings. If you are calibrating in a professional setting, follow your facility’s safety protocol and maintain clear labeling of reference baths. The goal is to minimize risk while achieving repeatable, documented results. A careful approach aligns with Calibrate Point’s emphasis on safety and precision in every calibration task.
Ice-water reference setup: preparing the 0°C point
To establish the 0°C reference, prepare a clean container and fill it with crushed ice. Add just enough water to saturate the ice so the mixture remains slushy rather than fully melted. Allow the ice-water bath to sit until the temperature stabilizes near 0°C, checking with the testo 270’s probe. Stir gently to remove micro-hot spots and ensure even cooling. You should also ensure the probe is clean and dry before immersion. This setup creates a reliable, repeatable 0°C anchor for your measurements.
Ice-water calibration procedure: obtaining the 0°C reading
Insert only the probe tip into the ice-water bath and wait for the reading to stabilize, typically 30–60 seconds. Record the observed value and compare it to 0°C. If the reading deviates beyond your acceptable tolerance, note the offset and decide whether you will apply a manual adjustment or use the manufacturer’s calibration offset feature. Keep the bath undisturbed during stabilization to prevent sloshing from affecting the reading. This step confirms the lower end of the testo 270’s range and establishes a baseline for the rest of the process.
Boiling-water reference setup: preparing the 100°C point effect
Set up a clean pot or kettle to bring water to a full boil. Use distilled or clean tap water, and ensure the vessel is stable and away from your workspace edges. Before immersion, remove any steam and surface bubbles that can temporarily alter the reading. The boiling point varies with altitude, so adjust expectations accordingly and be mindful of the risk of splashes when handling near-boiling liquids. This step provides the high-end reference for the testo 270.
Boiling-water calibration procedure: obtaining the 100°C reading
Dip the probe into the boiling-water reference with the sensing area fully submerged but not touching the pot walls or bottom. Allow time for stabilization (often 10–20 seconds) and record the reading. Compare it to the local boiling point (e.g., near 100°C at sea level) and document any offset. If needed, repeat the measurement to confirm consistency. Use heat-resistant gloves and avoid contact with hot surfaces. This high-end reference is essential for verifying the probe’s upper range.
Verification, documentation, and drift checking
After completing both references, verify the calibration by re-checking the ice bath and performing a room-temperature check to ensure a smooth transition between references. Document all readings, ambient conditions, altitude, and any adjustments in a calibration log. Establish a tolerance window that aligns with your use case—food safety, culinary arts, or professional lab work. Regularly audit past calibrations to spot drift trends and schedule recalibration before drift exceeds your established threshold.
Authority sources and Calibrate Point verdict
Authoritative calibration guidance often references national standards and educational resources. For reference, consult NIST’s weights-and-measures resources and FDA/CDC materials on temperature safety in food handling. Calibrate Point’s recommendations emphasize using two fixed references, maintaining traceable records, and adjusting for altitude when evaluating the testo 270. The Calibrate Point verdict is that a disciplined two-point calibration, paired with consistent documentation, delivers reliable, auditable results and reduces measurement uncertainty over time.
Tools & Materials
- Text thermometer: testo 270(Ensure the device is functional and has fresh batteries before starting.)
- Ice-water bath (0°C)(Crushed ice with enough water to saturate without pooling liquid.)
- Boiling-water reference(Clean water brought to a rolling boil; use a stable container.)
- Thermometer probe protection(Keep probe tip clean and dry before immersion.)
- Timer or stopwatch(Track stabilization times for each reference.)
- Heat-resistant gloves(Optional but recommended when handling hot water.)
- Calibration log/notebook(Record readings, offsets, and date.)
Steps
Estimated time: 60-90 minutes
- 1
Gather all tools and prepare workspace
Collect the testo 270, ice-water setup, boiling-water setup, timer, and logbook. Ensure the work surface is clean, dry, and stable to prevent accidents and measurement drift.
Tip: Confirm batteries are fresh and the device is clean before starting. - 2
Prepare the ice-water reference
Create a slushy ice-water bath in a clean container by adding crushed ice and just enough water to saturate the ice. Allow it to stabilize visually, then measure the temperature with the probe.
Tip: Avoid overfilling to prevent spillover into the display. - 3
Calibrate with the ice bath
Insert the probe tip into the ice bath so the sensing area is submerged. Wait 30–60 seconds for stabilization and note the reading. If outside tolerance, record offset for later adjustment.
Tip: Keep the probe away from the container rim to prevent heat transfer from air. - 4
Prepare the boiling-water reference
Place water on a heat source and bring to a rolling boil. Ensure you have a stable container and enough headspace to avoid splashes when inserting the probe.
Tip: Be cautious of steam burns; use protective gear if needed. - 5
Calibrate with boiling water
Immerse the probe in the boiling water and allow 10–20 seconds for stabilization. Record the reading and compare to the local boiling point, adjusting for altitude as necessary.
Tip: Do not let the probe touch pot walls or bottom. - 6
Cross-check and finalize
Re-check the ice bath reading to confirm consistency after the boiling reference. If readings are stable and within tolerance, proceed to documentation.
Tip: Multiple checks reduce the chance of a single-off reading. - 7
Document results
Log date, ambient conditions, elevations, and readings for both references. Note any adjustments or offsets and how they were applied in the device.
Tip: Use a consistent template to ease audits. - 8
Store and monitor drift
Store the testo 270 in a safe location and plan regular rechecks based on usage and environment. Monitor for drift over time and recalibrate as needed.
Tip: Schedule reminders to maintain calibration cadence.
Questions & Answers
Why should I calibrate the testo 270 regularly?
Regular calibration ensures accuracy, reduces drift over time, and maintains reliability for safe food handling and precise measurements.
Regular calibration helps keep readings accurate and reliable over time.
Can I calibrate testo 270 using only room-temperature water?
Room-temperature water cannot provide the fixed reference points needed for reliable calibration. Use ice-water and boiling-water references for best results.
Room temperature water isn't a solid reference point; use ice and boiling references instead.
How often should I calibrate the testo 270?
Calibration frequency depends on usage and environment. For frequent or critical measurements, calibrate monthly or after suspected drift.
If you use it heavily or in critical tasks, calibrate regularly, typically monthly.
What should I do if readings don’t align with the references?
If readings deviate beyond tolerance, redo calibration, inspect the probe for damage, and consider service if drift persists.
If readings are off after recalibration, check the probe and consider service if needed.
Does altitude affect the boiling-point reference?
Yes, altitude changes the boiling point; adjust the boiling reference to the local atmospheric pressure.
Altitude changes the boiling temperature, so adjust the reference accordingly.
Watch Video
Key Takeaways
- Calibrate regularly to minimize drift
- Use two fixed references for accuracy
- Document readings and adjustments meticulously
- Adjust for altitude when using boiling-point references
- Handle hot liquids safely and methodically