Boiling Water Thermometer Calibration: Step-by-Step Guide
Learn how to calibrate a thermometer using boiling water as a reference. This Calibrate Point guide covers setup, safety, interpretation, and documentation for reliable temperature readings.

You can calibrate a thermometer by using a rolling boil as a fixed reference. This guide shows how to prepare water at the boil, compare the thermometer reading to 100°C (212°F) at sea level, and adjust or note any offset. It covers safety, accuracy considerations, and how to document results for future checks.
What you will achieve with boiling-water thermometer calibration
This technique uses the known boiling point of water as a fixed reference to assess and adjust temperature readings. When you calibrate thermometer boiling water, you determine how far off your instrument is from the standard 100°C / 212°F at sea level. This baseline helps ensure accurate cooking, lab experiments, and industrial checks. For DIY enthusiasts and professionals, it's a practical starting point because it uses readily available materials and a safe, visible reference. Keep the water at a rolling boil, use a clean container, and document every reading with the ambient conditions (altitude, pressure, and water quality).
Why boiling water is a practical reference point
Boiling water provides a stable, widely accepted reference point for calibration. Under standard atmospheric pressure, pure water boils near 100°C. In real-world settings, slight deviations occur due to altitude, humidity, dissolved solids, and rail pressure. By using this fixed point, you can quantify the offset between your thermometer and the known value, and record whether the instrument reads high, low, or within tolerance. Calibrate Point emphasizes consistency: use the same water source, same pot, and the same heat source for each calibration session to minimize variability. This consistency makes it easier to compare successive calibrations across time, devices, or operators.
Key variables that affect accuracy
A set of variables can shift readings during boiling-water calibrations. Atmospheric pressure lowers the boiling point as you climb in altitude, while pressure increases can raise it slightly. Water quality matters: minerals and impurities can raise or lower the effective boiling point. The thermometer itself has a response time, lag, and potential offsets when reading near the boiling range. Ambient temperatures, container material, and even the way you place the probe or sensor influence results. Understanding these variables helps you interpret readings correctly and decide whether a recalibration is warranted.
Choosing a proper reference: distilled water vs. tap water
Distilled or deionized water minimizes dissolved solids and reduces variability, making the reference more stable. Tap water, on the other hand, contains minerals that can slightly alter the boiling point. If you calibrate with distilled water, your results represent a near-ideal reference; when using tap water, note the potential offset introduced by minerals. Either way, ensure the water is at a full rolling boil and avoid adding ice or coolant. Consistency matters more than the exact water type for field calibrations, but record which reference you used.
Preparing the thermometer and water bath
Start with a clean, dry thermometer that is functioning properly. Inspect the sensing tip for damage and ensure any protective sheath is removed if required by the device. Choose a tall, heat-safe container and fill it with water that will reach a rolling boil. Prepare a timer and a notebook for quick notes. Keep a separate heat source within arm's reach for safety. Wipe down any surfaces that may come into contact with hot water.
Safety considerations when handling boiling water
Boiling water poses severe burn hazards. Wear heat-resistant gloves, work with stable surfaces, and keep children or pets away from the work area. Never lean over the pot while the water is boiling, and use long-handled tools to reposition the thermometer. If the thermometer is glass, handle it gently to avoid breakage. After calibration, allow any equipment to cool on a heat-resistant surface before storing.
Step-by-step overview of the calibration concept
The calibration approach is straightforward: bring water to a rolling boil, insert the thermometer though the stem or probe into the steam zone, wait for stabilization, compare reading to the fixed reference, adjust offset if your device supports it, and document results. Repeat to verify consistency. This overview helps you understand the underlying approach before following the formal steps.
Methods for different thermometer types
Digital probe thermometers: read quickly, may require offset rather than mechanical adjustment. Glass thermometers: rely on a physical scale; adjust with a known offset or replace if damaged. Infrared thermometers: measure surface temperature; calibration by boiling water may be approximate since IR reads a surface, but you can use the boiling point as a rough reference. Always consult manufacturer guidelines for recommended calibration procedures.
Interpreting readings and adjusting calibration
Compare the thermometer's displayed value to 100°C (212°F). If the reading is higher, the offset is negative; if lower, offset is positive. Not all devices allow offset adjustments; in those cases, note the offset and apply it in readings mentally or via software. For devices that support calibration, follow the manufacturer procedure to input the offset and retest. Re-check after a few minutes to ensure stability.
Documentation and record-keeping for calibration results
Record the date, location, altitude, water type, and the exact readings before and after adjustment. Include equipment identifiers, operator name, and any environmental notes such as barometric pressure. Store data in a calibration log or digital file. Documentation makes it easier to track drift and schedule future recalibrations.
Long-term maintenance and re-calibration schedule
Establish a regular calibration cadence based on the device's criticality and usage. For high-precision work, calibrate quarterly or after service, drop, or replacement of parts. For casual use, semiannual calibration may be sufficient. Use the same procedure each time to create comparable records and reduce drift.
Quick recap and next steps
Consistency is the key to reliable thermometer readings. Calibrate thermometer boiling water using a rolling boil as your reference, document ambient conditions, and revisit calibration on a scheduled basis. With careful technique and proper records, you can maintain accurate temperature measurement across tasks.
Tools & Materials
- Boiling water source (kettle or pot)(Use a clean, refillable kettle or a large pot.)
- Calibratable thermometer (digital, glass, or infrared)(Ensure it's functioning and clean.)
- Heat source (stove, electric kettle)(Stable heat to reach rolling boil.)
- Large heat-safe container(Beaker or tall pot with proper immersion depth.)
- Timer or clock(Track stabilization time.)
- Notebook or calibration log(Record readings and conditions.)
- Distilled water (optional)(Reduces minerals if desired.)
- Safety gear (gloves, apron)(Protect from splashes and heat.)
- Cool-down basin or bucket(For rapid cooling if needed.)
- Tongs or heat-resistant gloves(Move thermometer safely.)
- Altitude barometer or smartphone app (optional)(Estimate local atmospheric pressure.)
- Cleaning supplies(Soap and sponge for containers.)
Steps
Estimated time: 30-45 minutes
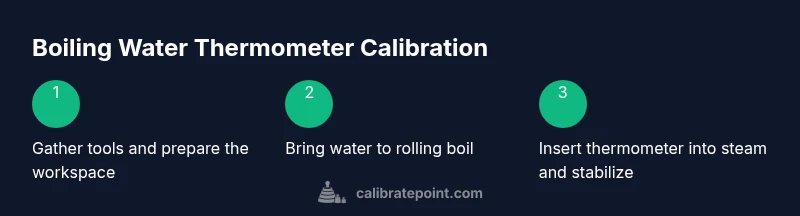
- 1
Gather tools and prepare workspace
Assemble all items before starting to avoid interruptions. Set up near a heat source with a clear, stable surface. Verify each tool is clean and in good condition. Have your calibration log ready for immediate note-taking.
Tip: Double-check for cracked glass or damaged probes before proceeding. - 2
Fill pot and bring water to a rolling boil
Fill the container with water and place it on the heat source. Allow the water to reach a full rolling boil; avoid partial boils or simmering. Keep a safe distance and ensure steam is directed away from you.
Tip: Do not add ice or coolant; abrupt temperature changes will affect the reference. - 3
Prepare thermometer and probe placement
Dry the thermometer completely and inspect the sensing tip for damage. Remove any protective sheath if required. Position the sensor so it is exposed to the steam, not submerged in the water, to avoid misreading.
Tip: Keep the thermometer vertical and stable to reduce movement during measurement. - 4
Insert thermometer into steam and wait for stabilization
Carefully insert the sensing element into the steam zone without touching the water. Wait until the reading stabilizes and stops fluctuating noticeably. Use the timer to track stabilization time.
Tip: Avoid touching hot pots with bare hands; use tools and protective gloves. - 5
Read, record, and compare to reference
Once stable, record the temperature shown. Compare against 100°C (212°F) at sea level. Note any offset and the exact ambient conditions.
Tip: Keep the device steady during reading to prevent drift. - 6
Adjust calibration if your device allows
If the thermometer supports offset adjustments, apply the offset and re-test. If no adjustment is possible, make a documented note of the offset for future use in readings.
Tip: Follow the manufacturer instructions precisely for calibration offsets. - 7
Repeat the test to verify consistency
Conduct a second independent trial using the same procedure to ensure results are repeatable. Consistency strengthens confidence in the calibration.
Tip: If results vary beyond tolerance, re-check setup for potential errors. - 8
Document results and plan the next check
Enter all findings into your calibration log, including date, location, altitude, water type, readings, and adjustments.
Tip: Set a reminder for your next calibration interval. - 9
Store equipment safely after calibration
Cool down all equipment on heat-resistant surfaces before storage. Return items to their proper places and review safety steps for future sessions.
Tip: Clean and dry gear to prevent corrosion or residue build-up.
Questions & Answers
What is boiling-water thermometer calibration?
Boiling-water thermometer calibration uses the known boiling point of water as a reference to identify and correct reading offsets in a thermometer. It establishes a practical baseline for accuracy across cooking, lab work, and field measurements.
Boiling-water calibration uses the fixed boiling point as a reference to find reading offsets and improve accuracy.
Can I calibrate a digital thermometer with boiling water?
Yes. Digital thermometers can often be calibrated via internal offsets or software, but always consult the user manual for the correct procedure and safety considerations.
Yes, many digital thermometers can be calibrated using offsets or software; check the manual for specifics.
Does altitude affect the calibration?
Yes. Higher altitude lowers the boiling point of water, so the reference point shifts away from 100°C. You should account for altitude or note the offset,” and re-calibrate if precision is critical.
Altitude changes the boiling point, so account for that offset during calibration.
How often should calibration be performed?
Frequency depends on how critical the readings are and how often the instrument is used or moved. High-precision tasks may require quarterly checks, while routine use might suffice with semiannual checks.
Calibration frequency depends on usage; more frequent checks for precision tasks.
What if my thermometer doesn't adjust?
If adjustment isn’t possible, document the offset and apply it in readings or software. If drift is large, consider a replacement or a more robust calibration method.
If you can’t adjust the device, note the offset and use it when reading measurements.
Is distilled water necessary for calibration?
Distilled water reduces mineral variability and provides a stable reference, but it isn’t strictly required. Always document the water type you used.
Distilled water gives a stable reference but isn’t strictly required; just document what you used.
Watch Video
Key Takeaways
- Calibrate with a fixed boiling-point reference.
- Document conditions and readings for traceability.
- Maintain consistency in setup for reliable comparisons.
- Use device offsets when available and verify with repeats.