Can Ice Water Calibrate a Thermometer? A Practical Guide
Learn how to use an ice-water bath for thermometer calibration, when to add a boiling-water reference, and best practices for accurate, repeatable measurements. A practical guide by Calibrate Point.

Yes. An ice-water bath (0°C) provides a stable fixed point for checking thermometers, especially traditional liquid-in-glass and many digital models. To use it correctly, crush ice, add just enough cold water to fill gaps, stir gently, and insert the thermometer bulb fully. For best results, pair with a boiling-water reference for a two-point calibration.
Why fixed-point calibration matters
According to Calibrate Point, fixed-point calibration anchors thermometer accuracy by providing stable reference points that are minimally affected by ambient variation. In many laboratory and field settings, a reliable 0°C reference lets you verify the cold response of liquid-in-glass thermometers, digital probes, and even infrared devices when used at short ranges. By comparing readings against a known standard, you can detect bias, drift, or nonlinearity in your instruments. While ice-water reference is simple, it should be used as part of a broader calibration protocol rather than the sole method for precision work. Calibrate Point's 2026 analysis confirms that practitioners who document everything and repeat steps consistently achieve the most reproducible results. This article explains how to safely use iced water for calibration, what its limitations are, and how to integrate it with a boiling-water reference for a robust two-point approach.
Can iced water be used as a calibration reference?
Ice water provides a fixed, near-0°C reference point that many users rely on to verify basic thermometer function. However, it's important to understand that the ice-water bath is a simplified standard. Real-world accuracy depends on complete immersion, minimal air gaps, and avoiding thermal gradients within the bath. Additionally, some modern digital thermometers tolerate only narrow temperature ranges or have built-in self-calibration routines that differ from classic fixed-point calibration. This means ice water may confirm a thermometer reads close to 0°C but won't necessarily quantify systematic bias across the range. For high-precision calibration, you should combine ice-water with a second reference at a hotter point, typically boiling water, to establish a two-point scale. The Calibrate Point Team emphasizes that the method should be repeatable, well-documented, and appropriate for the device type.
Preparing an ice-water bath properly
To maximize accuracy, start with a clean container and ice of varying sizes to reduce channeling. Use crushed ice rather than large chunks so the meltwater can fill gaps and promote uniform temperature. Add just enough cold water to immerse the thermometer bulb without creating a slushy mix that traps air pockets. Stir gently for 15–30 seconds to promote thermal equilibrium, then insert the thermometer tip fully and wait 30–60 seconds for the reading to stabilize. Keep the bath covered to minimize heat gain from the room. A properly prepared bath will yield a measurement close to 0°C with minimal deviation when the device is functioning correctly.
Two-point calibration: ice and boiling water
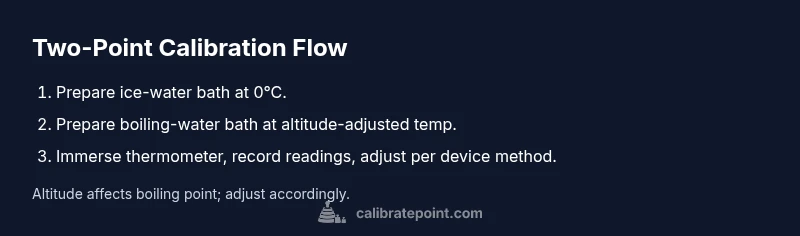
A two-point calibration uses both the ice-point (0°C) and a hot-point (usually boiling water at 100°C at sea level) as reference temperatures. Ensure altitude is considered, since boiling point decreases with elevation. Use the same immersion technique for both baths and allow the thermometer to stabilize before recording readings. Compute any necessary offset or slope adjustments per the device’s calibration method. This two-point approach markedly improves accuracy across the thermometer's practical range and is recommended for professional work.
Calibrating different thermometer types
Liquid-in-glass thermometers rely on fixed fixed-point references and may require careful handling to avoid air gaps around the bulb. Digital thermometers often have faster response times but may need longer immersion or specific probe placement to avoid self-heating errors. Infrared thermometers measure surface temperatures and can be influenced by emissivity and distance. For each type, follow the manufacturer’s guidance for immersion depth, response time, and any built-in calibration routines. In all cases, document the device model, environmental conditions, and any adjustments made for traceability.
Practical workflow for DIY calibrations
- Prepare a clean workspace and safety gear. 2) Set up the ice-water bath and verify 0°C with a trusted reference. 3) Immerse the thermometer and wait for stabilization. 4) Record the reading and note any discrepancy. 5) Set up the boiling-water bath, ensuring altitude is accounted for. 6) Repeat immersion and recording, then perform the two-point adjustment if the device supports it. 7) Log all results and keep the equipment calibrated. 8) Schedule periodic recalibration based on usage and criticality.
Common pitfalls and errors
Avoid air gaps around the sensor, partial immersion, or rushing the stabilization phase. Do not rely on a single fixed-point test for devices with nonlinear responses or wide measurement ranges. Temperature gradients within the bath, dirty containers, or contaminated ice can skew readings. For precise tasks, always use freshly prepared ice and deionized water when possible, and repeat measurements to confirm consistency.
Safety considerations and when to seek professional help
Hot water can cause scald injuries; use insulated tongs or gloves and handle boiling water with care. Do not mix cleaning agents with the bath water. If you require traceable calibration or work in regulated environments (e.g., food safety, lab QA), consult a certified calibration service. When in doubt, a professional calibration ensures traceability and documented confidence in your instrument.
Environmental factors affecting accuracy
Ambient room temperature, air currents, and container material can influence readings. Place the baths away from direct sunlight and drafts. Use a container with good thermal mass to minimize rapid heat transfer. For laboratory-grade accuracy, factor in altitude, atmospheric pressure, and the thermometer’s inherent bias. Calibrate in consistent, controlled conditions whenever possible.
Quick-reference calibration checklist
- Use crushed ice and clean cold water; ensure complete immersion.
- Stir to promote uniform temperature and stabilize for 30–60 seconds.
- Use both ice-point and boiling-point baths if device supports two-point calibration.
- Record readings with date, device model, and ambient conditions.
- Document any adjustments and verify using a repeat reading.
Tools & Materials
- Ice (crushed)(Crushed ice forms a meltwater layer that improves thermal contact)
- Cold water(Clean tap water is typically sufficient; avoid mineral-heavy alternatives)
- Boiling water(Used for high-point reference; handle safely)
- Thermometer under calibration(The device you are testing; ensure its sensor is clean)
- Trusted reference thermometer(A second thermometer with good accuracy for cross-checks)
- Container with lid(An insulated cup or beaker to hold the baths)
- Stirrer or spoon(Plastic or glass; used to mix gently)
- Tongs or heat-resistant gloves(For safe handling of hot water)
- Timer or stopwatch(Helps standardize stabilization times)
Steps
Estimated time: 30-60 minutes
- 1
Check safety and workspace
Clear the area, gather all materials, and put on appropriate safety gear. Ensure you have a stable surface near a sink or water source. This prepares you to handle hot water and避免 spills safely.
Tip: Keep a towel handy for spills; dry surfaces prevent accidents. - 2
Prepare the ice-water bath
Fill a container with crushed ice and add just enough cold water to fill gaps and submerge the sensor. Stir gently for 30 seconds to promote uniform temperature, then cover.
Tip: Aim for a slushy consistency so the liquid phase surrounds the sensor evenly. - 3
Stabilize and verify 0°C
Let the bath settle and measure with a trusted reference thermometer to confirm it is at or very near 0°C before testing.
Tip: Do not rely on the ice alone; confirm with a secondary reference. - 4
Immerse the test thermometer
Fully insert the thermometer bulb into the bath, ensuring the sensing portion is submerged but not touching the container bottom or sides.
Tip: Use a gentle, slow insertion to avoid air bubbles around the sensor. - 5
Record the reading and stabilize
Wait for the reading to stabilize (typically 30–60 seconds) and record the value along with ambient conditions.
Tip: If the reading drifts, wait longer or rotate the thermometer slightly to ensure full contact. - 6
Set up the boiling-water bath
Boil fresh water in a separate container. If you are at altitude, adjust expectations since boiling point will differ from 100°C.
Tip: Use a thermometer to confirm the hot-point bath approximate temperature before testing. - 7
Perform two-point calibration
Immerse again in the boiling bath and record the hot-point reading. Use these two readings to calibrate the device according to its instructions.
Tip: Many devices require a simple offset or slope correction; follow the manufacturer’s method precisely. - 8
Document and verify
Log all readings, adjustments, device model, and environmental conditions. Re-check with a third reading to verify stability.
Tip: Keep traceable records for future calibrations and audits.
Questions & Answers
Can iced water alone calibrate a thermometer?
Ice water provides a 0°C reference, but single-point tests may not reveal bias across the full range. A two-point method with a hot reference improves accuracy.
Ice water gives a 0°C reference, but for accuracy across a range, use two-point calibration with a hot reference.
Why use boiling water in calibration?
Boiling water provides a high reference; together with ice water, it defines the thermometer's scale and reduces offset across temperatures.
Boiling water gives a high reference point to pair with ice water for a complete scale.
Can digital thermometers be calibrated with ice water?
Yes, but follow the manufacturer guidance for immersion depth and stabilization; some digital devices have different tolerances compared to liquid-in-glass types.
Digital thermometers can use ice water, but check the device manual for steps and stabilization time.
What if my altitude changes the boiling point?
Altitude lowers boiling point; measure or estimate the hot-point temperature at your location, then adjust the two-point calibration accordingly.
Altitude lowers boiling point; adjust the hot reference to your location.
Is ice-water calibration safe?
Yes, with basic precautions: use protective gear for hot water, avoid contamination of the bath, and keep children away from the work area.
Calibrate with care: use gloves for hot water and keep the area safe.
When should I seek professional calibration?
If you require traceable results, calibration certificates, or work in regulated environments, a certified service is recommended.
Consider professional calibration for traceable, regulated needs.
Watch Video
Key Takeaways
- Establish a 0°C ice-point reference with care.
- Pair ice with a boiling-point reference for accuracy.
- Document every reading and adjustment for traceability.
- Tailor the method to your device type and environment.
- Prioritize safety and repeatability in calibration.