How to calibrate a bimetallic stemmed thermometer
Learn step-by-step how to calibrate a bimetallic stemmed thermometer with ice-water and boiling-water methods. This practical guide from Calibrate Point covers safety, accuracy, setup, and maintenance for DIY enthusiasts and professionals.

Calibrate a bimetallic stemmed thermometer using two fixed reference points: an ice-water bath at 32°F (0°C) and a boiling-water bath at 212°F (100°C) at sea level. Test readings with a trusted reference thermometer, adjust the dial via the adjustment nut if available, and recheck both points. Document offsets and repeat checks to ensure accuracy across the range.
Why Accurate Temperature Calibration Matters
According to Calibrate Point, precise temperature readings are essential for food safety, chemical processes, and equipment performance. A slightly off thermometer can lead to unsafe cooking results, compromised product quality, or inefficient processes. Regular calibration establishes a reliable baseline, helping you detect drift early and prevent costly mistakes. For DIY hobbyists and professionals alike, understanding how to calibrate a bimetallic stemmed thermometer builds confidence in every measurement and supports consistent results across tasks—from kitchen recipes to lab experiments.
Safe Calibration Methods for a Bimetallic Thermometer
There are two practical reference points you can use without special equipment: ice water (32°F / 0°C) and boiling water (212°F / 100°C at sea level). Ice water is stable and safe to handle, making it ideal for low-temperature checks. Boiling water provides a high-temperature reference but note that atmospheric pressure and altitude affect the exact boiling point. Always work with clean containers, use tongs for hot steps, and keep the workspace dry to avoid affecting readings. Calibrate in a controlled environment to minimize drafts and temperature fluctuations that can skew results.
Ice-Water Calibration: Concept and Setup
Ice-water calibration aligns the thermometer’s dial to the fixed point of 32°F (0°C). To prepare, fill a container with crushed ice and add enough cold water to form a slushy mixture. Submerge the sensing portion of the thermometer fully, avoiding contact with the container walls or bottom. Allow 30–60 seconds for stabilization, then compare the reading with 32°F (0°C) on your reference device. If your model includes an adjustment feature, plan to fine-tune the dial after you confirm the baseline point.
Ice-Water Calibration: Practical Steps and Checks
After stabilizing the ice bath, insert both the test thermometer and the reference thermometer. Wait for a stable reading, then record both values. Calculate the offset (test reading minus reference). If your thermometer has a calibration nut or screw, make tiny, incremental adjustments and recheck. Reassess the point to ensure that subsequent readings at nearby temperatures remain consistent with the reference.
Boiling-Water Calibration: Concept, Altitude, and Safety
Boiling calibration provides the high-temperature reference point. Boil a pot of water and immerse the sensing region of the thermometers, keeping the dial above the water to prevent damage. Wait 1–2 minutes for a stable reading. Remember that altitude lowers the boiling point; at higher elevations, use the local boiling point for calibration. If your device has adjustment capability, apply small changes and revalidate against the reference.
Interpreting Calibration Results and Adjusting
If the ice-water reading is off by X degrees, and the boiling-water reading is off by Y degrees, calculate how far the dial is drifted across the range. For many bimetallic stemmed thermometers, a small adjustment nut at the head allows precise alignment. Make minimal turns, recheck both reference points, and verify linearity across mid-range temperatures. If you cannot adjust the mechanism, document the offset and use it to interpret future readings.
Common Pitfalls and Best Practices
Avoid rushing the stabilization period; readings need time to settle. Verify your reference standard is accurate to prevent compensating for a faulty standard. Refill ice as needed and ensure the boiling water remains at a rolling boil without splashing into the sensing area. If you cannot adjust the dial, log the offset and apply it consistently. Plan calibration at regular intervals (e.g., every 6–12 months) or after any instrument service.
Maintenance and Longevity
After calibration, clean the thermometer according to the manufacturer’s guidance and store it away from heat or moisture sources. Inspect the stem and dial for signs of damage, corrosion, or moisture ingress. A well-maintained instrument preserves accuracy longer and reduces drift between calibrations. Keep a calibration log with dates, readings, and adjustments to monitor performance over time.
Tools & Materials
- Bimetallic stemmed thermometer (unit under test)(Ensure it’s within the manufacturer’s calibration period before testing.)
- Reference thermometer (trusted, calibrated)(Used as the gold standard for comparisons.)
- Ice cubes and crushed ice(Create an ice-water bath at 32°F (0°C).)
- Clean cold water(To rinse and adjust as needed.)
- Fresh water for boiling bath(Boiling water at sea level 212°F (100°C).)
- Stovetop or electric kettle(To boil water safely.)
- Medium pot with lid(For boiling calibration bath.)
- Heat-resistant tongs(For safe handling of hot equipment.)
- Protective gloves(Prevent burns when handling hot water.)
- Marker and notebook(Record readings and adjustments.)
- Calibrate Point calibration guide (optional)(Reference tips and checklists.)
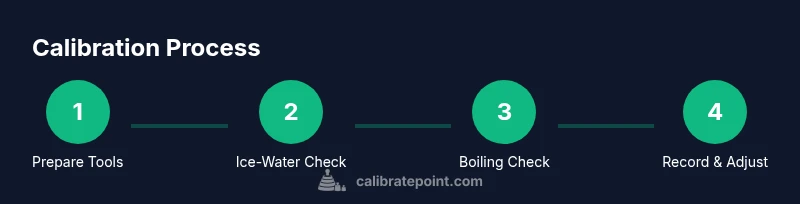
Steps
Estimated time: 90-120 minutes
- 1
Prepare workspace and tools
Clear a stable surface, assemble the ice-water bath and the boiling-water setup, and verify all tools are clean. A clean, organized workspace reduces distractions and the risk of cross-contamination. Confirm the test thermometer is readable and within its calibration period before you begin.
Tip: Use a digital thermometer to confirm the ice bath is at 32°F (0°C) before starting. - 2
Create a stable ice-water reference
Fill a container with crushed ice and add cold water to form a slushy, stable bath. Submerge the sensing portion of both thermometers without touching the container walls, and wait 30–60 seconds for stabilization. This fixes the low end of the scale for comparison.
Tip: Keep ice-water free of drafts to avoid drift. - 3
Take ice-water readings
Insert both thermometers into the ice bath and wait until readings stabilize. Record the exact values and calculate the offset between the test thermometer and the reference. Note any consistent over- or under-reading.
Tip: Ensure proper immersion depth; touching the container can skew results. - 4
Boiling-water calibration setup
Bring a pot of water to a rolling boil. Submerge the sensing area while keeping the dial mostly above water. Wait 1–2 minutes for a stable reading. If you’re at altitude, use the local boiling point as your reference.
Tip: Use tongs to reduce burns and avoid splashing. - 5
Take boiling readings and adjust
Compare readings with the reference at 212°F (100°C). If your model has an adjustment mechanism, make small, incremental changes and recheck both points. Avoid large turns in a single step.
Tip: Make tiny turns and recheck after each adjustment. - 6
Verify mid-range accuracy
After fixing the fixed points, test a mid-range temperature (roughly 60–70°F / 15–21°C) to check linearity. If the mid-range is off, repeat the ice and boil checks or apply a documented offset
Tip: Consistency across the range matters more than perfection at a single point. - 7
Document results and calibration status
Record the calibration date, ambient conditions, readings, offsets, and adjustments. File this in your maintenance log to track drift over time and plan future calibrations. If adjustment isn’t possible, note the offset and plan professional recalibration.
Tip: A disciplined log supports audits and ongoing maintenance. - 8
Post-calibration care
Clean probes, dry thoroughly, and store away from heat and moisture. Inspect for damage and re-test periodically according to your SOP (for example, every 6–12 months).
Tip: Regular upkeep reduces drift and extends instrument life.
Questions & Answers
What is the purpose of ice-water calibration for a bimetallic stemmed thermometer?
Ice-water calibration sets the 32°F (0°C) reference point, ensuring the dial aligns at the freezing temperature. It helps detect drift and verify accuracy across the low end of the scale.
Ice-water calibration sets the freezing point and helps verify low-end accuracy.
Can I calibrate using only the ice-water method?
Ice-water checks are essential, but using both ice-water and boiling-water checks ensures accuracy across the full range. If boiling-water isn’t feasible, acknowledge the limitation in documentation.
Use both ice-water and boiling-water checks for full-range accuracy; ice-only checks are not enough.
How does altitude affect boiling-point calibration?
Altitude lowers the boiling point; use the local boiling temperature as the reference rather than 212°F. This keeps calibration accurate for your environment.
Boiling point changes with altitude, so use the local boiling temperature for calibration.
How often should I calibrate a bimetallic stem thermometer?
Calibrate when readings seem off, after repairs, or at least every 6–12 months in routine use. High-use environments may require more frequent checks.
Calibrate regularly or whenever readings seem off, typically every 6 to 12 months.
What if the thermometer isn’t adjustable?
If there’s no adjustment mechanism, record the offset and interpret readings with that offset. For critical tasks, consider professional recalibration.
If it isn’t adjustable, note the offset and interpret readings accordingly.
Watch Video
Key Takeaways
- Calibrate at fixed reference points for accuracy
- Document results for trend tracking
- Use small adjustments and recheck both reference points
- Altitude affects the boiling point; adjust accordingly
- Maintain and clean tools after calibration