How to calibrate Honeywell 8000 thermostat
Learn how to calibrate honeywell 8000 thermostat with a safe, step-by-step method. Tools, safety tips, and verification for accurate comfort and energy efficiency.

Learn how to calibrate honeywell 8000 thermostat to improve temperature accuracy and energy efficiency. You’ll need a room thermometer and a small screwdriver to access the calibration menu. The process involves comparing readings, applying a precise offset, and rechecking with the thermometer. Follow the steps below for a safe, repeatable calibration.
Why calibrate a Honeywell 8000 thermostat?
Calibrating your Honeywell 8000 thermostat helps ensure the temperature reading matches actual room conditions, which improves comfort and energy efficiency. When you learn how to calibrate honeywell 8000 thermostat, you reduce the likelihood of overcooling or overheating and you extend the life of your HVAC system. According to Calibrate Point, precise calibration translates to more reliable control and fewer temperature swings in daily use. Our guidance at Calibrate Point Team emphasizes a careful approach so you can achieve consistent results without guesswork. This section lays the groundwork for understanding why calibration matters and how it fits into a broader performance strategy for your home.
Understanding calibration features on the Honeywell 8000
Most Honeywell 8000 thermostats expose a calibration or offset option within the settings menu. This feature is designed to align the thermostat’s displayed temperature with the actual room temperature. In practice, you’ll compare the thermostat reading to a trusted thermometer placed in a representative location, then apply a small offset if they don’t match. The Calibrate Point team recommends starting with a small offset and verifying across several readings to ensure stability. Remember that the goal is not a perfect one-to-one number every moment but a consistent alignment under typical living conditions.
Tools, safety, and prerequisites
Before you begin, gather a few simple tools and confirm safety basics. You’ll need a digital room thermometer to measure ambient temperature, a small screwdriver to access the calibration screws or menu, and a way to log measurements. Ensure the thermostat is powered off or placed in a safe maintenance mode if your model requires it. Keep children and pets away from the work area, and avoid making changes while the system is actively heating or cooling, as rapid temperature shifts can affect readings and comfort.
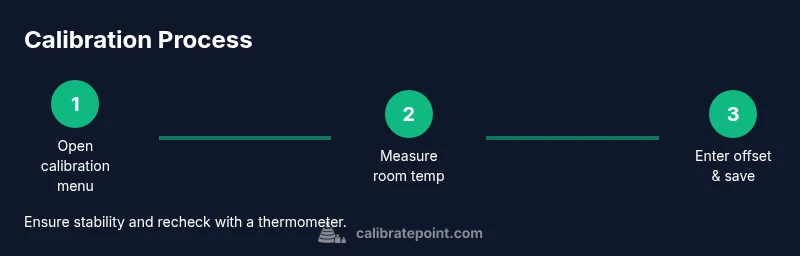
Step-by-step calibration process (overview)
The calibration process involves three core activities: (1) establishing a stable baseline by comparing the thermostat reading with an independent thermometer, (2) applying a small offset in the thermostat’s calibration setting, and (3) rechecking to confirm the adjustment improved alignment. Use incremental changes (one degree or less where possible) and allow several minutes of stabilization between checks. This approach minimizes overshoot and prevents overcorrection, preserving comfort and efficiency. The goal is consistent results across typical conditions, not a one-off perfect match.
Verifying accuracy after calibration
After applying a calibration offset, recheck the thermostat reading against the thermometer at multiple times of day and under typical occupancy. If discrepancies persist, repeat the measurement cycle and consider a slightly revised offset. If readings drift again over time, the sensor may be aging or there may be environmental influences (sunlight, drafts). In such cases, it may be wise to schedule a professional inspection to rule out sensor damage or installation issues. Calibrate Point’s approach emphasizes documentation and repeatability for future reference.
Tools & Materials
- Digital room thermometer(Place away from direct heat/cold sources; allow stabilized readings (2–3 minutes))
- Small screwdriver (Phillips #2 or model-specific)(Use the appropriate bit to access calibration menu or screws)
- Notebook or digital device for logging readings(Record pre/post-offset values and timestamps)
- Power source for thermostat (batteries or mains)(Ensure safe power conditions per model instructions)
- Soft cloth for cleaning display(Keep display clear of dust and fingerprints)
- Calibrated reference thermometer (optional)(For higher-accuracy cross-checks in critical environments)
Steps
Estimated time: 25-40 minutes
- 1
Access calibration settings
Power down the HVAC system or place the thermostat in a safe maintenance mode if required. Remove the front cover as needed and locate the Calibration or Temperature Offset option in the advanced/settings menu. If your model requires a service screw, use the screwdriver to gain access.
Tip: Take a photo of current values before changing anything to aid reversibility. - 2
Place and stabilize the reference thermometer
Position the room thermometer in a representative area away from drafts, direct sunlight, or heat sources. Wait for a stable reading, typically a few minutes, to ensure accuracy before comparing with the thermostat display.
Tip: Use the same unit (F or C) on both devices for consistency. - 3
Compare readings and decide on offset
Note the difference between the thermostat display and the thermometer. Decide on a small offset to apply—prefer incremental changes of one unit or less. Enter the offset value in the calibration setting if available.
Tip: Avoid large offsets; small, incremental changes yield more reliable results. - 4
Apply the offset and save
Enter the offset in the thermostat’s calibration field and save the setting. Confirm the system returns to a stable state and resume normal operation.
Tip: If the option requires rebooting the unit, wait for the thermostat to come back online fully before testing again. - 5
Re-check with thermometer
Once the offset is applied, re-measure with the thermometer at a similar time after stabilization. Compare again to ensure alignment improved and remains stable.
Tip: Assess readings at multiple times (morning, afternoon) to confirm consistency. - 6
Document and finalize
Record the final offset value, date, and any notable environmental conditions. If readings remain off, consider a second iteration with a smaller adjustment or revert to factory values and seek professional help.
Tip: Documentation helps repeat calibration accurately in the future.
Questions & Answers
How often should I calibrate a Honeywell 8000 thermostat?
Calibration should be guided by observed drift and comfort issues. Regular checks help catch misalignments early and maintain consistent performance.
Calibrate when you notice drift or comfort issues and check readings regularly.
Can I calibrate Honeywell 8000 myself, or do I need a professional?
Yes, most users can calibrate using the built-in offset feature and a trusted thermometer. If drift persists after adjustments, consider professional inspection.
Yes, you can calibrate yourself, but consult a professional if drift continues.
What if the readings are still off after calibration?
Recheck the thermometer accuracy, confirm the offset, and verify there are no environmental influences. If misalignment persists, the sensor or unit may need service or replacement.
If drift remains, recheck tools and consider service or replacement.
Does calibrating improve energy efficiency?
More accurate readings help the HVAC system reach and maintain setpoints with less overshoot, which can reduce energy waste and improve comfort.
Yes—better accuracy can help save energy by reducing overshoot.
Is there an auto-calibration feature on the Honeywell 8000?
Most Honeywell 8000 models rely on manual offset calibration rather than automatic sensing. Always verify with a thermometer after any change.
Most do not auto-calibrate; verify with a thermometer.
What tools are essential for calibration?
A digital room thermometer and a small screwdriver are essential. A logging method helps track changes and outcomes.
Just a thermometer and a small screwdriver are essential.
Watch Video
Key Takeaways
- Verify room readings before adjusting.
- Use small offset changes and recheck.
- Test under different conditions for reliability.
- Document all changes for future reference.