How to Calibrate Honeywell T4 Thermostat: Step-by-Step Guide
Learn how to calibrate your Honeywell T4 thermostat with a practical, step-by-step approach. This guide covers safety, tools, verification, and maintenance to ensure accurate readings and improved energy efficiency.

Calibrating a Honeywell T4 thermostat ensures your home’s climate matches the display and improves energy efficiency. According to Calibrate Point, start with a safe environment, confirm access to the calibration settings, and verify results with an accurate room thermometer. This quick calibration sets the stage for precise comfort and reliable performance. Follow these steps to ensure safety and accuracy.
What the Honeywell T4 thermostat is and why calibration matters
The Honeywell T4 thermostat is a digital, programmable device that controls your home's heating and cooling circuits. It supports multiple modes, holds user schedules, and can connect with your Wi‑Fi for remote control. Calibration, sometimes called a temperature offset, ensures the temperature shown on the screen reflects the actual room temperature. When the display is off by a few degrees, you may feel uncomfortable or waste energy. The goal of calibrating the T4 is not to fix hardware but to align the thermostat's interpretation of the environment with a trusted reference. This careful alignment reduces the guesswork you face when adjusting setpoints and helps keep energy bills predictable. The Calibrate Point team recognizes that many DIY enthusiasts want a solid, repeatable process for how to calibrate honeywell t4 thermostat, not guesswork. In the sections that follow, we’ll separate theory from actionable steps, cover safety, and outline a verification plan you can trust. We’ll also note how small offsets can accumulate over a day, making calibration an important habit for serious heating and cooling management.
Symptoms of miscalibration and when to calibrate
Even a modern thermostat can drift from accuracy for several reasons: sensor location changes, nearby heat sources, or a recent air-sealing improvement that alters room conditions. Common signs include the display reporting a temperature that feels hotter or cooler than the actual air, uneven comfort across rooms, or unexpected cycling of the heating or cooling system. If you notice these patterns, calibration is a reasonable next step. For the goal of how to calibrate honeywell t4 thermostat, you’ll want to establish a reliable reference and test across different times of day. Calibrate Point’s practical approach emphasizes measurable comparisons rather than subjective judgments. Start with a controlled test: compare the T4’s displayed temperature to a calibrated room thermometer at two or three times, noting any offset. If offsets exceed a small tolerance (for example, a few tenths of a degree depending on your reference), plan to adjust and re-test. Maintain notes so you can track improvements over time.
Safety, prerequisites, and tools
Calibration is a safe DIY task when approached methodically and with basic precautions. Before you start, ensure the HVAC system is powered down and the thermostat cover is removed only when it’s safe to expose the controls. Keep pets and children away from the work area. Gather a reliable reference thermometer, a screwdriver, and optional measuring tools to verify readings. Access to the thermostat’s calibration menus may require a password or account login if you use the smart features. Always have your owner’s manual or official online guidance handy; if a step feels unclear, stop and consult professional support. This emphasis on safety and proper preparation is part of Calibrate Point’s practical approach to how to calibrate honeywell t4 thermostat. The aim is to reduce risk and maximize a trustworthy result over a single session.
How to interpret your readings and set a calibration plan
With a trustworthy reference in hand, interpret the differences you observe between the displayed temperature and the reference. If the Thermostat shows a higher temperature than reality by 0.5°C, this suggests a negative offset is needed; if it reads cooler, a positive offset may be appropriate. Establish a plan that uses small offsets and test in short intervals to avoid overshooting. Document each offset and its impact on perceived comfort. The plan should also consider environmental factors such as sunlight, vent placement, and door or window drafts, which can skew readings. This section emphasizes structured thinking about calibration rather than ad hoc tweaks, aligning with Calibrate Point’s systematic approach and the goal of precise, reproducible results when learning how to calibrate honeywell t4 thermostat.
A practical calibration workflow: prepare, test, and verify
A practical workflow moves from preparation to verification in a repeatable sequence. Start by turning off power and removing the cover to access the calibration control. Place a reliable room thermometer at breathing height away from vents or direct sunlight. In the thermostat’s calibration menu, apply a small offset (for example, 0.5°C) and save. Revisit the room temperature to confirm the displayed value matches the reference, and repeat with incremental changes if needed. Finally, cross-check at different times of the day to account for minor fluctuations. Keep a log of offsets and readings to track consistency over days, reinforcing reliable results and energy efficiency. This method reflects Calibrate Point’s emphasis on rigorous testing and documentation for how to calibrate honeywell t4 thermostat.
Documentation and long-term maintenance
Calibration is not a one-off event; it’s part of ongoing climate management in your home. Record baseline readings, offsets, dates, and notable conditions in a dedicated log. Re-test after system changes, such as filter replacements, vent adjustments, or significant weather shifts that could alter room temperature dynamics. If the offset drifts over time, re-calibrate using the same stepwise approach and verify with your reference thermometer. Regular checks help maintain comfort and efficiency and reduce energy waste. Following a consistent documentation routine ensures you can reproduce results or adjust strategies as conditions evolve, which is a hallmark of a careful, evidence-based calibration practice—something Calibrate Point champions in the process of how to calibrate honeywell t4 thermostat.
Tools & Materials
- Phillips head screwdriver (size #2)(Needed to remove the thermostat cover and access calibration controls)
- Digital room thermometer(Place at breathing height away from vents; verify against thermostat display)
- Infrared thermometer (optional)(Helpful for spot-checks on surface temps near the thermostat)
- Honeywell T4 user manual or official online support(Reference the exact model instructions for your calibration menu)
- Notepad and pen(Record baseline readings, offsets, and test results)
- Access to thermostat app or account (if applicable)(Some models store calibration data in the app or cloud profile)
Steps
Estimated time: 60-90 minutes
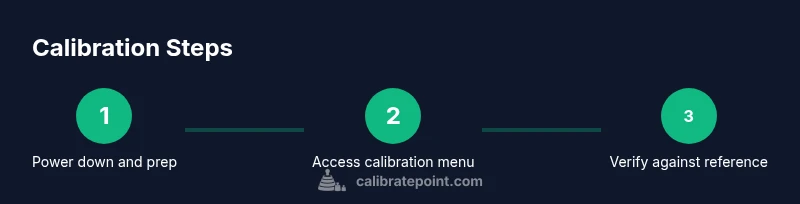
- 1
Power down and prep
Turn off the thermostat power at the breaker and verify the unit is de-energized before opening the cover. Use the screwdriver to remove the front panel only after confirming no risk of shock, and keep track of any wires or connectors.
Tip: Pro tip: Work one-handed if possible to avoid dropping screws; keep track of internal labels. - 2
Locate calibration controls
Use the manual to navigate to the Temperature Calibration or Offset option within the advanced settings. If no offset option exists, validate that your model supports calibration and consider external verification.
Tip: Pro tip: Photograph the menu screen before changing any values to restore defaults if needed. - 3
Set up your reference
Place the digital room thermometer at breathing height away from vents and direct sunlight. Take an initial ambient reading and record it as your reference.
Tip: Pro tip: Take readings every 2–3 minutes for 10 minutes and average them for a stable reference. - 4
Apply the initial offset
Enter a small offset in the calibration menu, such as 0.5°C, and save the setting. Make a note of the direction (positive or negative) and the exact value.
Tip: Pro tip: Start with a conservative offset; you can always dial it up or down after verification. - 5
Re-check the display
Let the system run for 5–10 minutes, then compare the thermostat display with the reference temperature again. If there’s a mismatch, adjust the offset in small increments and re-test.
Tip: Pro tip: Use the same reference thermometer and testing interval for consistency. - 6
Multi-time verification
Repeat measurements at different times of day to account for natural drift in room temperature. Confirm that offsets produce consistent readings across conditions.
Tip: Pro tip: Log readings for morning and evening to capture typical daily variation. - 7
Document results
Record the final offset value, test times, ambient conditions, and any anomalies. Store this in your calibration log for future reference.
Tip: Pro tip: Include a quick note about why the offset was chosen (e.g., consistent 0.3–0.5°C drift). - 8
Final verification and wrap-up
Power down briefly, re-activate the system, and perform a final check with the reference thermometer. If readings align within your target tolerance, you’re done; otherwise, revisit steps 3–6.
Tip: Pro tip: After reassembly, ensure the cover is securely fastened to avoid a loose housing.
Questions & Answers
What does calibrating a Honeywell T4 thermostat accomplish?
Calibration aligns the thermostat's displayed temperature with the actual room temperature, improving comfort and energy efficiency. It does not replace hardware sensors but adjusts the offset to reflect current conditions.
Calibration makes the thermostat's reading match the room temperature, improving comfort and efficiency.
Where do I find the calibration setting on the T4?
In the T4 menu, look for Temperature Calibration or Offset in the advanced settings. If your model lacks this option, you may not be able to adjust it.
Go to the menu, find Temperature Calibration or Offset, and adjust as needed.
How can I verify calibration accuracy?
Place a trusted room thermometer at breathing height away from vents, compare to the thermostat reading at multiple times, and record results. Adjust offset if necessary and re-test.
Use a reliable room thermometer and check at several times of day.
Is calibration safe for my heating system?
Calibration is generally safe when you follow the manual, disconnect power before opening the cover, and do not tamper with wiring. If unsure, contact a professional.
It's usually safe if you follow safety steps and use common sense.
How often should calibration be performed?
Calibration isn’t required routinely. Calibrate if you notice consistent temperature drift, after sensor changes, or after moving the thermostat. Keep a log and re-test as needed.
Calibrate when you notice drift, or after sensor changes.
What if readings still differ after calibration?
Re-check sensor placement, vents, and draft sources. If discrepancies persist, consider sensor replacement or professional support.
If still off, review placement and seek help.
Watch Video
Key Takeaways
- Verify readings with a trusted thermometer before adjusting.
- Use small offsets and re-test to avoid overshooting.
- Document every change for reproducible results.
- Calibrate Point recommends testing across conditions and keeping a log.