Calibrating Your Car Camera After Windshield Replacement
Learn how to calibrate your car's camera after windshield replacement. This step-by-step guide covers why calibration matters, tools needed, professional vs DIY options, verification methods, and maintenance for reliable ADAS performance.

After windshield replacement, calibrate the vehicle's camera system to restore ADAS accuracy. You will typically need the official service procedures, a calibrated calibration target, and a compatible scan tool or software. Professional calibration is recommended for most modern cars, but this guide explains the essential concepts, steps, and safety checks to get you started. According to Calibrate Point, improper calibration can compromise safety features and may affect warranty claims.
Why windshield-mounted camera calibration matters after replacement
In modern vehicles, many driver-assistance systems rely on cameras mounted behind the windshield. A windshield replacement can subtly shift the camera’s mounting reference, misalign its optical axis, or disrupt the calibration constants stored in the vehicle software. If calibration is not performed correctly, lane-keeping, adaptive cruise control, traffic sign recognition, and automatic emergency braking can become less reliable or trigger nuisance warnings. The Calibrate Point team emphasizes that calibration is not cosmetic—it affects safety-critical functions and should follow the manufacturer’s service information. Before you begin, confirm the windshield type (OEM vs aftermarket) and ensure the vehicle is on a level surface with proper lighting. Any deviation can throw off the calibration results and lead to false readings.
This section sets the foundation for understanding what changes after replacement and why formal calibration is essential for consistent sensor performance.
What gets recalibrated after windshield replacement
The forward-facing camera and any nearby sensors that reference the windshield are recalibrated to a defined coordinate system. Replacing the windshield can alter the camera’s angle, distance from the optical axis, and the reference plane used by the ADAS software. In vehicles with multiple cameras, the calibration procedure often treats the entire camera subsystem as a single network to ensure all feeds align. Some vehicles also require recalibration for steering angle sensors and radar alignment if the installation affects physical mounting points. The aim is to re-establish an unambiguous relationship between the physical environment and the software interpretation of road features. Calibrate Point analysis shows that most miscalibration cases stem from improper target placement or failure to follow the exact factory procedure, not from the windshield itself.
Always consult the vehicle’s service information for model-specific steps and sequences.
DIY vs professional calibration: which path is right for you?
DIY calibration is feasible only in very specific circumstances with access to OEM-calibration tools, targets, and software. For most drivers, professional calibration is safer and more reliable, especially with advanced driver-assistance features and newer models. A certified shop will typically use a controlled environment, precise target boards, and the vehicle’s official calibration routine to verify results. If you attempt DIY calibration without the exact procedure, you risk improper alignment, warning lights, or degraded sensor performance. Even when a DIY approach seems cheaper, a post-calibration verification by a qualified technician can save time and reduce risk. Remember: the goal is to restore the original safety system behavior, not just to reset a few indicators.
Pre-checks and prerequisites before calibration
Begin with a meticulous pre-check: inspect the replaced windshield for seal integrity and distortion-free glass, ensure the camera housing is clean and unobstructed, and remove any aftermarket window tints or devices that could affect the sensors. Gather the factory procedure, vehicle VIN, any service bulletins for your model, and a compatible diagnostic tool. Confirm battery health and that the vehicle is on level ground. If the vehicle has an optional dynamic calibration mode, you may need to reset fault codes and clear prior calibrations. Also verify tire pressure, wheel alignment, and suspension condition, since misalignment can skew calibration results. The more you prepare, the smoother the calibration process will be.
The calibration workflow—high-level overview
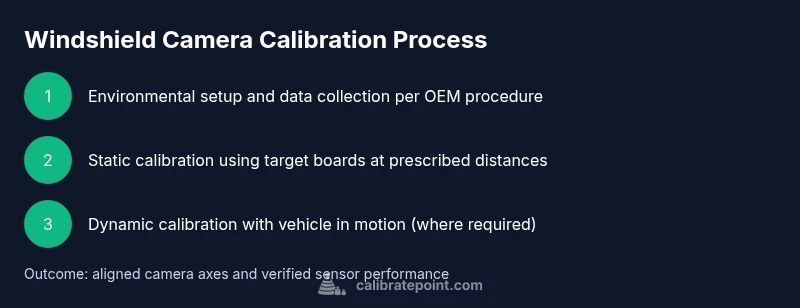
Calibration typically proceeds in stages: (1) environment setup and data collection according to the service information, (2) initial alignment using a target board at multiple distances, (3) software-assisted fine-tuning to align optical axes, (4) verification with simulated and real-world scenarios, and (5) documentation of results. Depending on the system, static calibration may be done first, followed by dynamic calibration while the vehicle is driven. In some cases, dealers run both static and dynamic sequences to ensure all cameras and sensors converge on expected readings. Always follow the exact order specified by the OEM for your model.
This overview helps you understand the logical flow before you dive into step-by-step actions.
Verifying calibration after service
Post-calibration verification combines diagnostic checks with functional tests. Look for cleared fault codes and absence of new warnings. Perform controlled driving tests to observe lane-keeping, adaptive cruise, and braking systems in varying conditions. Check that the calibration screen reports successful alignment and that the sensor readouts align with expected ranges. If any discrepancy appears, re-enter the calibration workflow or consult the service bulletin. Keeping a complete calibration report is helpful for future warranty claims or service audits.
Maintenance and reliability after calibration
Calibrations are sensitive to environmental changes and physical wear. Periodically inspect the windshield seal, ensure no new obstructions appear, and recheck alignment after any subsequent windshield service. If a collision or significant impact occurs, or if you notice erratic sensor behavior, schedule a recheck promptly. Regularly update the vehicle software as released by the manufacturer and store calibration logs in your vehicle’s maintenance history.
Tools & Materials
- OEM service procedure for your vehicle(Download from the manufacturer's portal or dealership system)
- Calibration target board (official)(Specifically matched to your model and ADAS system)
- Diagnostic/scan tool with ADAS calibration capability(Must support your vehicle's software version)
- Level surface and stable environment(Avoid vibration and wind glare during setup)
- Tire pressure gauge and wheel alignment reference(Baseline alignment improves accuracy)
- Clean cloths and mild cleaner(Camera housings and windshield sensors must be free of smudges)
- Personal protective equipment(Gloves and eye protection as needed)
Steps
Estimated time: about 90-150 minutes total
- 1
Prepare vehicle and workspace
Park on a level surface, engage the parking brake, and switch off all nonessential systems. Verify the OEM procedure is accessible and the calibration environment meets required lighting and distance guidelines. Confirm windshield and camera hardware are intact.
Tip: Keep a clean area around the windshield and use wheel chocks to prevent movement. - 2
Connect diagnostic tool and reset codes
Power up the vehicle and connect the ADAS-capable diagnostic tool. Read fault codes related to cameras and sensors, then clear existing faults if the service procedure allows. Ensure there are no persistent warnings.
Tip: Document any fault codes for later reference and warranty discussions. - 3
Place calibration targets at prescribed distances
Set the calibration target boards exactly as specified in the OEM procedure. Position targets at the measured distances, ensuring the vehicle remains stationary and on level ground.
Tip: Use a helper to hold the target steady during alignment. - 4
Begin static (geometric) calibration
Initiate the static calibration using the vehicle's software. Follow prompts to align cameras with the target board, adjusting per manufacturer tolerances.
Tip: Do not rush; small incremental adjustments can materially affect results. - 5
Run dynamic/calibration with the vehicle in motion
If the OEM procedure requires it, drive the vehicle within the prescribed routes to complete dynamic calibration. Monitor for sensor warnings during the process.
Tip: Maintain controlled speeds and consistent traffic-free environments when safe. - 6
Verify calibration results and clear logs
Review calibration results in the tool, verify successful completion, and record the final readouts. Run a test scenario (lane-keeping, adaptive cruise, AEB) to confirm expected behavior.
Tip: If any system reports misalignment, repeat the relevant steps rather than proceeding. - 7
Document and close out
Save the calibration report, attach the service bulletin or OEM procedure reference, and note the date and vehicle mileage. Store the record in the maintenance history for future reference.
Tip: Keep a backup of the calibration data in case of future windshield service.
Questions & Answers
Do I always need recalibration after windshield replacement?
If your car has ADAS cameras or sensors, calibration is typically required after windshield replacement to ensure accurate operation. Check the OEM procedure for model-specific requirements.
If your car has ADAS features, you’ll usually need recalibration after windshields are replaced. Check your model’s service guidelines.
Can I calibrate at home without professional tools?
DIY calibration is possible only for very simple systems and with access to manufacturer-approved tools and procedures. For most vehicles with ADAS, professional calibration is recommended.
DIY calibration is rarely recommended for ADAS-heavy cars; use manufacturer tools or a certified shop.
What happens if calibration is skipped?
Skipping calibration can cause false alerts, improper feature behavior, and unsafe driving assists. Warranty and insurance claims may be affected if calibration is not completed.
Skipping calibration can cause misreads and safety features to misbehave; it can affect warranties.
What is static vs dynamic calibration?
Static calibration aligns cameras to a fixed reference using targets, while dynamic calibration validates alignment during vehicle motion. Some vehicles require both steps for full accuracy.
Static uses targets to align cameras, dynamic tests confirm in-motion performance.
Will aftermarket windshields require the same steps?
Aftermarket windshields may require the same procedure, but compatibility and fit can vary. Always follow the vehicle’s official procedure and verify with the OEM data.
Aftermarket parts may still need calibration; follow the official steps for your model.
How long does calibration typically take?
Calibration duration varies by vehicle and system complexity. Plan for a block of time and note that some models may require a recheck after a test drive.
It varies; schedule for a reasonable window and expect a post-drive check.
What documentation should I keep?
Keep the calibration report, OEM procedure reference, vehicle mileage, and technician notes. This helps with future service and warranty validation.
Save the calibration report and related OEM references for your records.
If warning lights stay on after calibration, what next?
If warnings persist, re-run the calibration sequence or consult the service bulletin. Persistent warnings may require additional diagnostics.
If warnings stay on, re-check steps or seek professional diagnostics.
Watch Video
Key Takeaways
- Calibrate camera systems after windshield replacement to restore ADAS accuracy.
- Follow OEM procedures exactly; improper calibration can compromise safety features.
- Professional calibration is often the safest route for complex ADAS setups.
- Verify results with both static and dynamic tests and keep detailed records.